Billing access for EA customers
Follow these steps to allow CloudMonitor to access, and view Billing Information for Enterprise Agreement (EA) customers.
Step 1
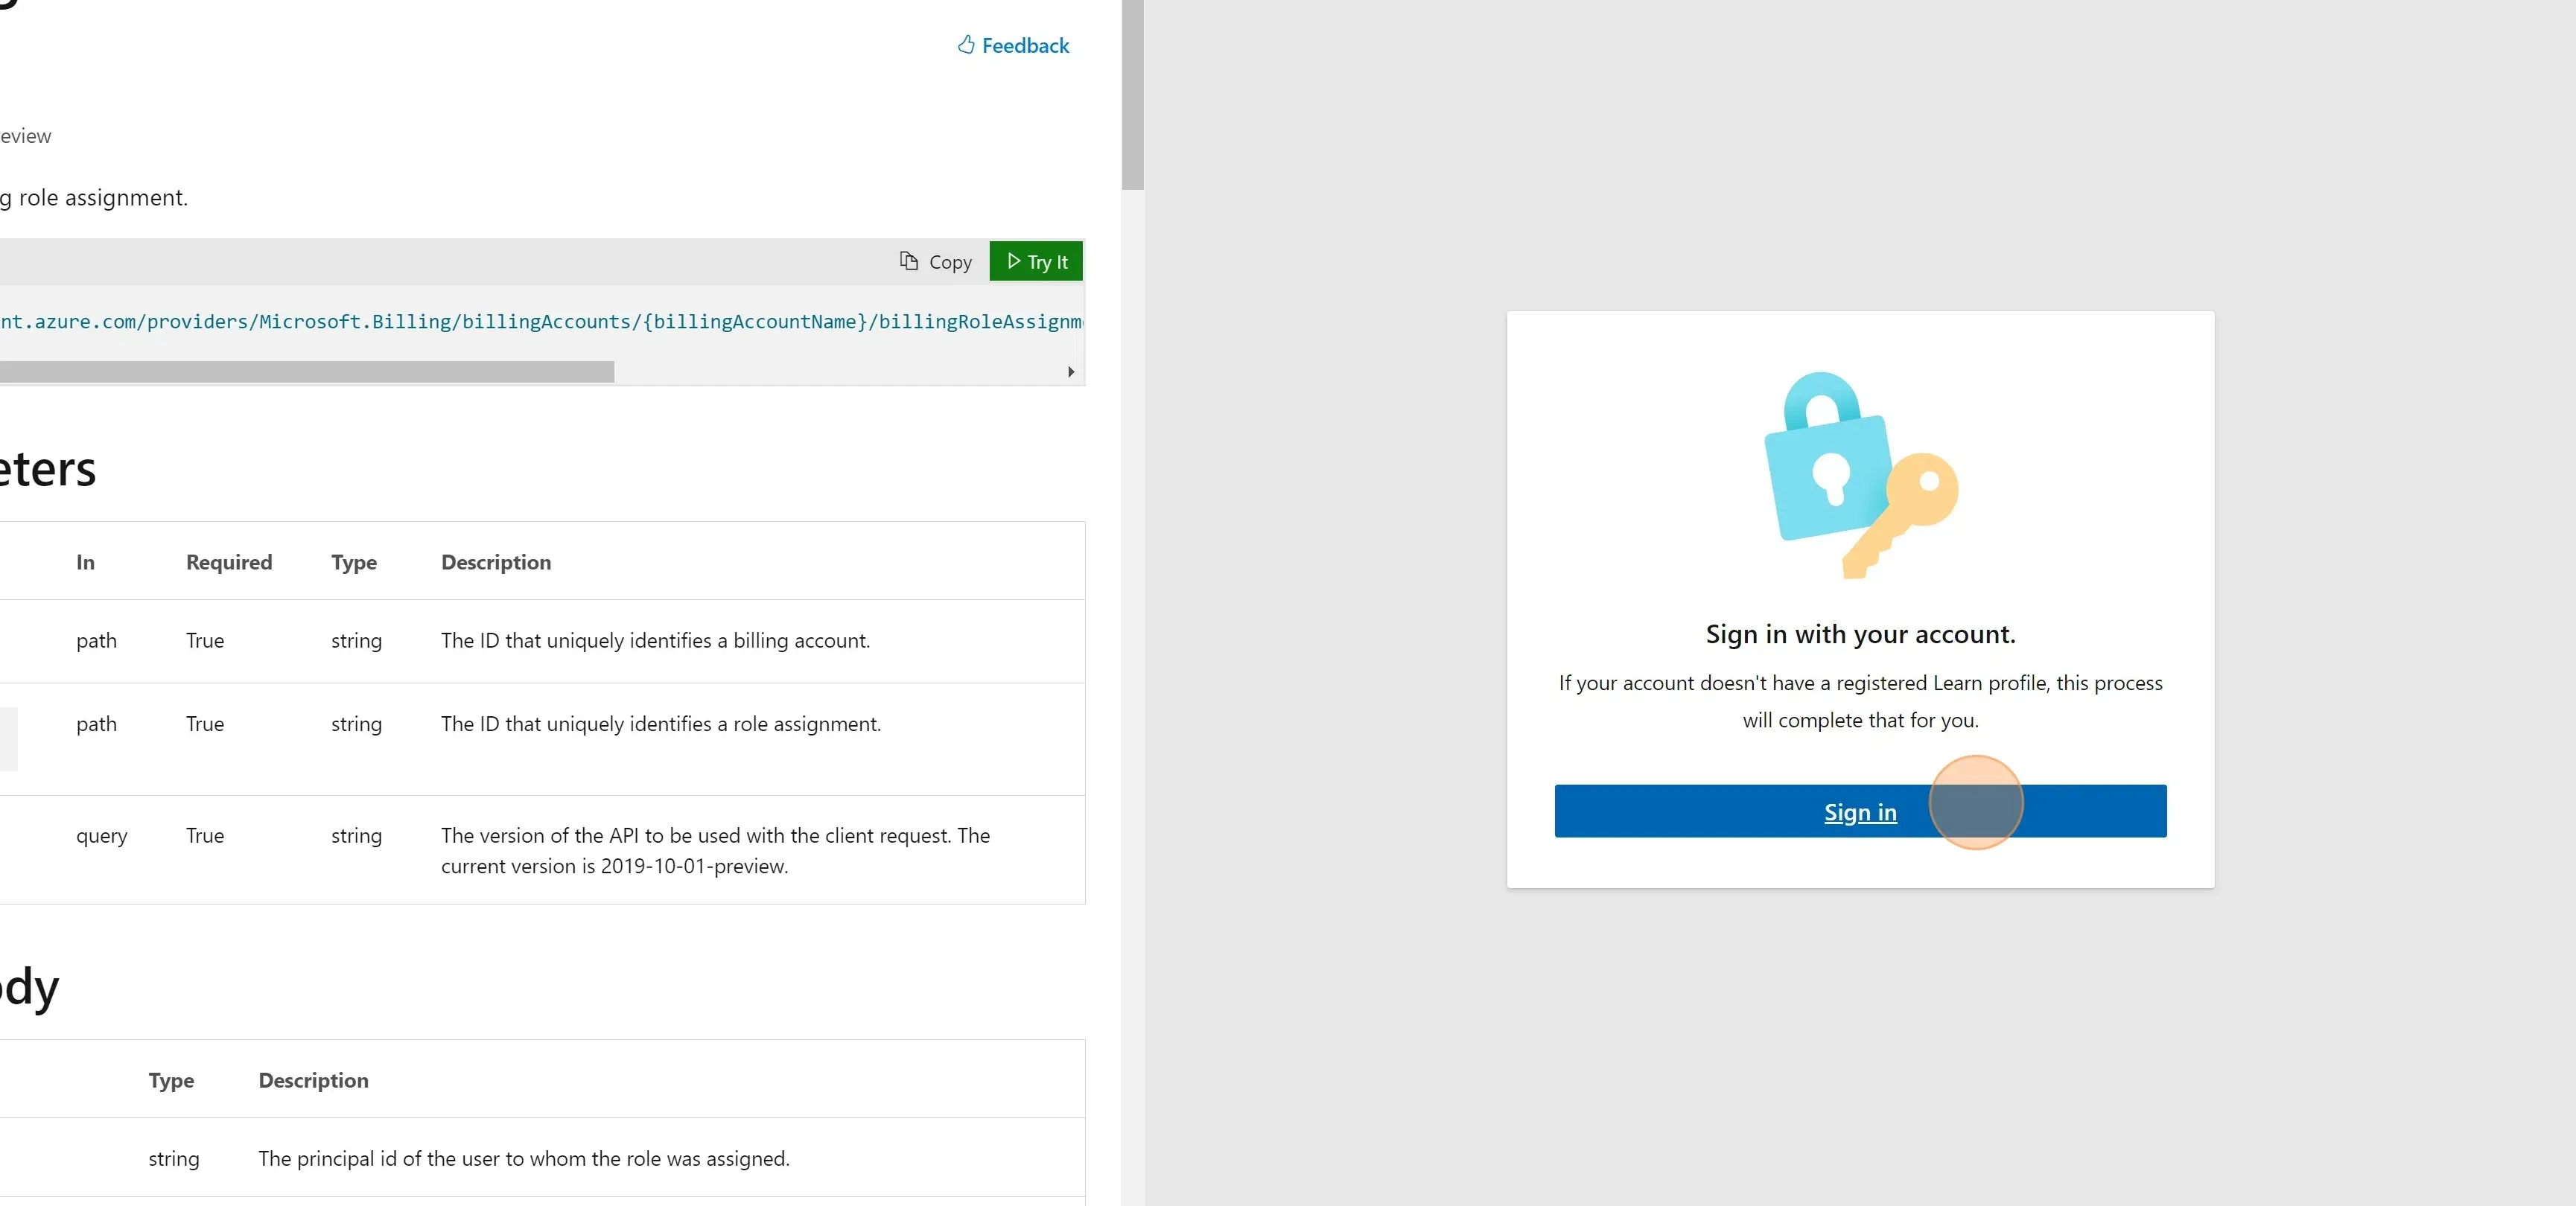
Section titled “Step 1”First navigate to the REST API page - https://learn.microsoft.com/en-us/rest/api/billing/2019-10-01-preview/role-assignments/put?tabs=HTTP#code-try-0 • Sign in with an Admin Account. • Select the AD Tenant that contains the CloudMonitor Service Principal.
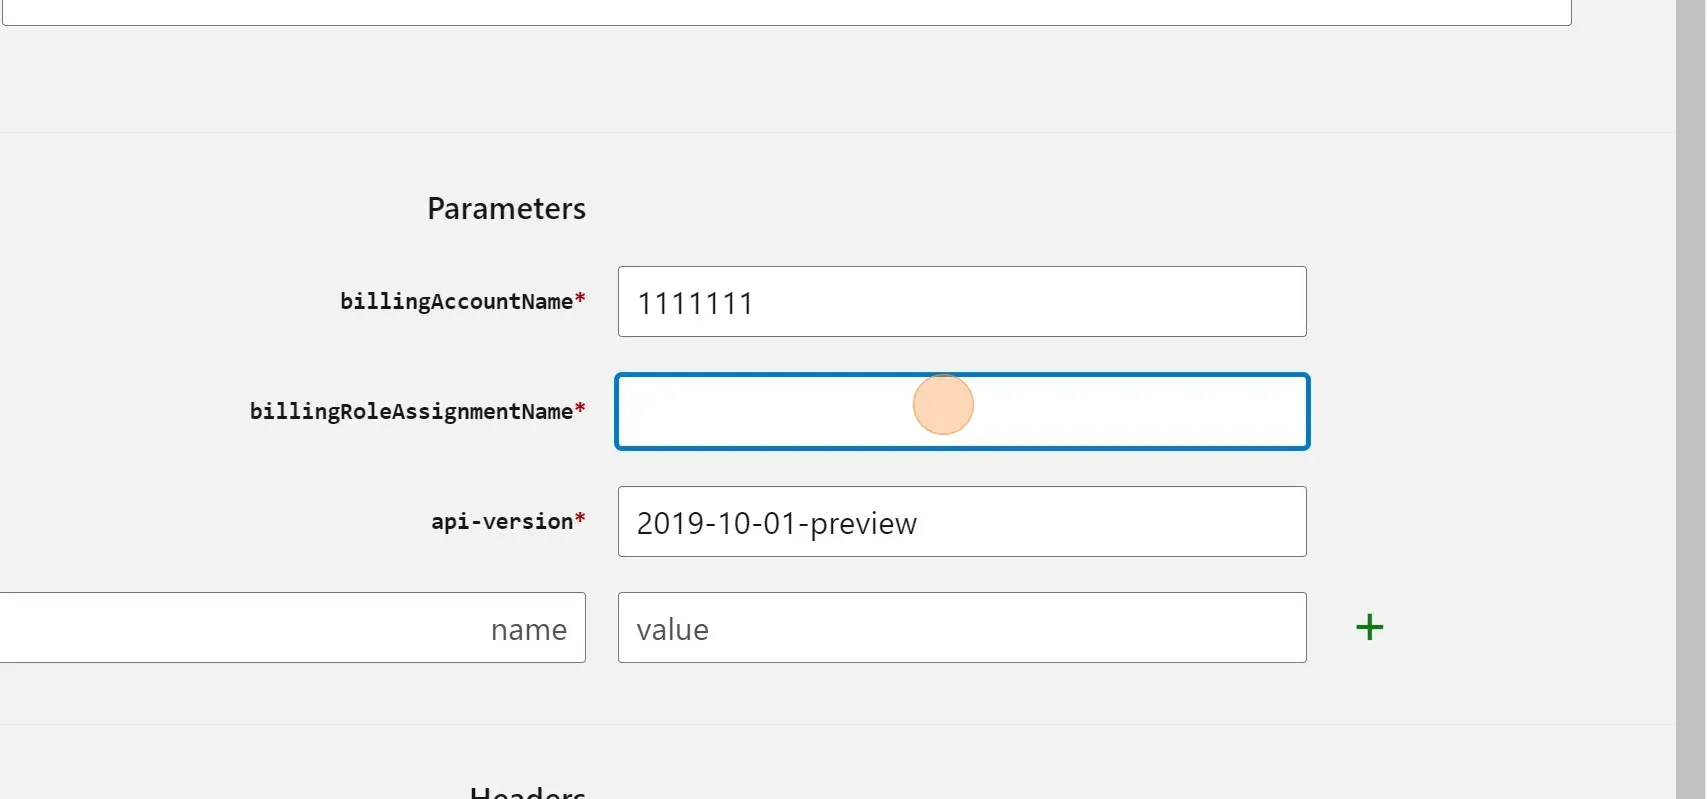
Step 2
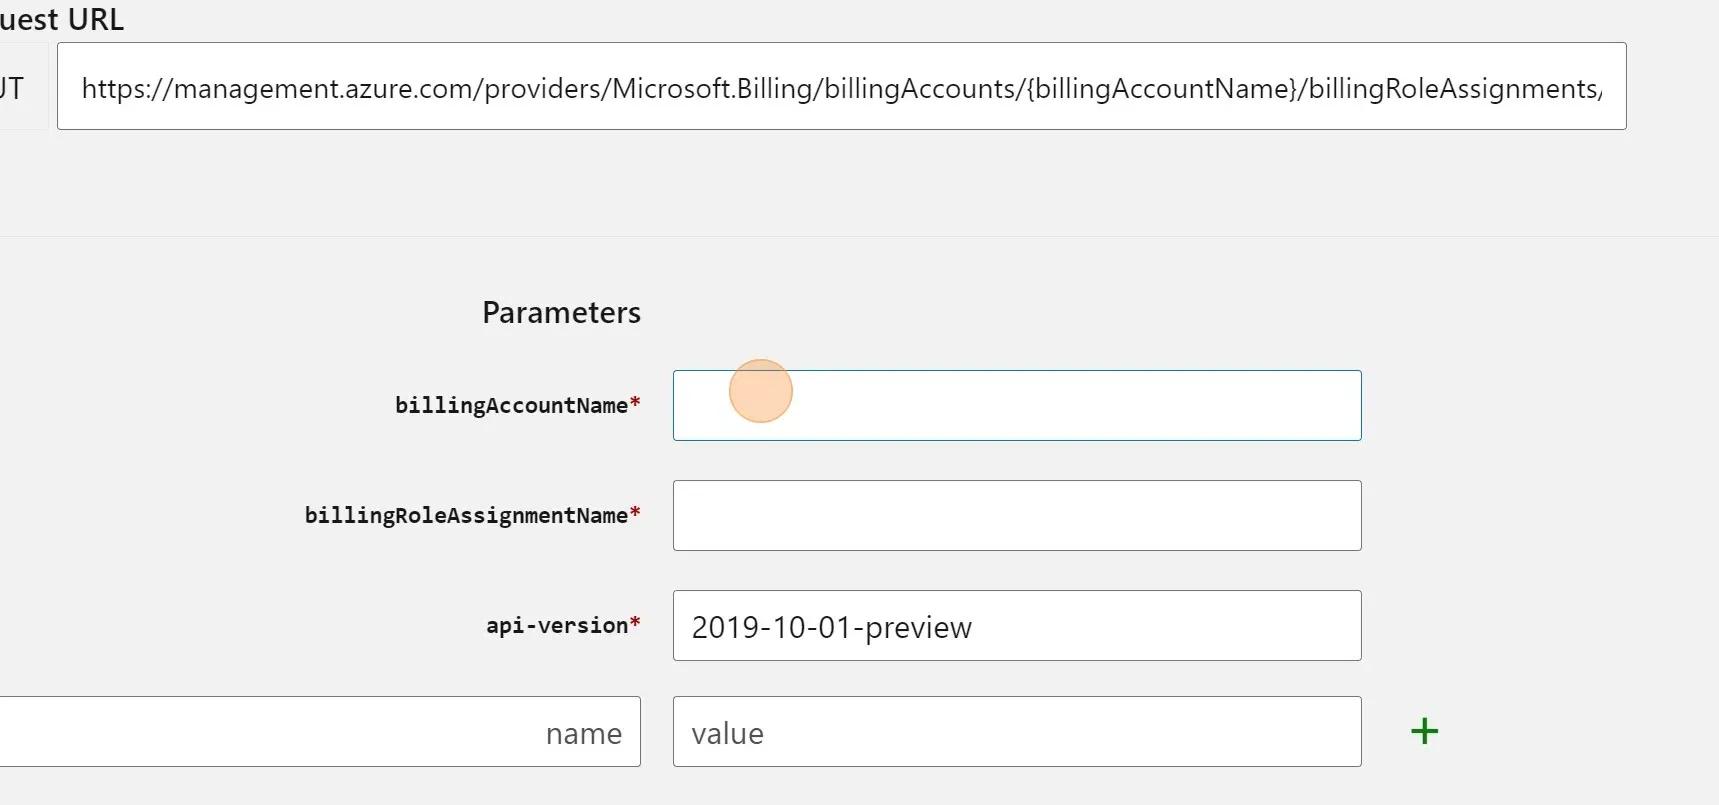
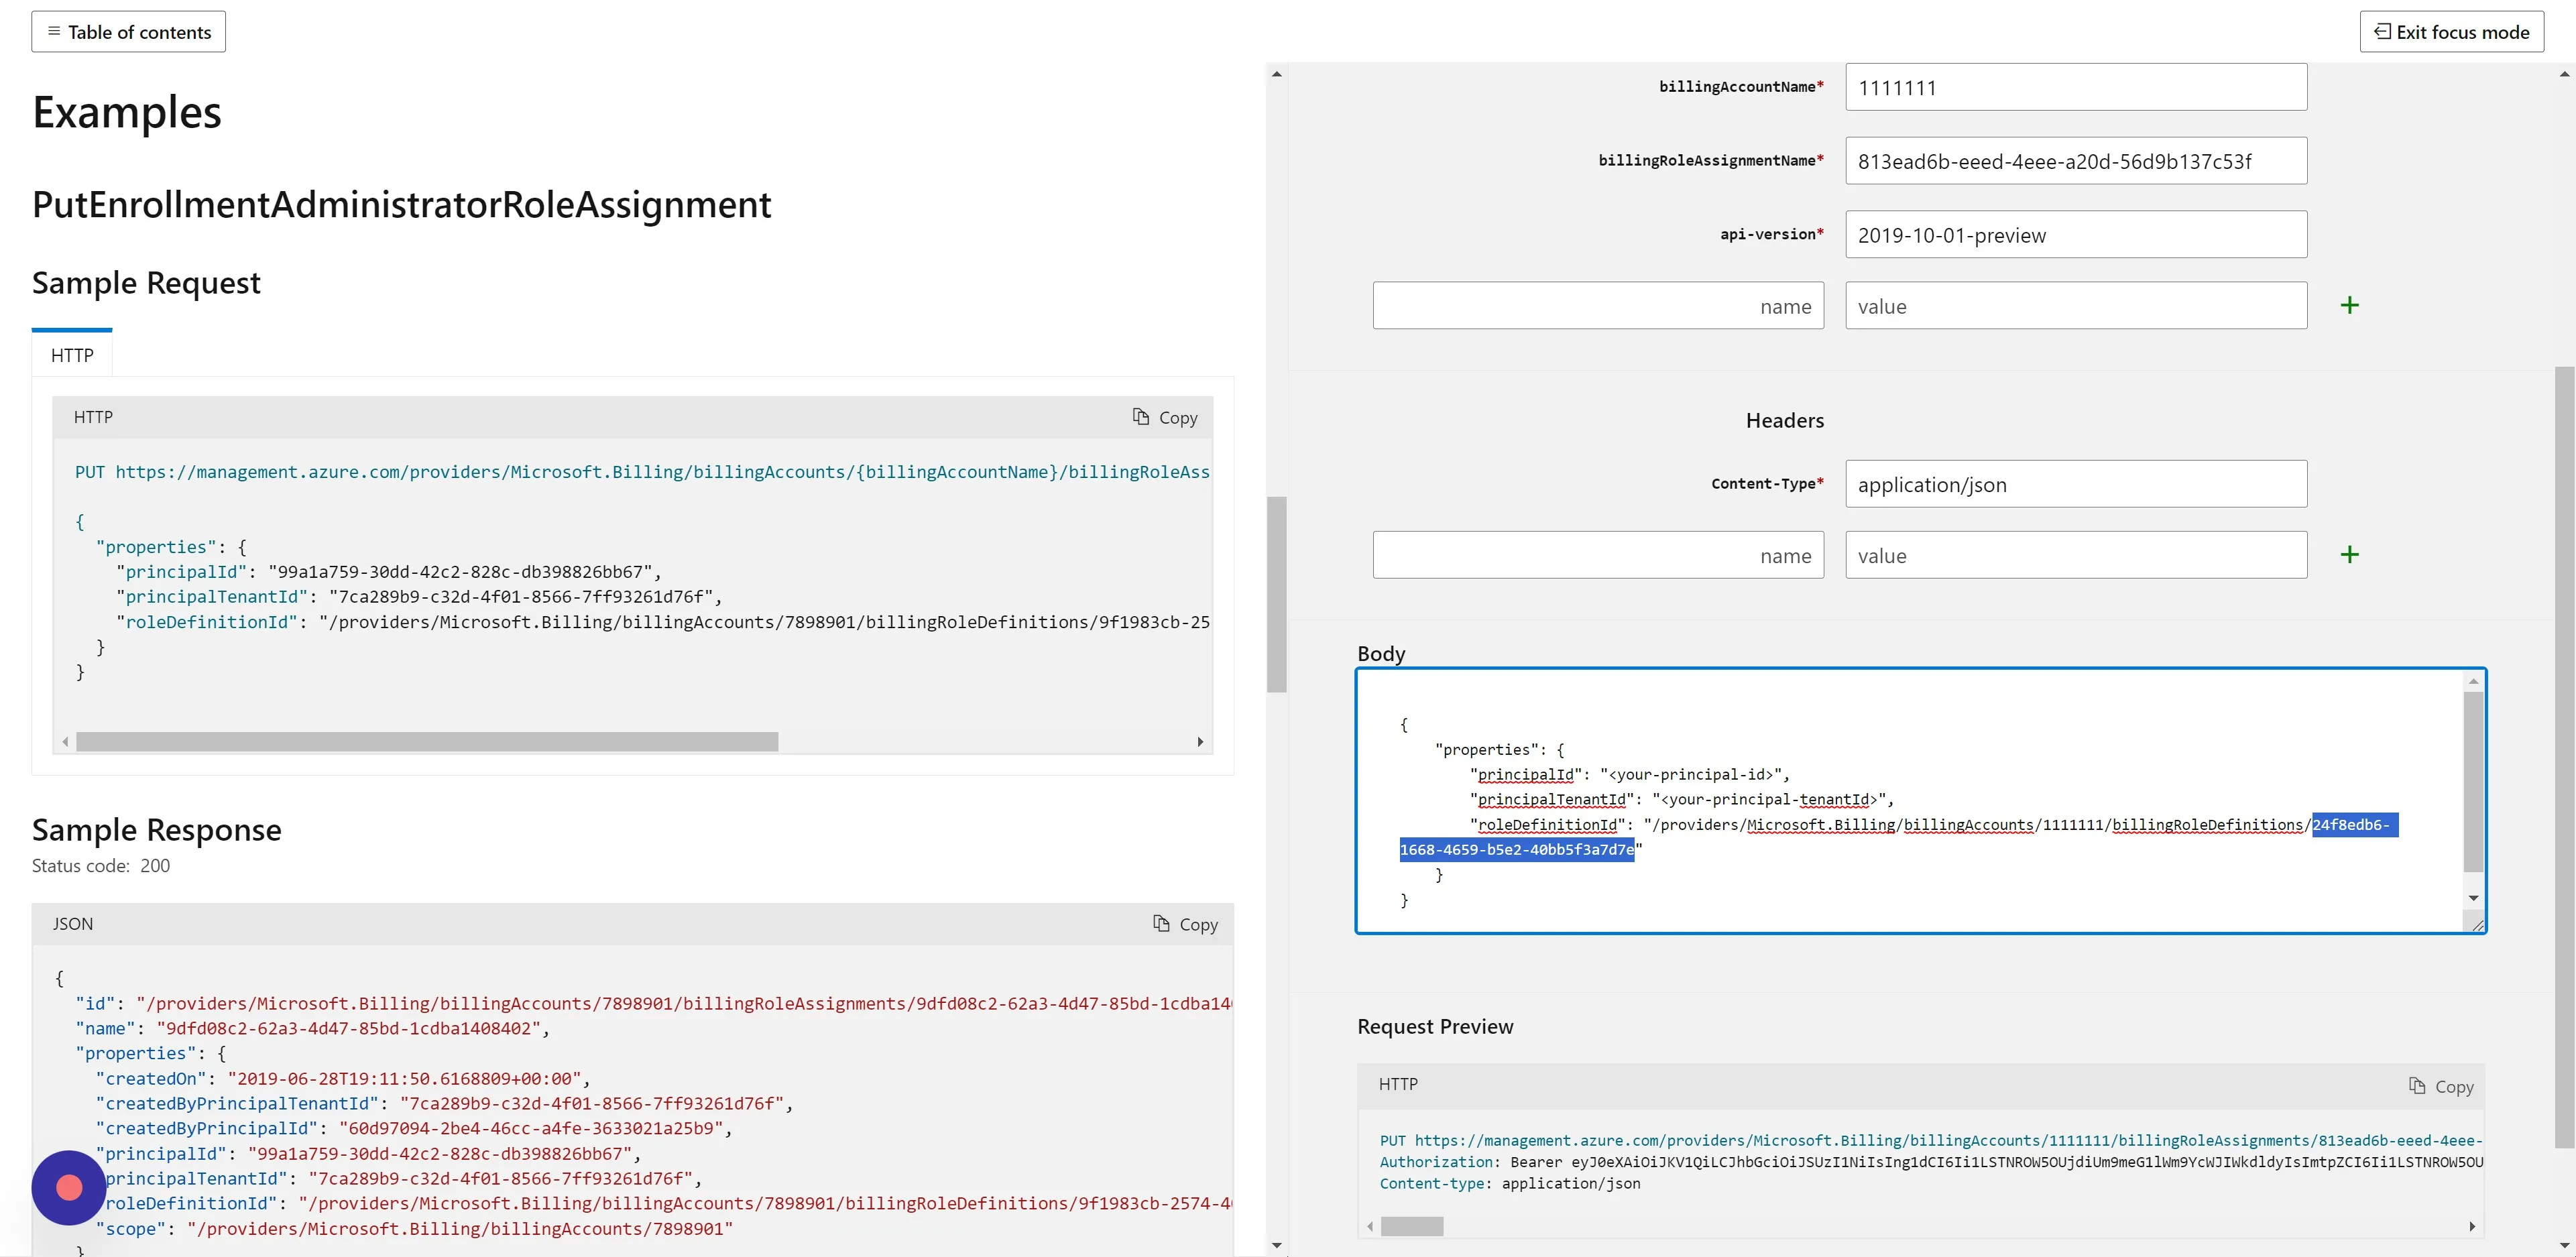
Section titled “Step 2”You will see that the right pane has changed into a simple API platform. In the Parameters section we need to provide values for the following fields:
- billingAccoutName
- billingRoleAssignmentName

Step 3
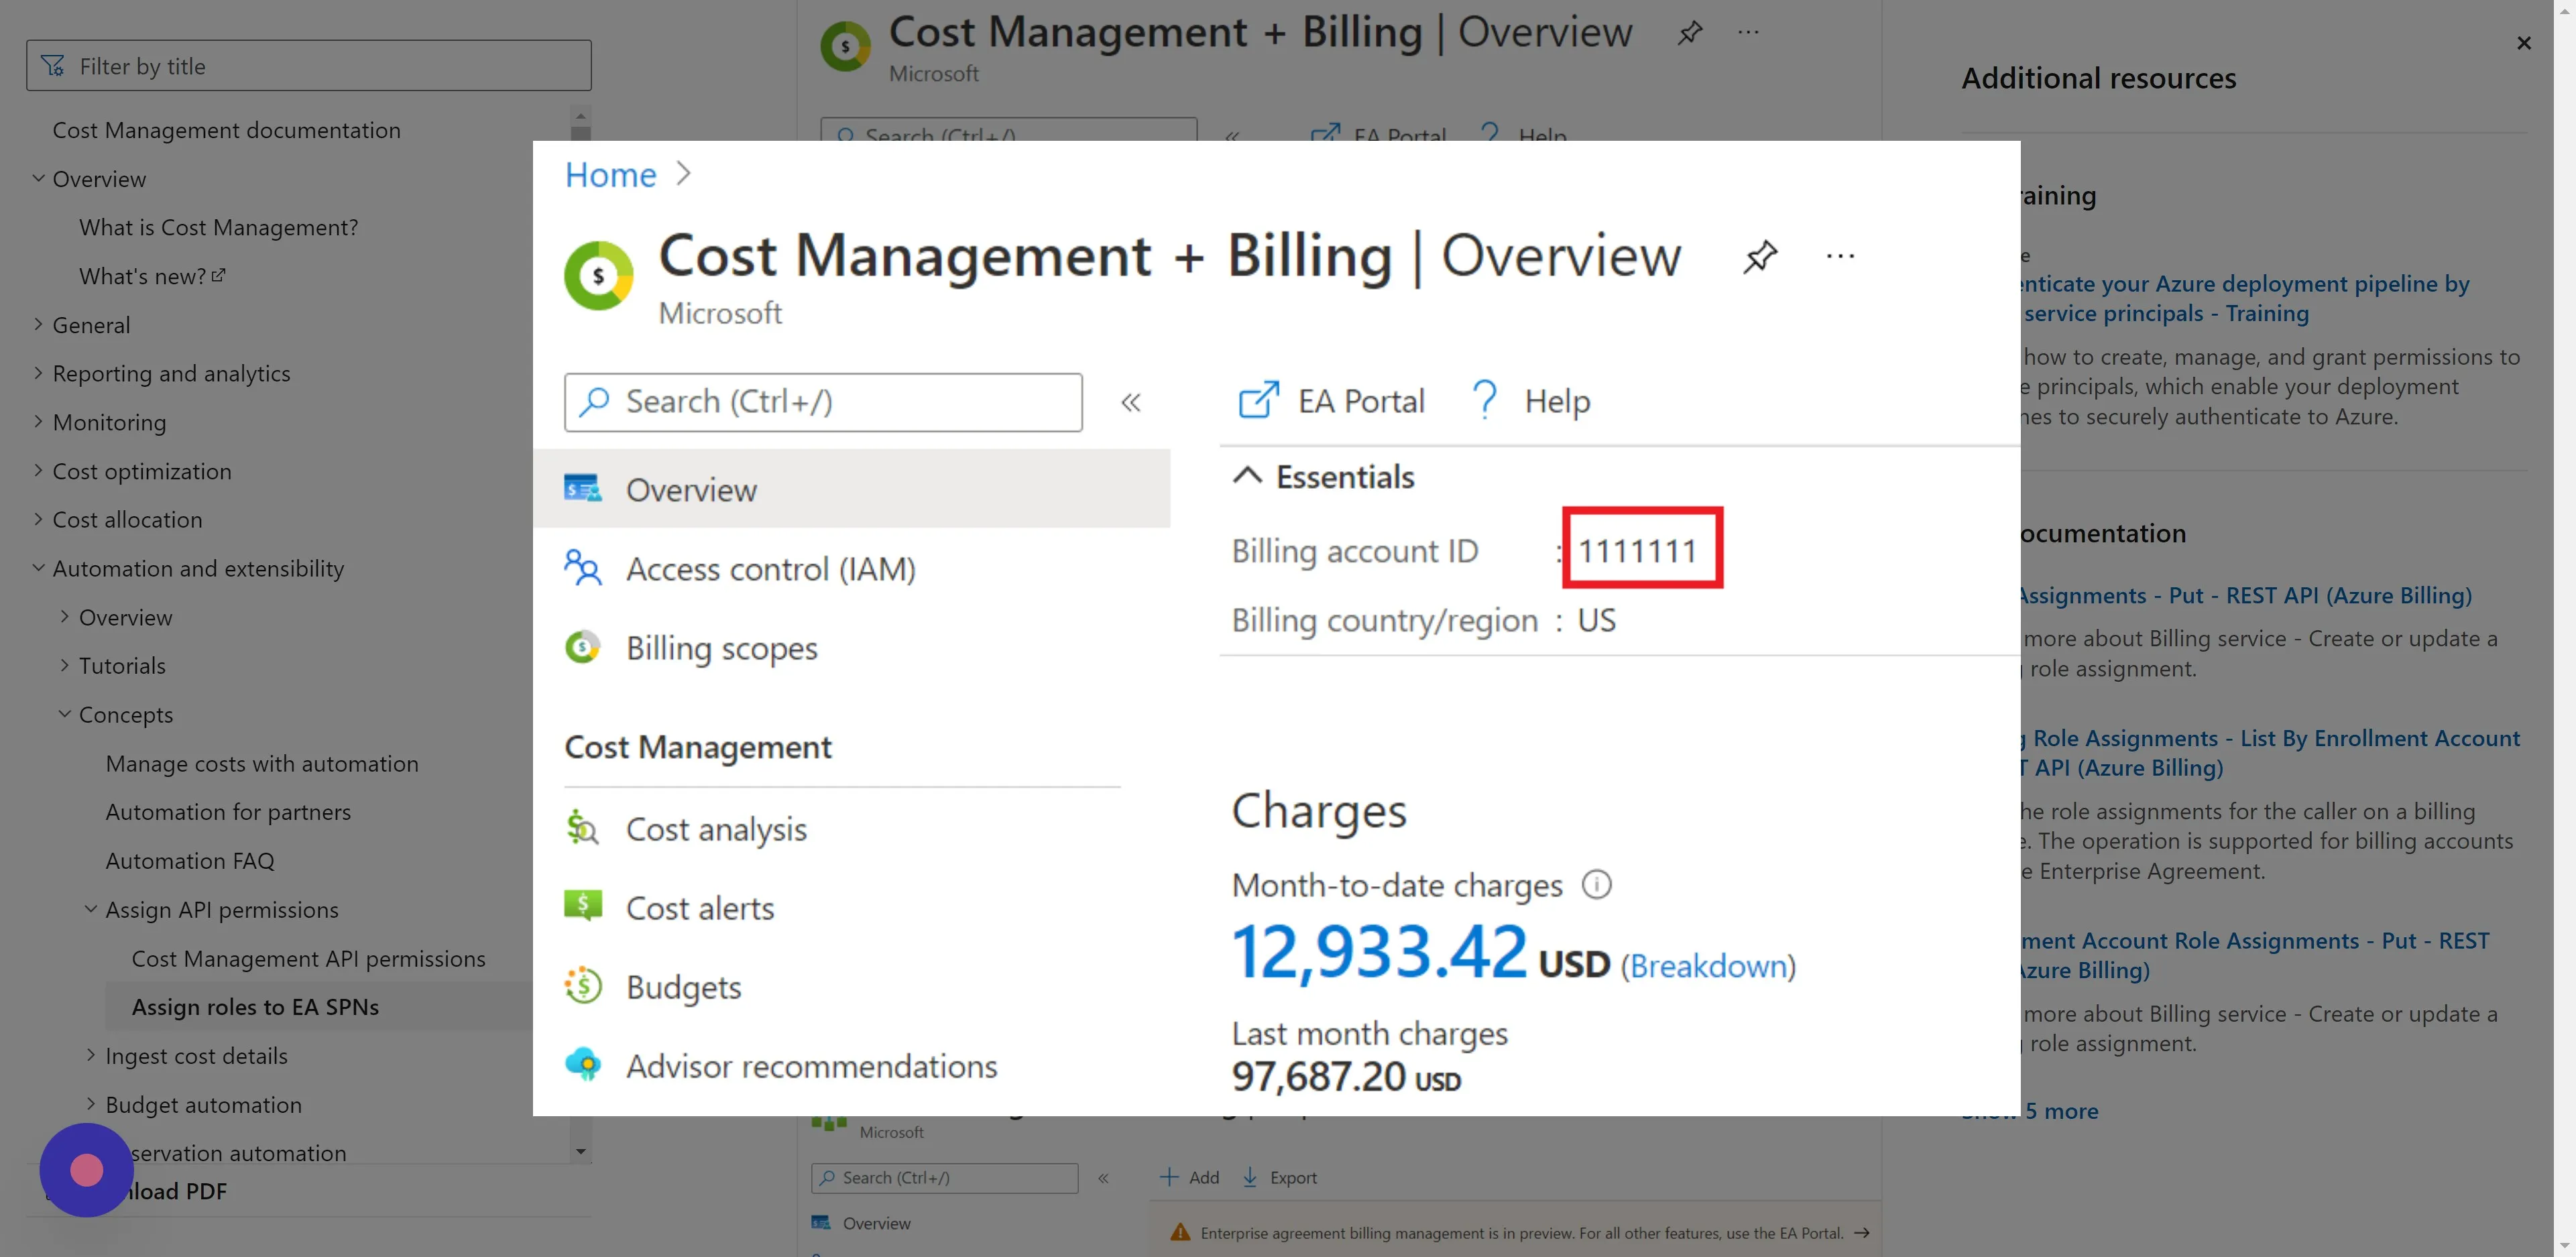
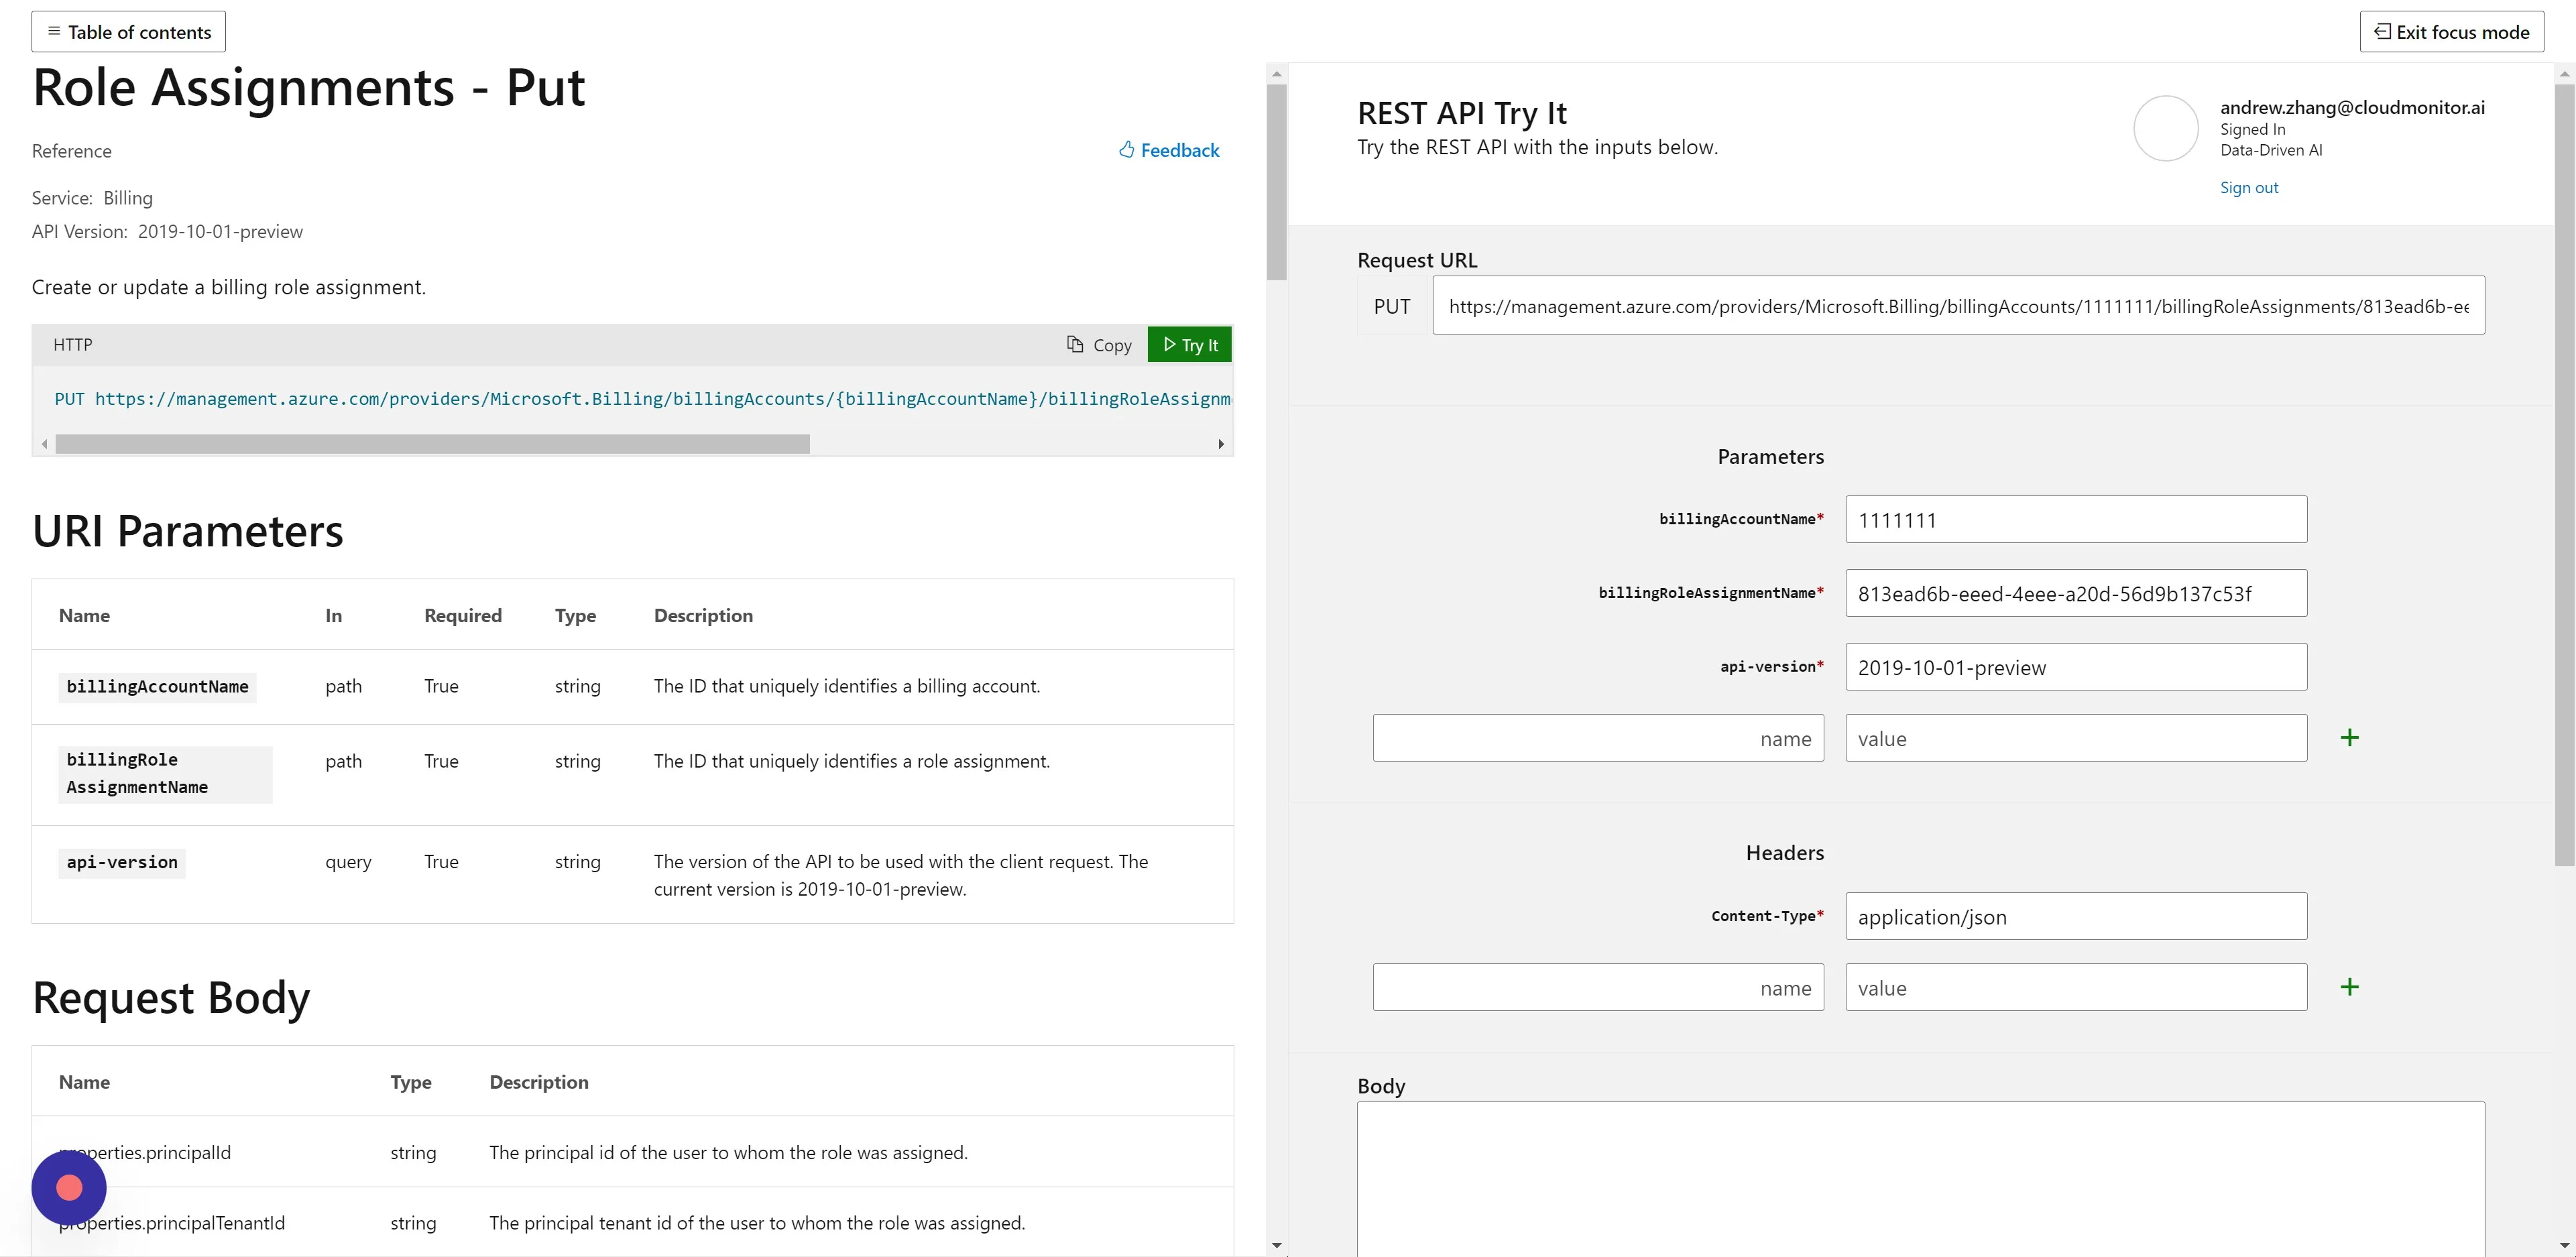
Section titled “Step 3”The billingAccountName is your “Billing account ID”. You can find this in the Azure portal on the “Cost Management + Billing” Overview. In our example below it is 1111111.
Step 4
Section titled “Step 4”Paste the “Billing account ID” into the billingAccountName input field.
Step 5
Section titled “Step 5”For the second input, we need to provide a random, unique GUID. We can generate one using the online GUID/UUID Generator website - https://guidgenerator.com.
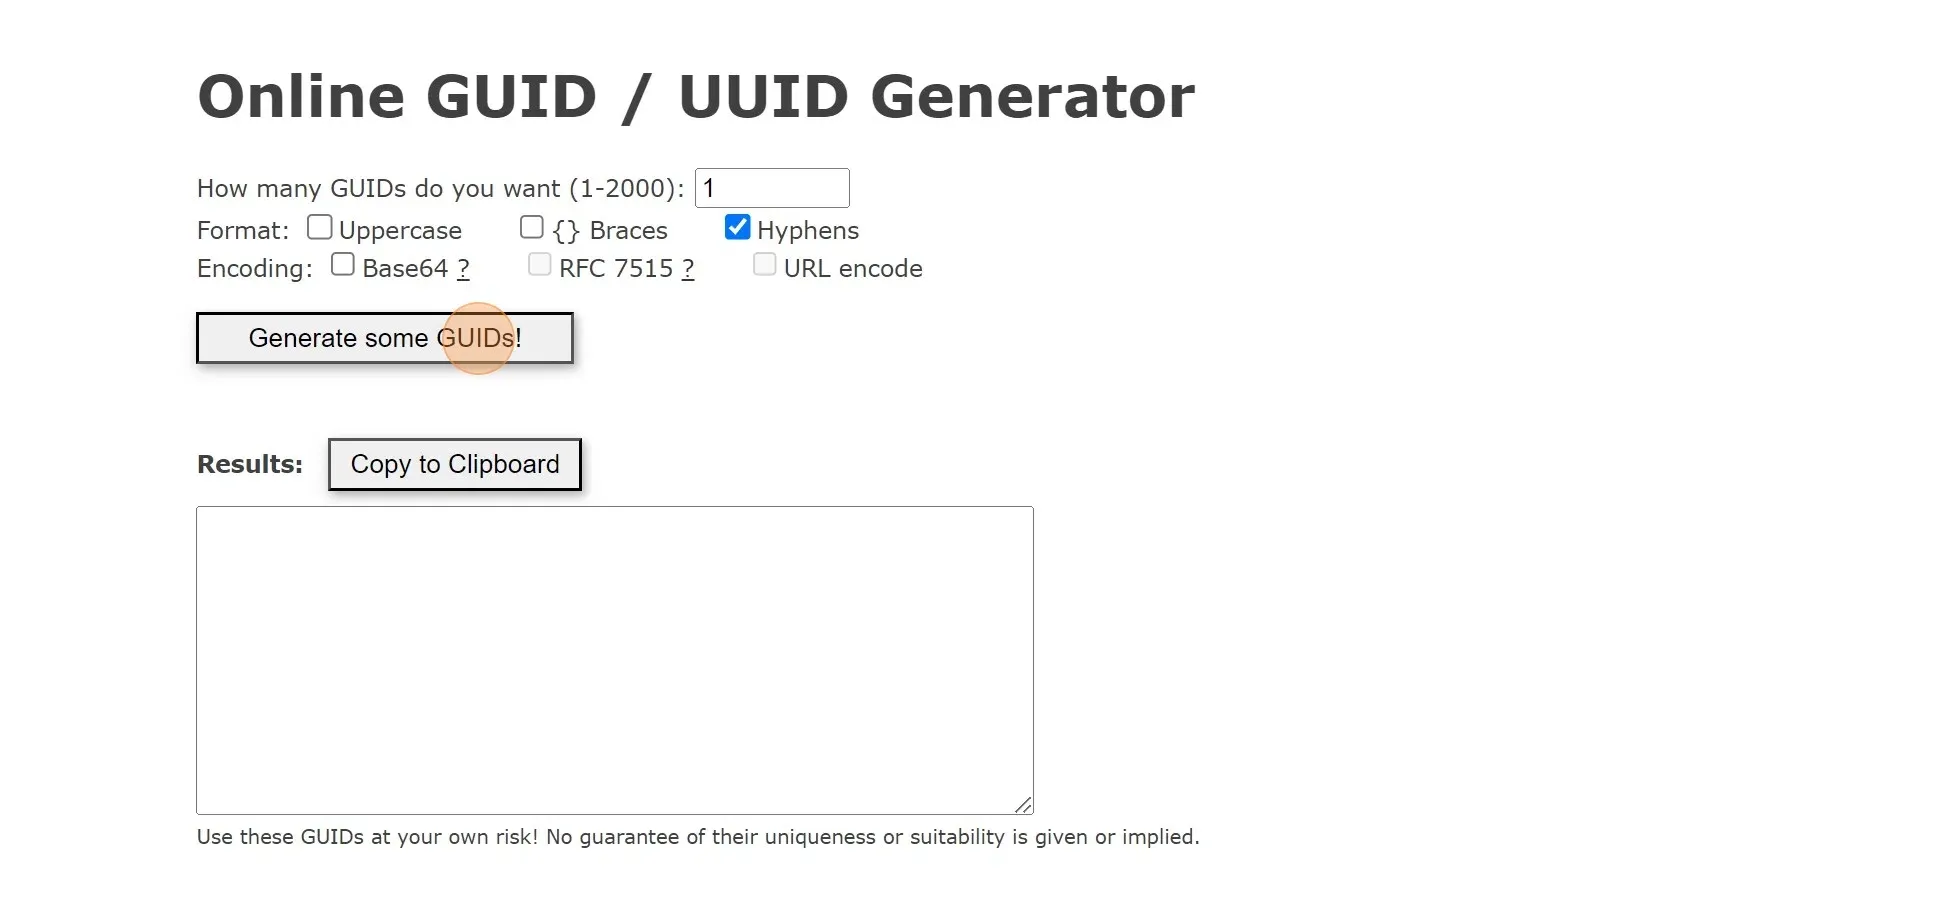
Step 6
Section titled “Step 6”Paste the GUID in the billingRoleAssignmentName input field.
Step 7
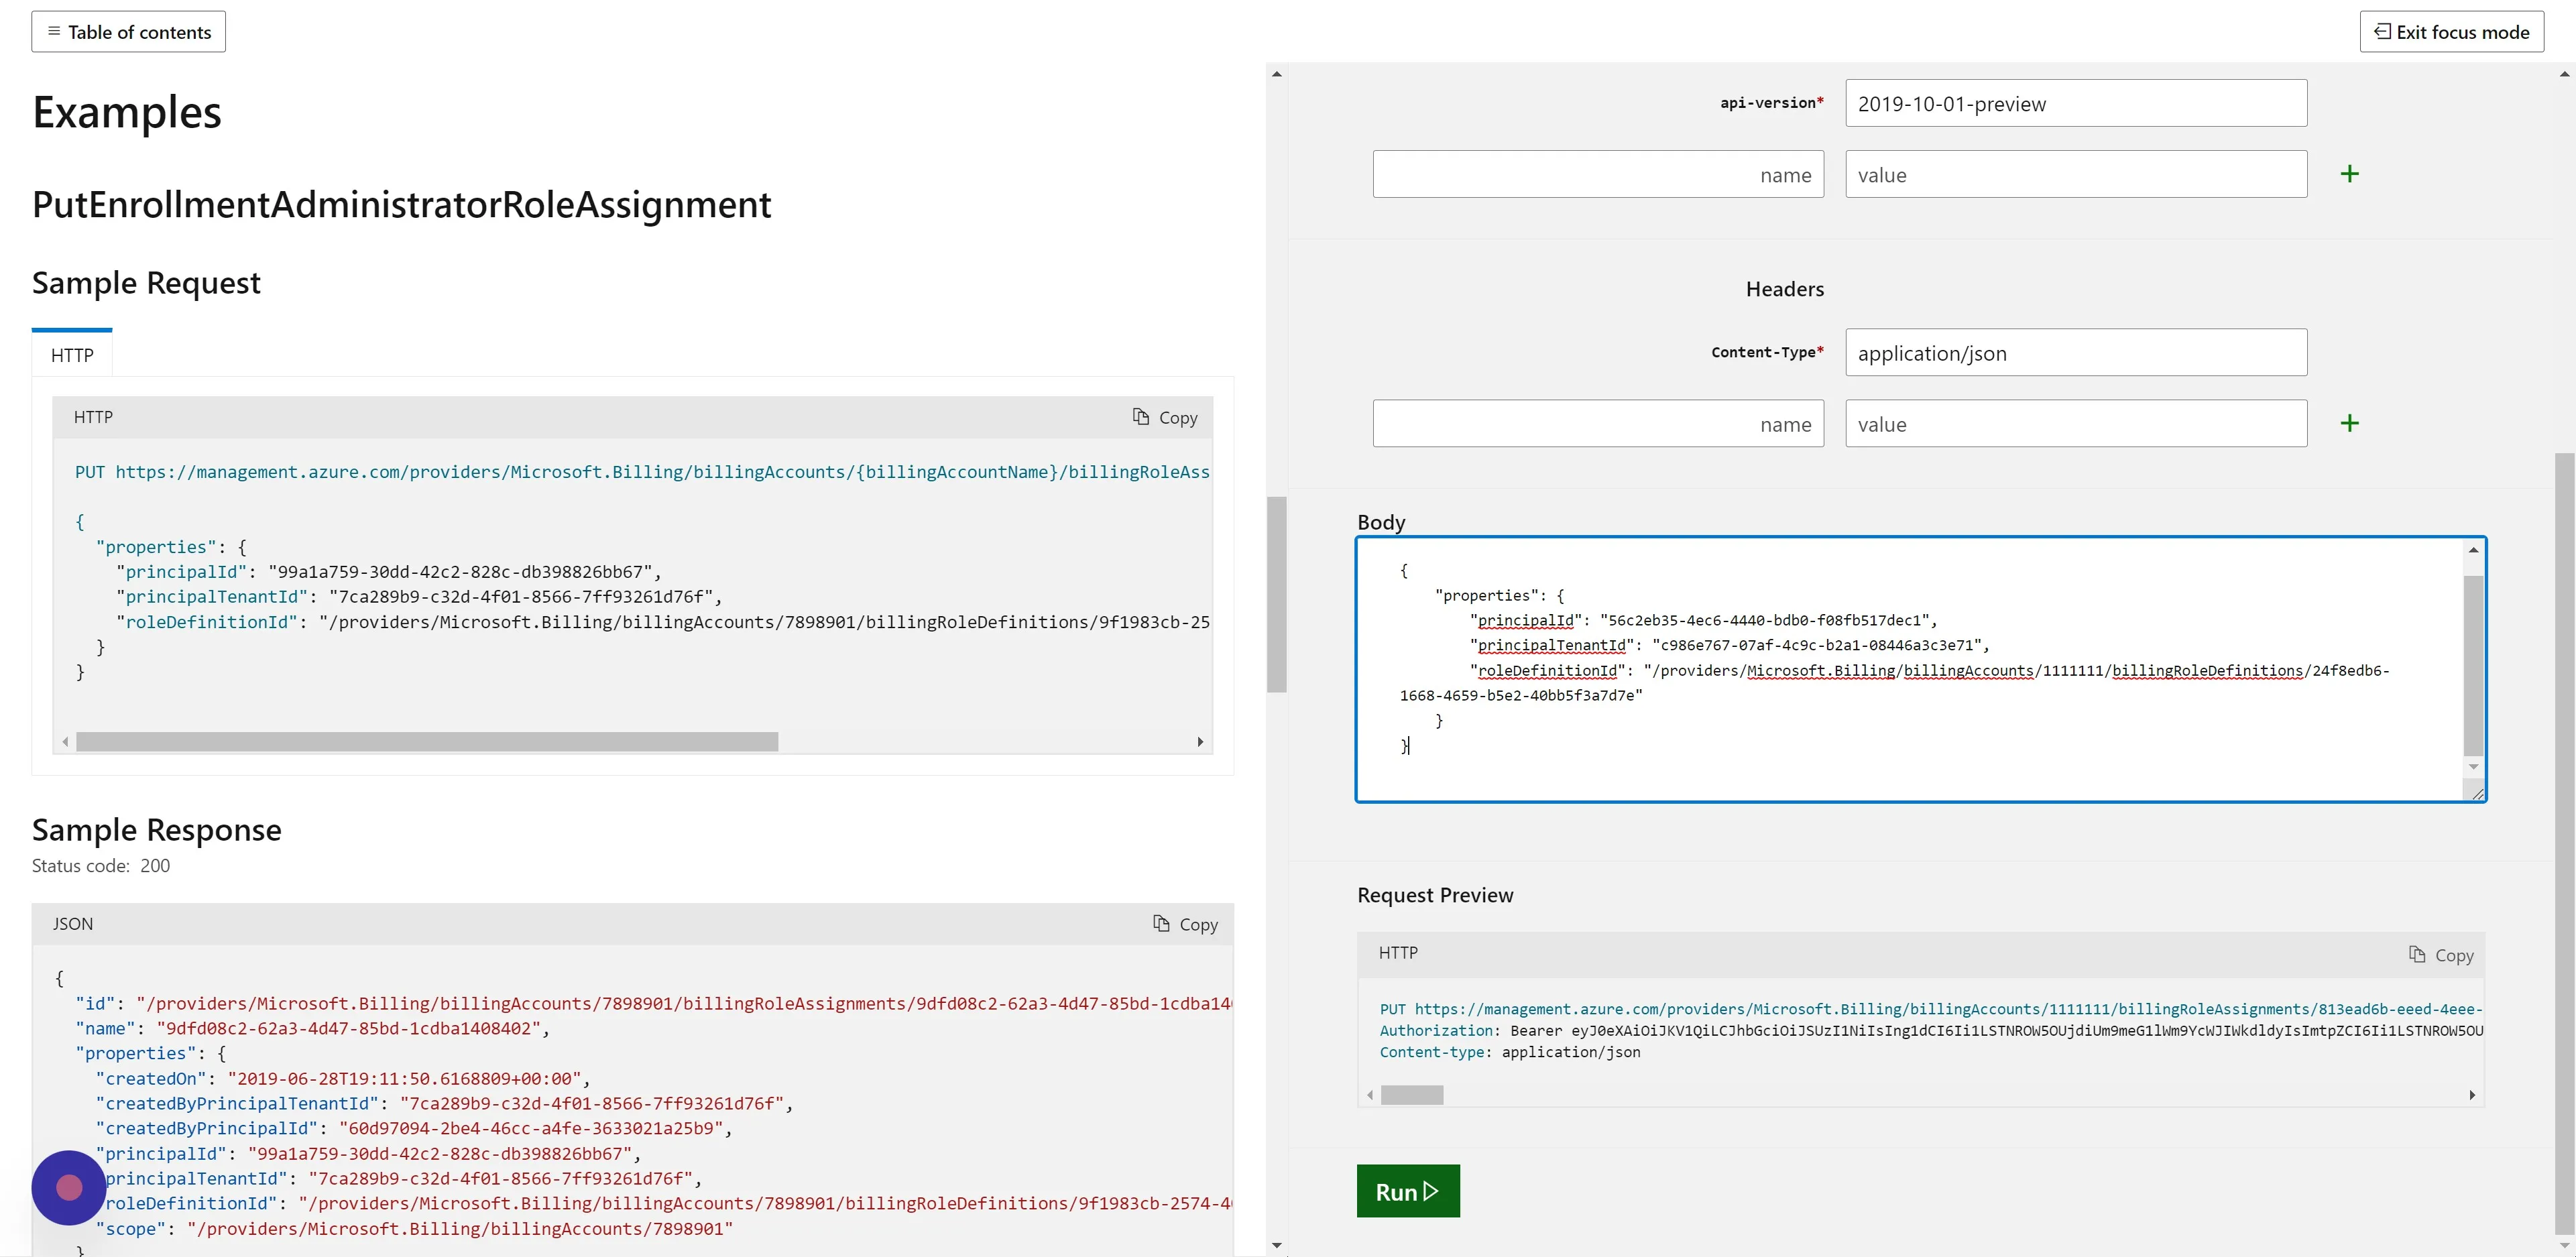
Section titled “Step 7”The Parameters section is now done. We will now move onto providing a JSON object in the Body section.
Step 8
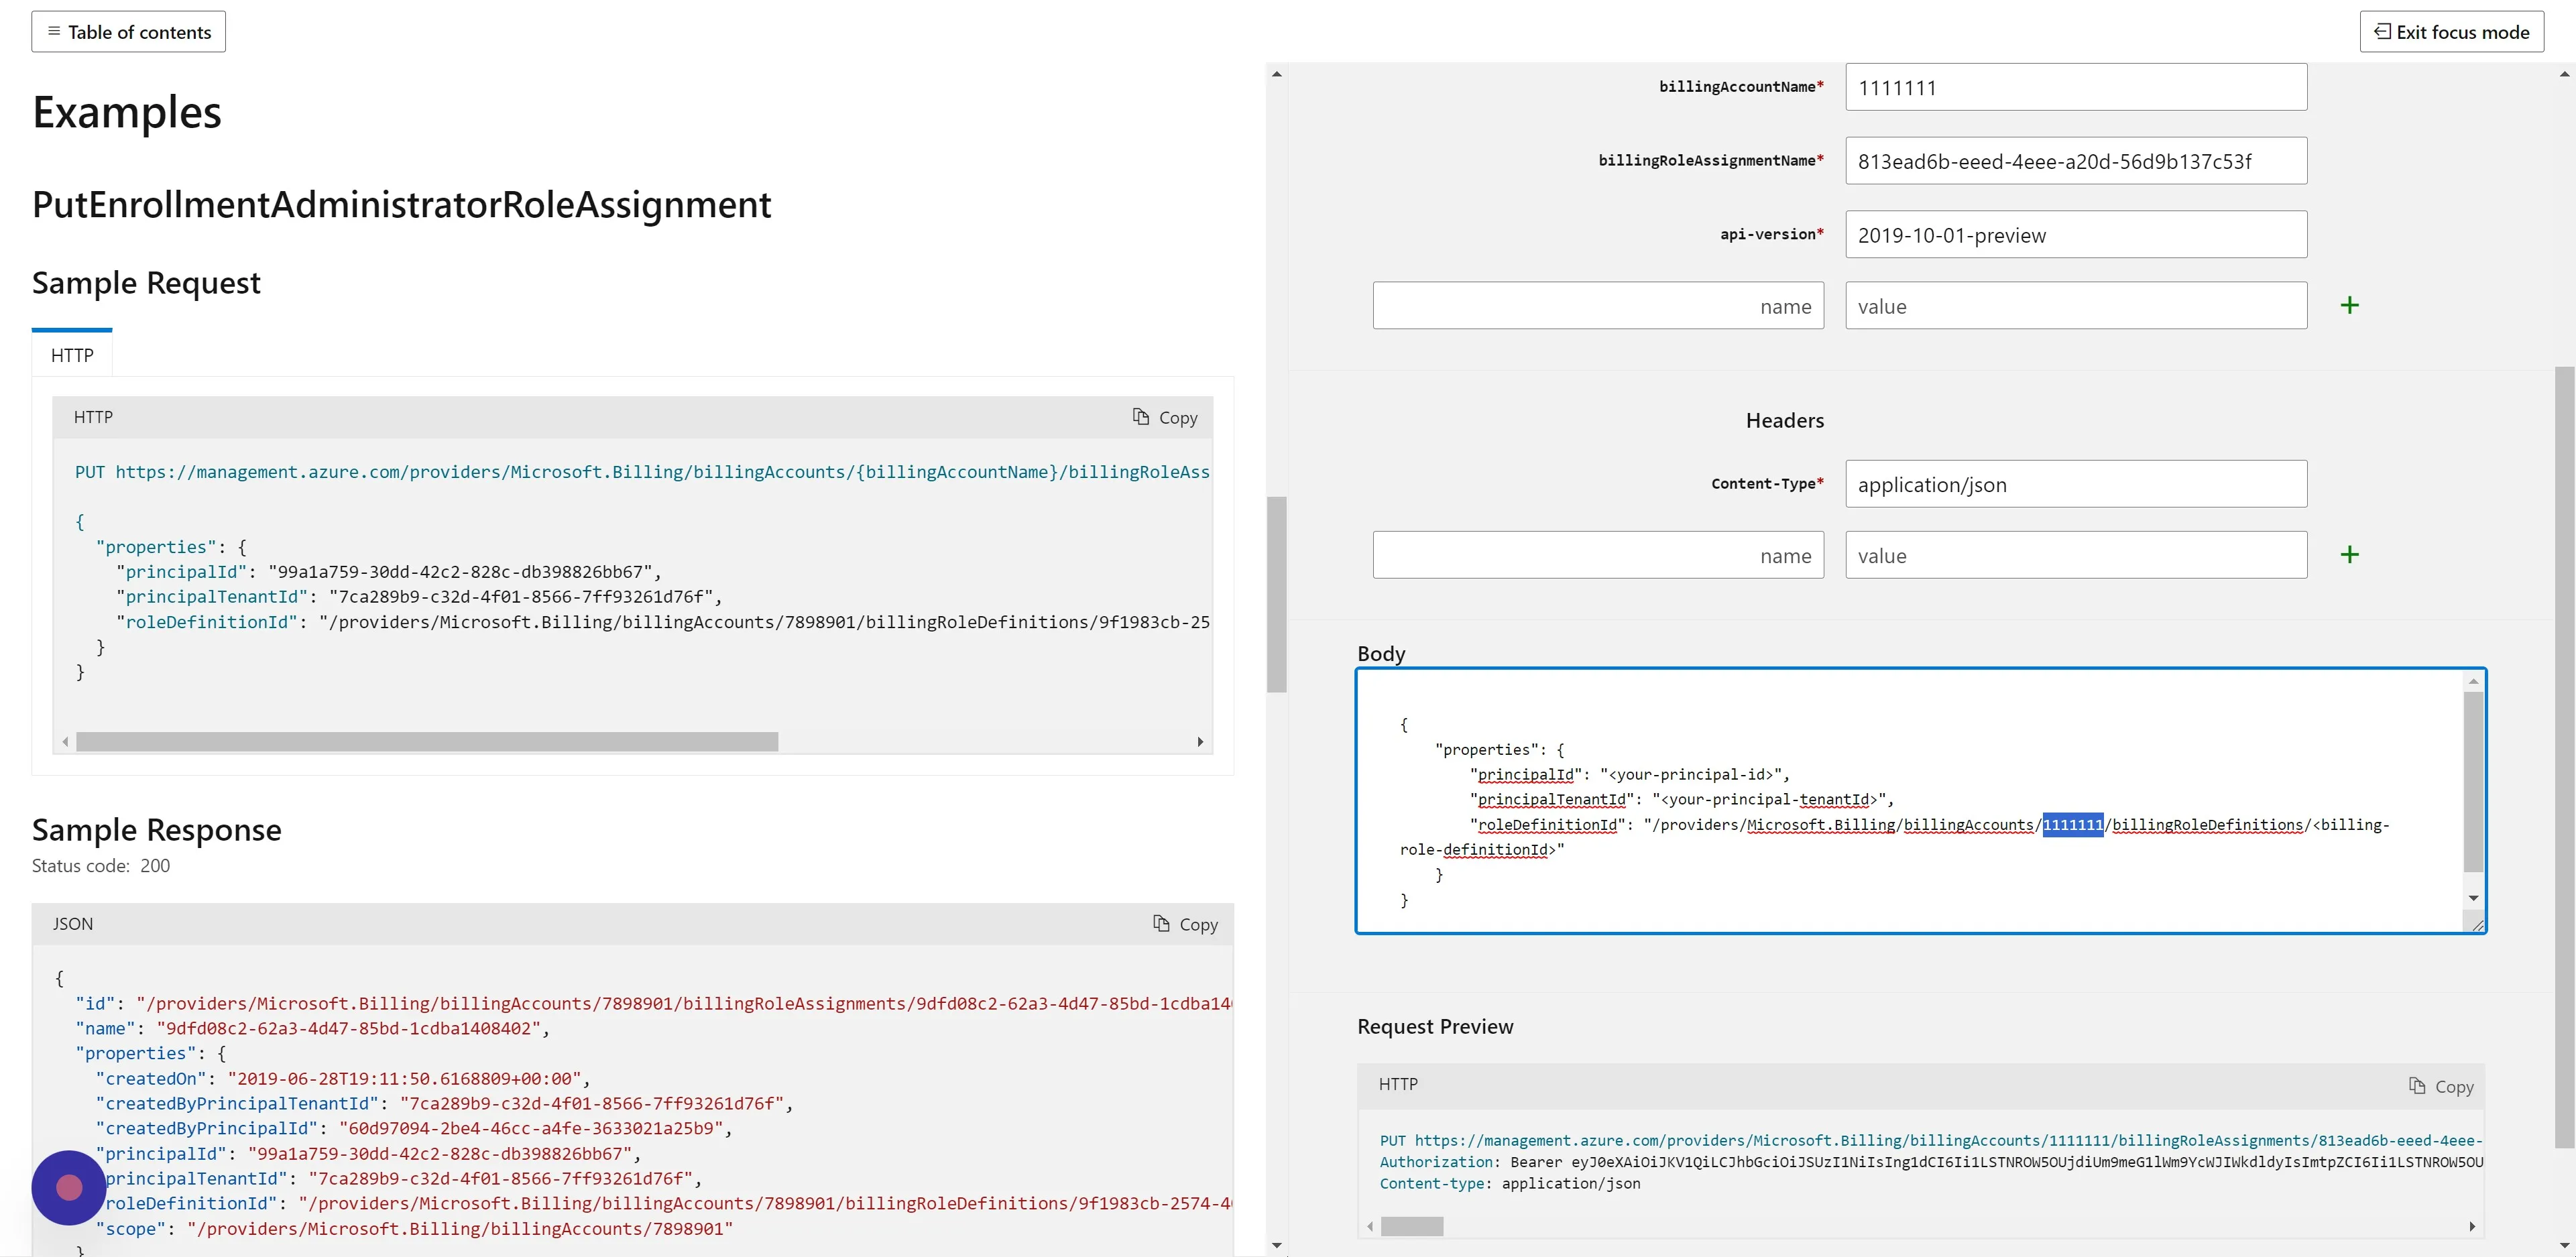
Section titled “Step 8”Replace <your-billing-accountId> with the same billingAccountId used in the “billingAccountName” parameter. In our example, it is “1111111”.
Step 9
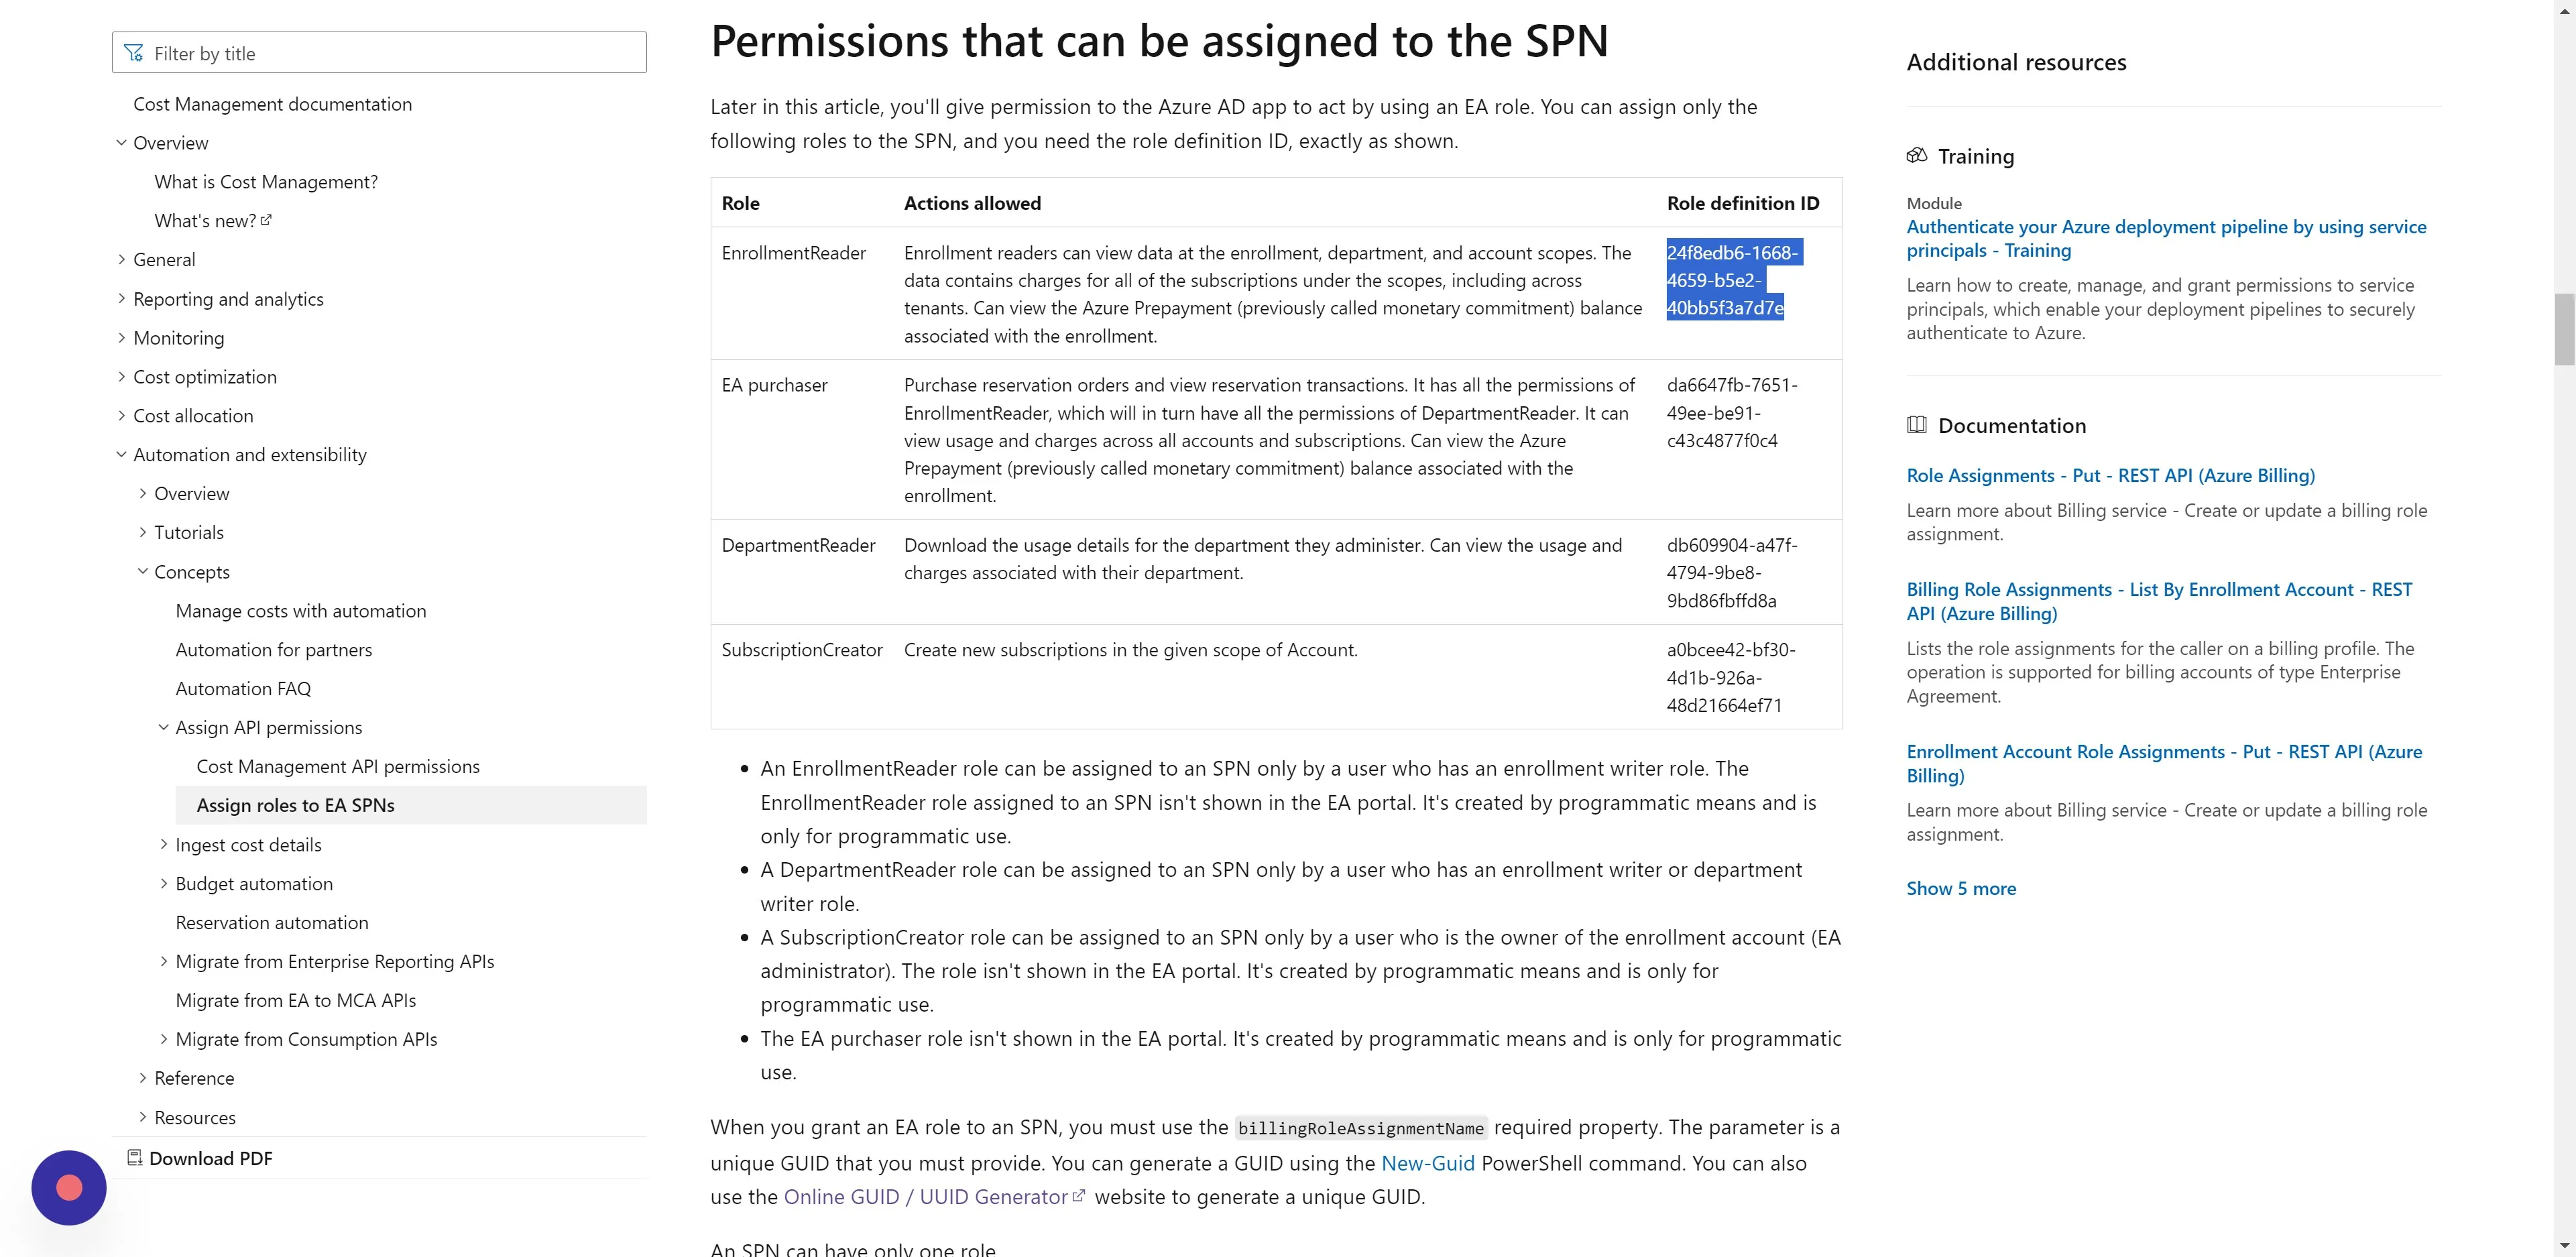
Section titled “Step 9”Replace <billing-role-definitionId> with “24f8edb6-1668-4659-b5e2-40bb5f3a7d7e”. The reason for this specific value is explained in the next step.
Step 10
Section titled “Step 10”Note: “24f8edb6-1668-4659-b5e2-40bb5f3a7d7e” represents the role definition ID for the EnrollmentReader role. This role grants the Service Principal Name (SPN) read access to view your billing information.
Step 11
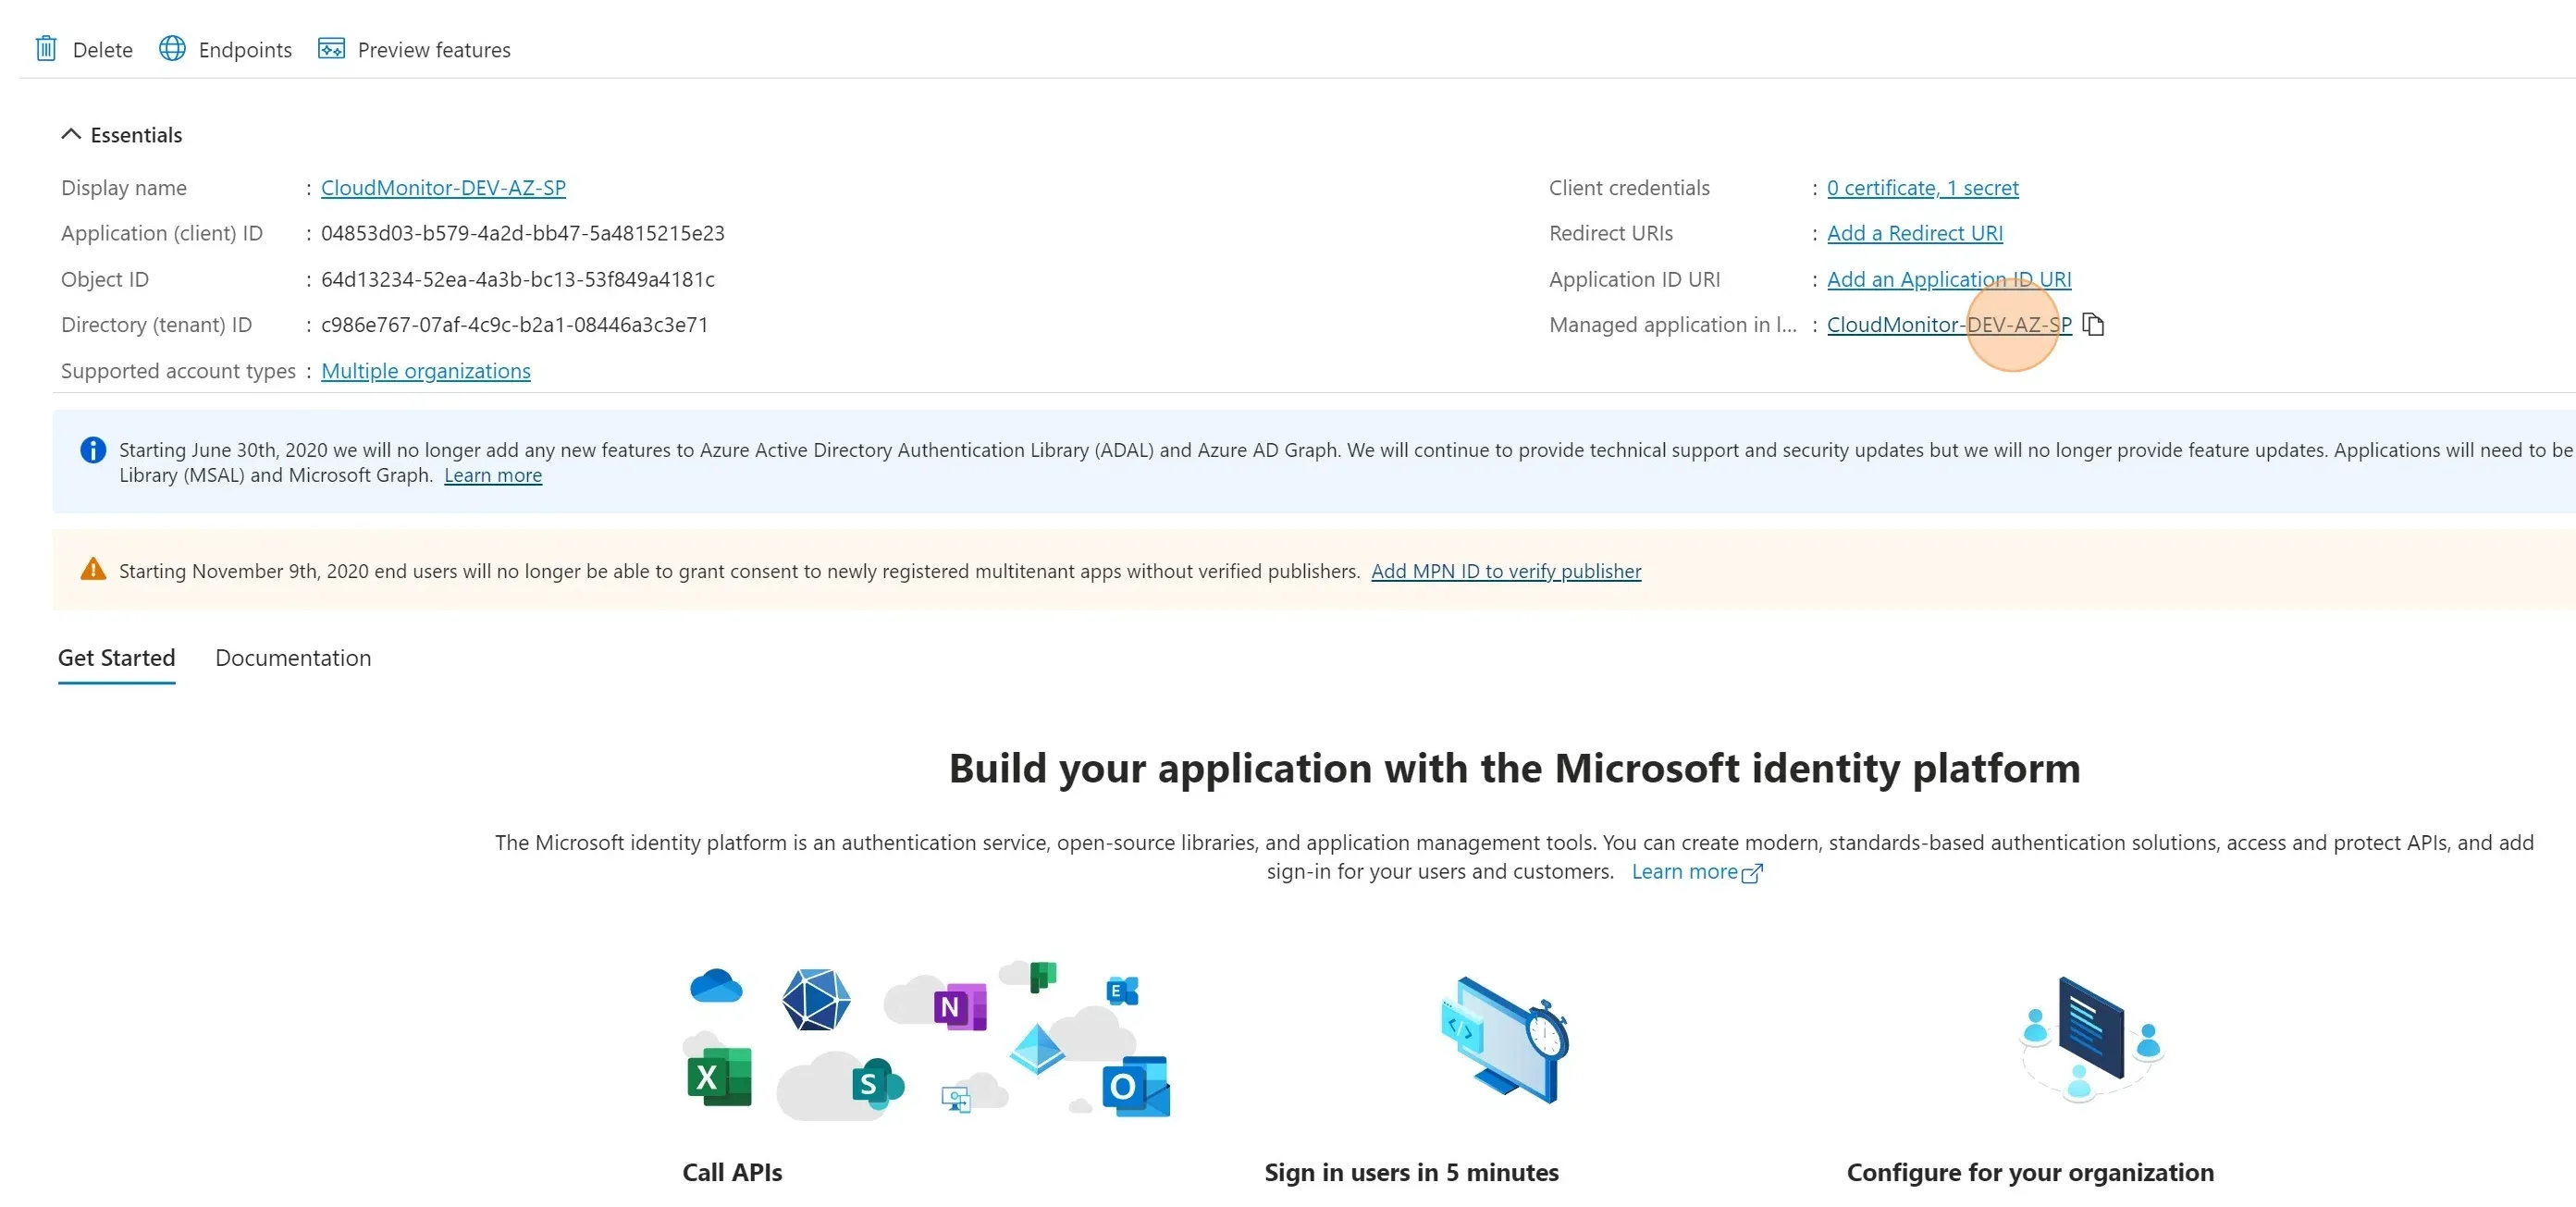
Section titled “Step 11”Then replace <your-principal-tenantId> with your AD Tenant Id. You can locate it via:
- Go to Azure Ad > App Registrations > Find the CloudMonitor Service Principal/App (Tip: paste the Service Principal’s Client Id for filtering).
- Replace
<your-principal-tenantId>with the “Directory (tenant) Id” field. - Stay on this page for a future step.

Step 12
Section titled “Step 12”Lastly, replace <your-principal-Id> with the CloudMonitor Service Principal Managed Application resource Object ID. You can find it by:
- Continuing from the last location & clicking on the Managed Application link.
- Replace
<your-principal-Id>with the “Object ID”.
Step 13
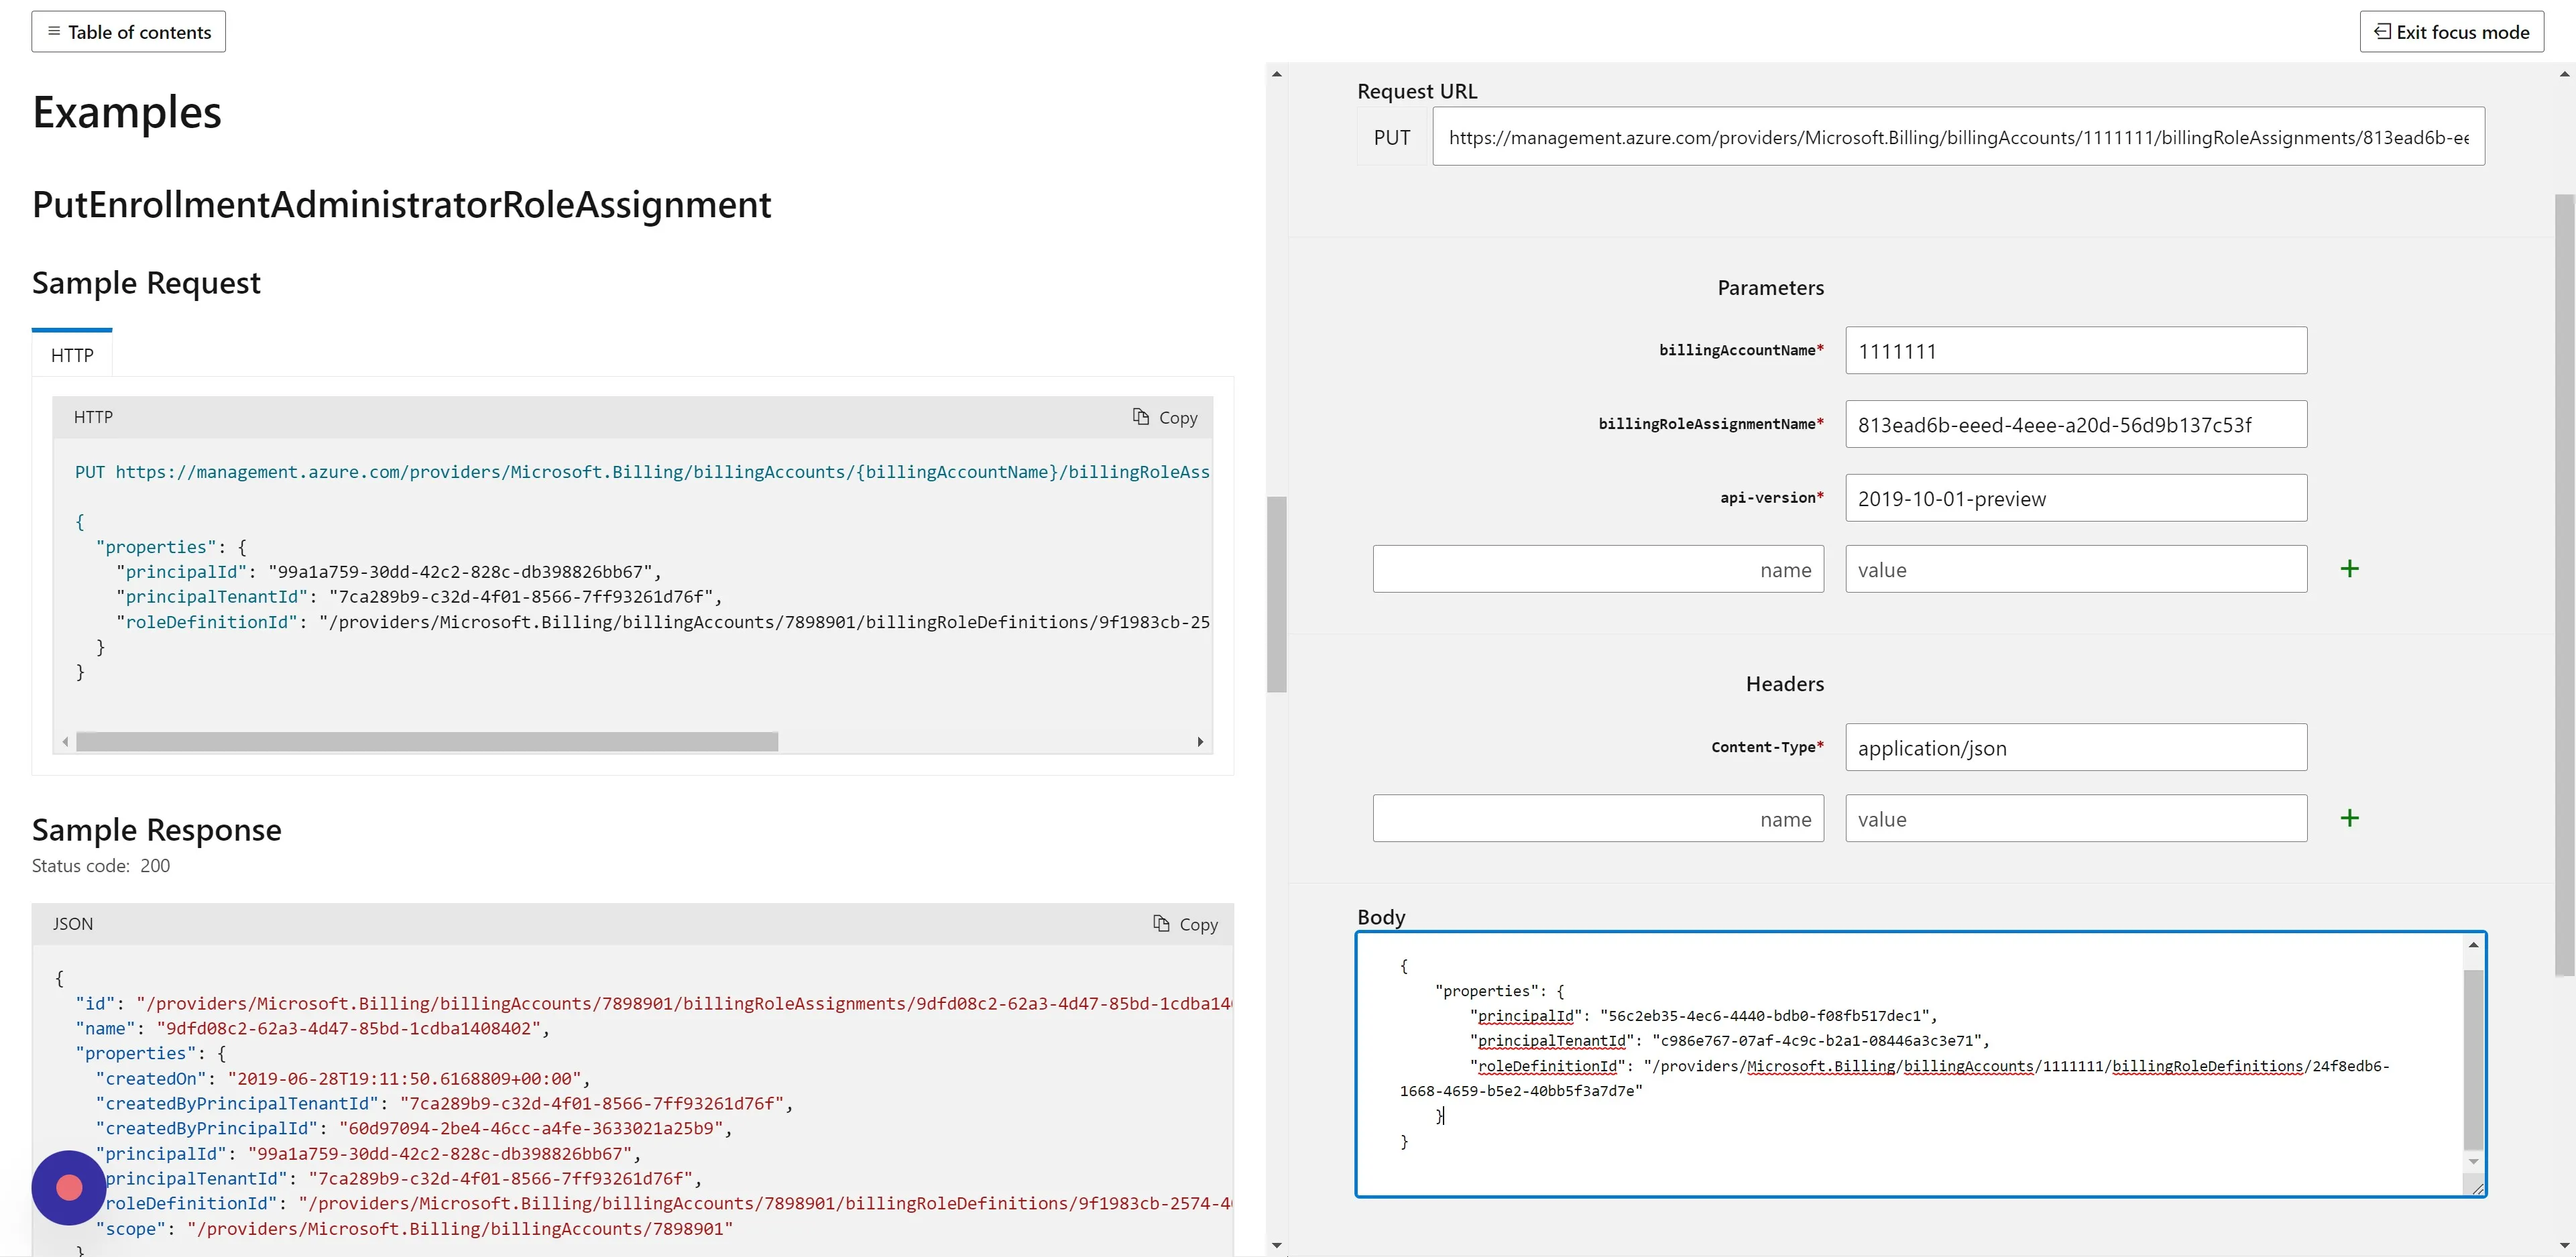
Section titled “Step 13”Your Body section should now look similar to the below:
Step 14
Section titled “Step 14”Click “Run” – it should return a “200” Status Code if it made the association successfully.
If it returns 400 error, then check all the fields again.
If it returns a 403 error, then this usually means that the logged in user does not have permission to update the role assignment. Make sure you are logged in as Account Owner or Department Owner.
Raise a helpdesk ticket if you cannot get a successful 200 response