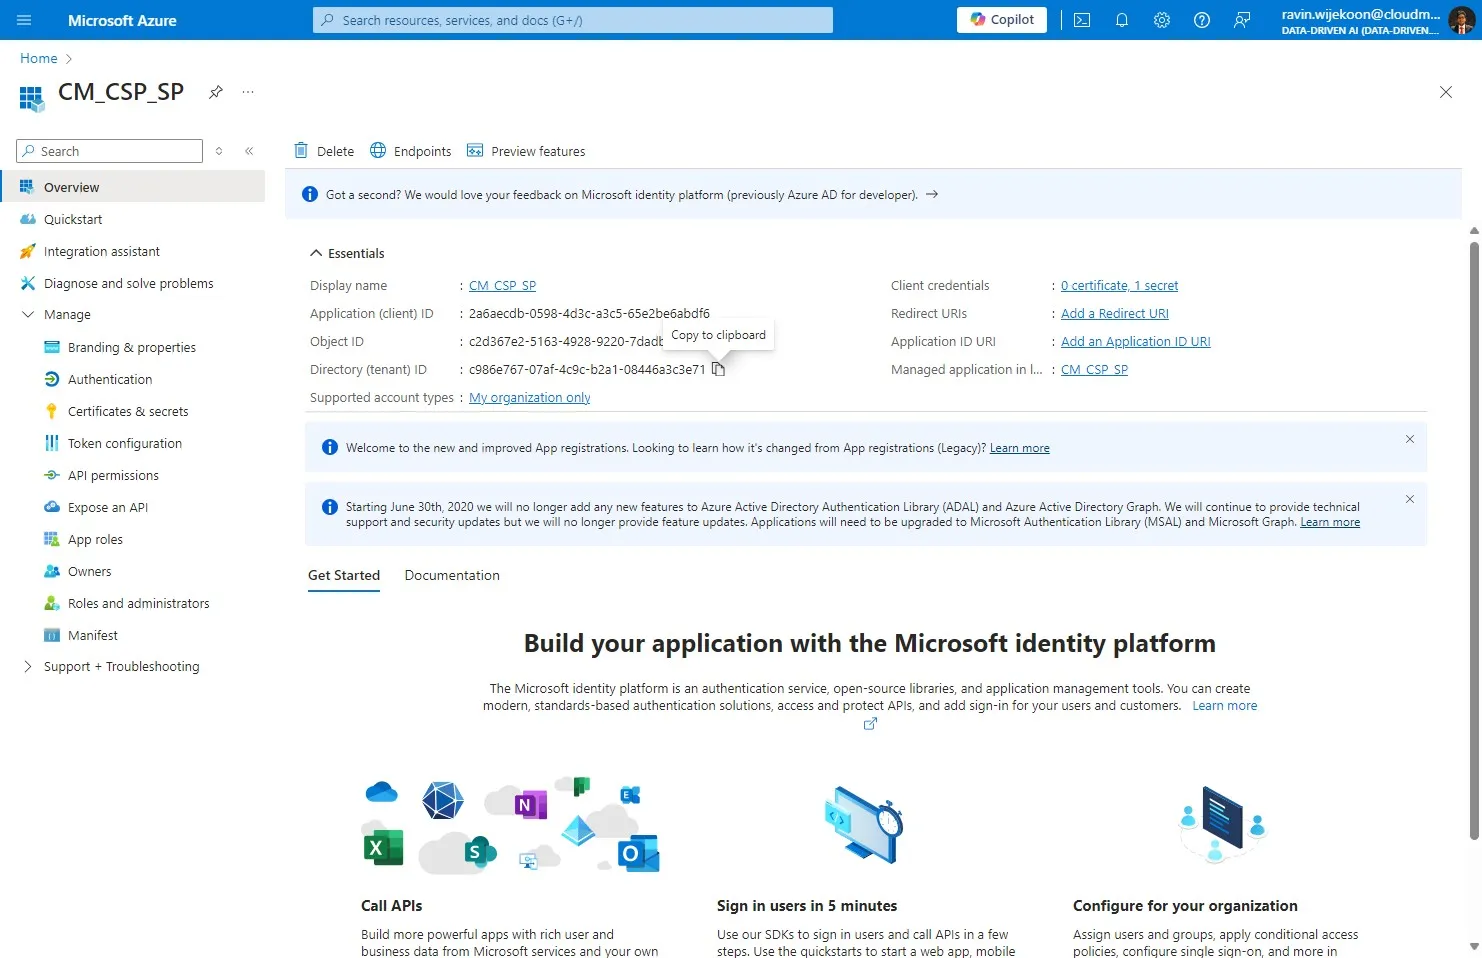
How to create a Service Principal? legacy
Step 1
Section titled “Step 1”Login to the Customer’s tenant with admin account and Search for “App Registrations”
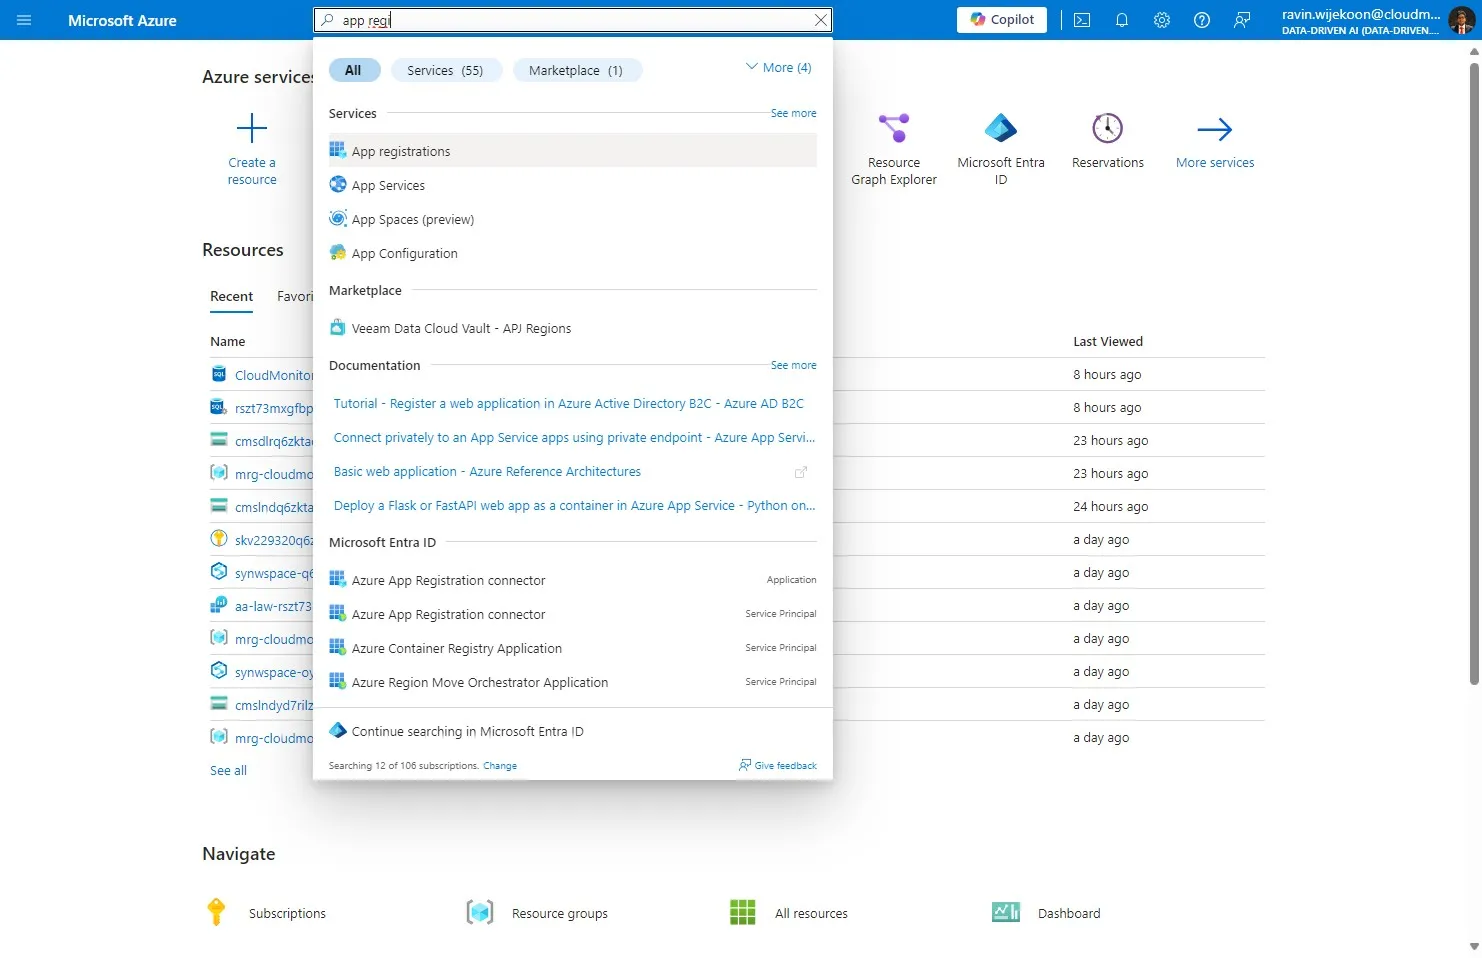
Step 2
Section titled “Step 2”Click “Owned applications”
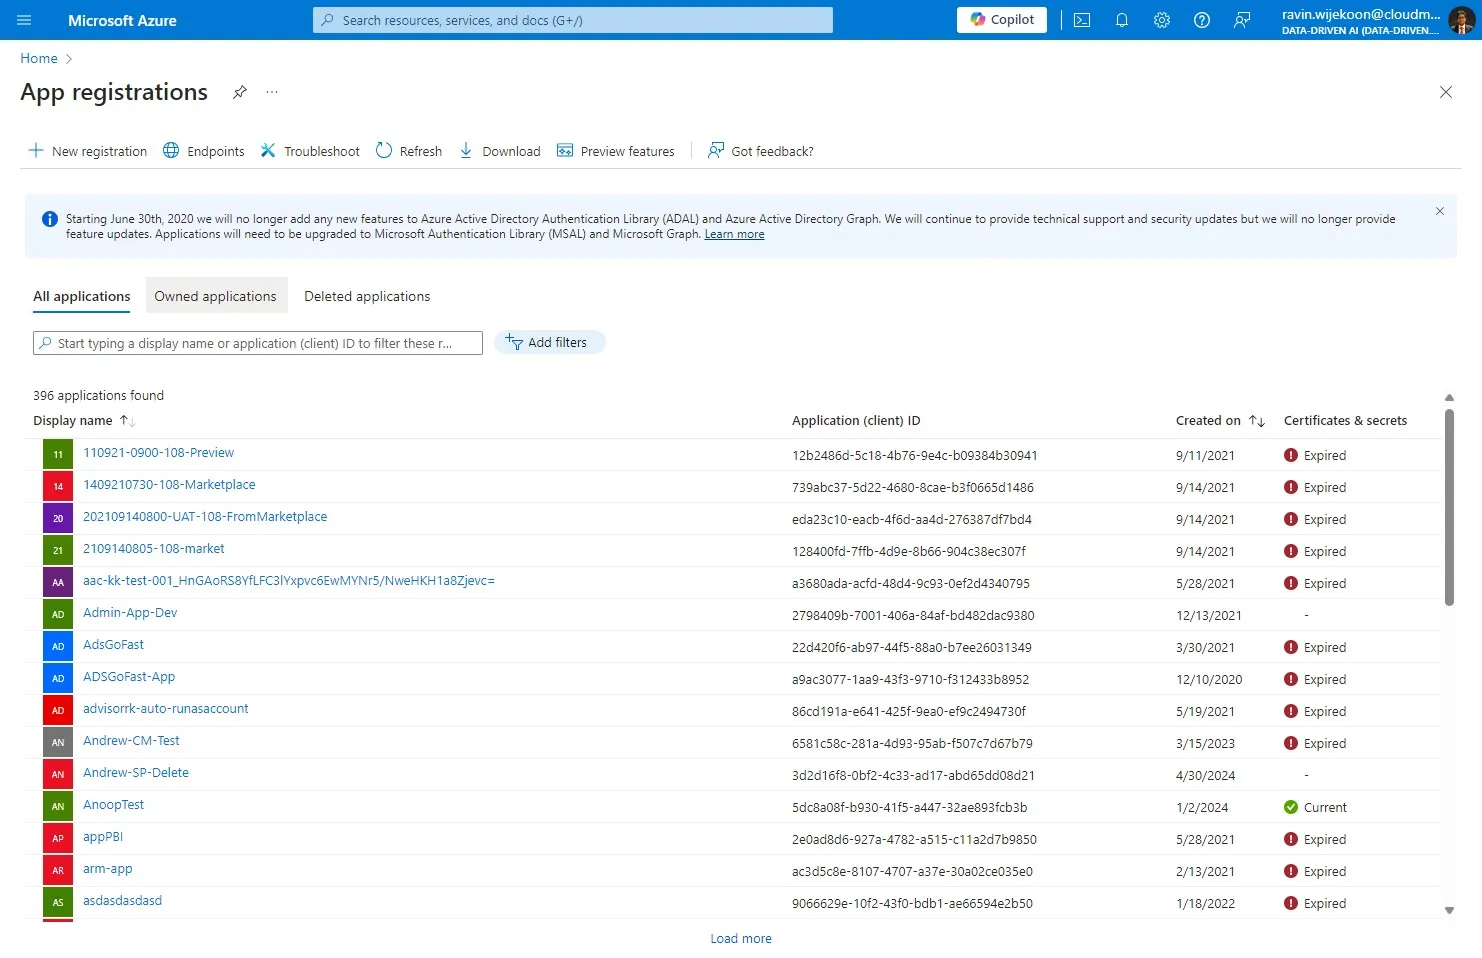
Step 3
Section titled “Step 3”Click here.
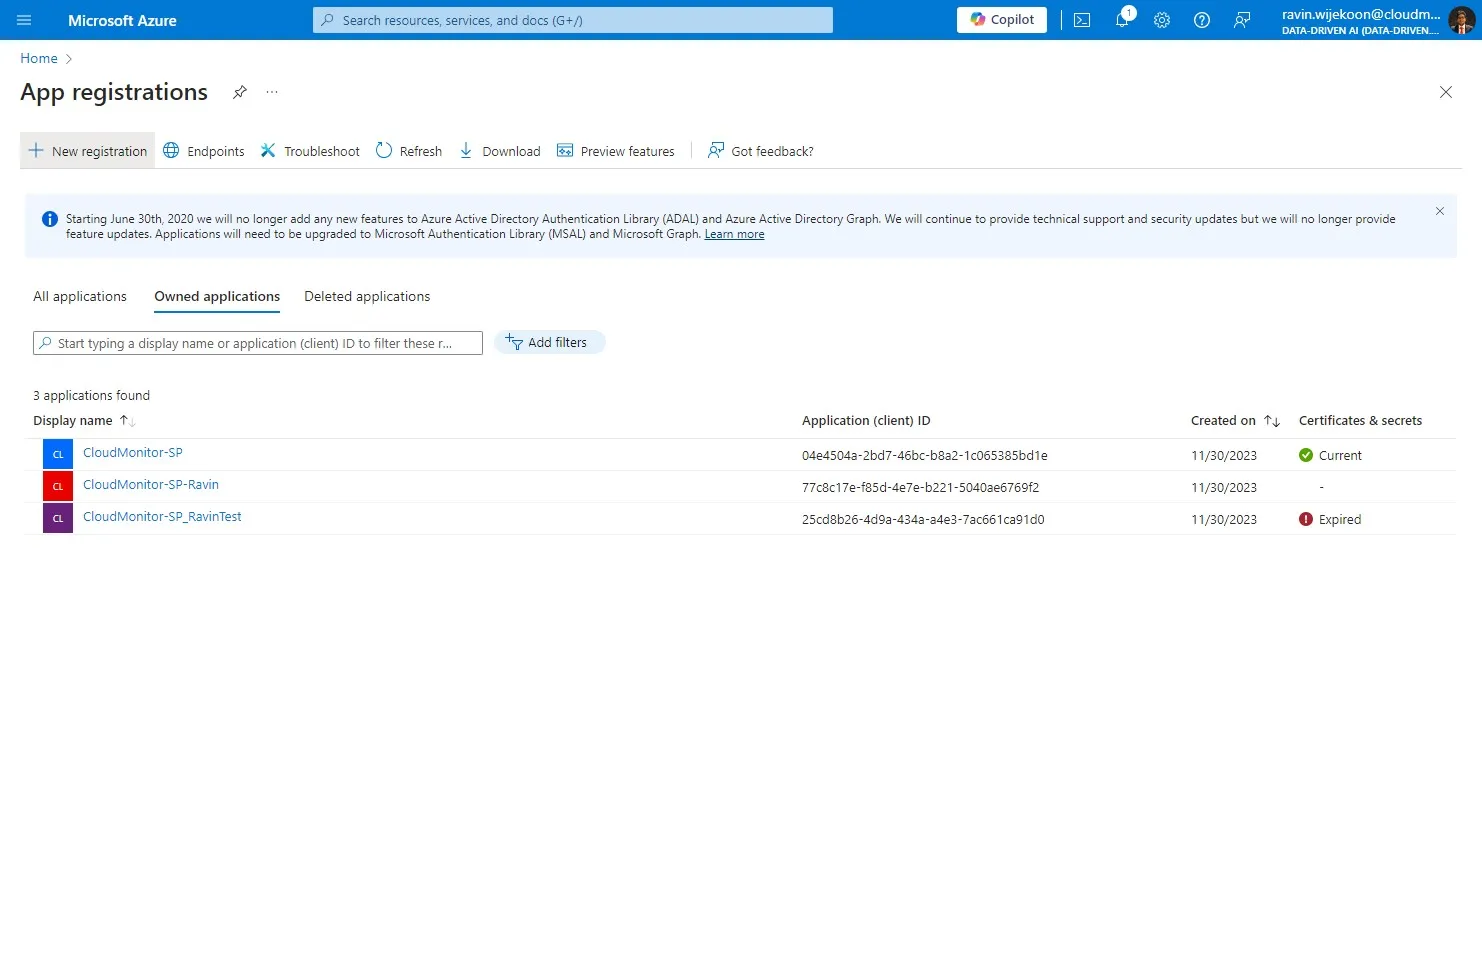
Step 4
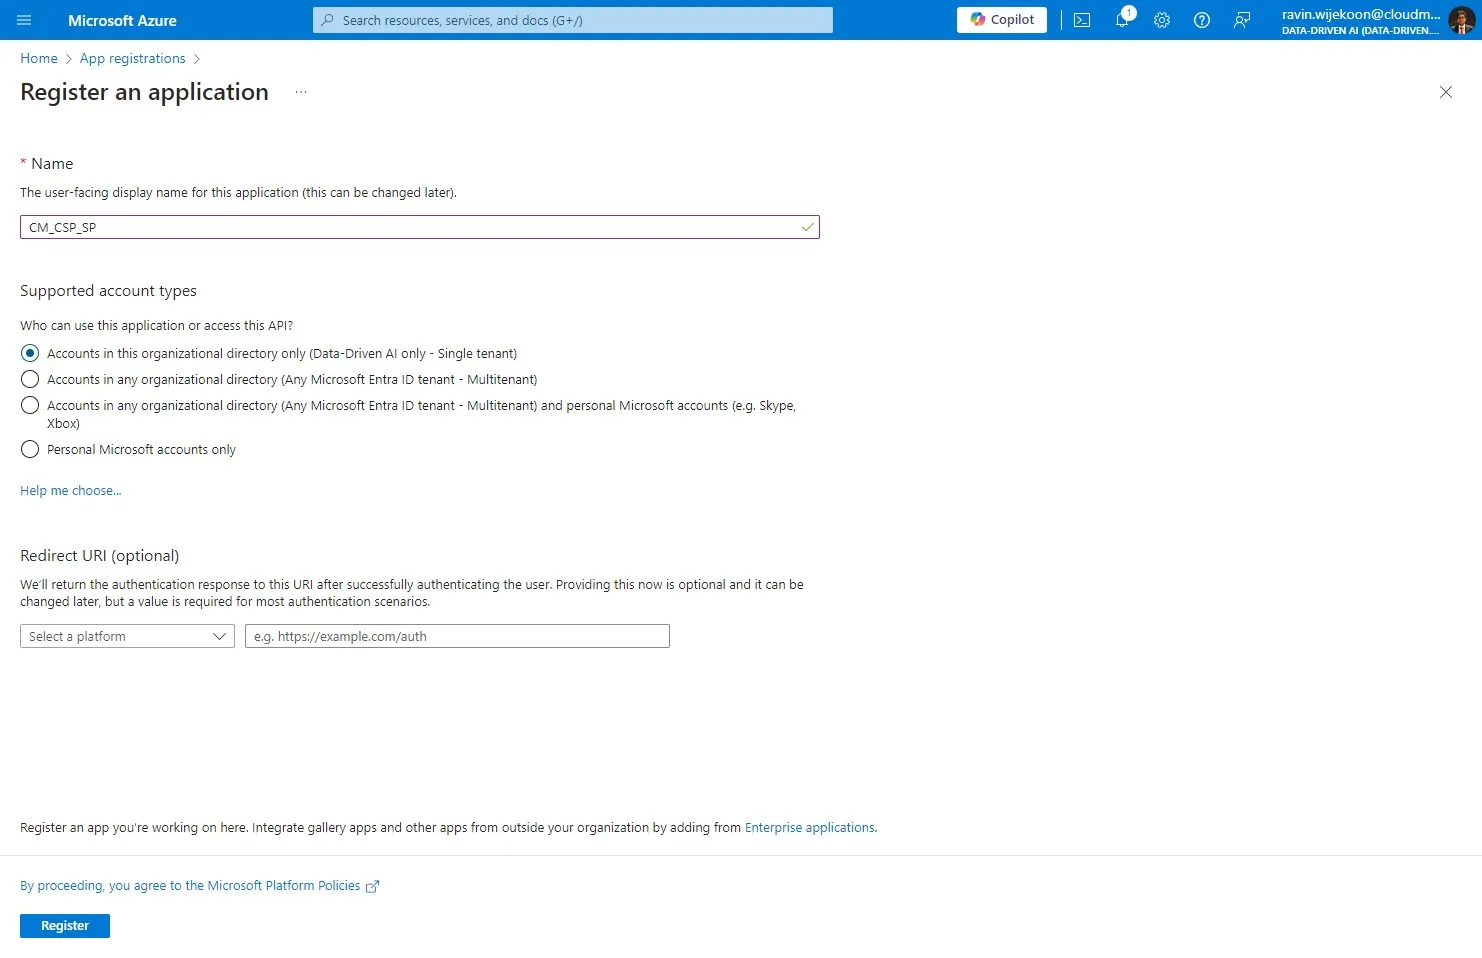
Section titled “Step 4”Provide a name for the Service Principal.
Note - Please remember this name as it will be needed in next steps.
Step 5
Section titled “Step 5”Click “Accounts in this organizational directory only (Data-Driven AI only - Single tenant)”
Step 6
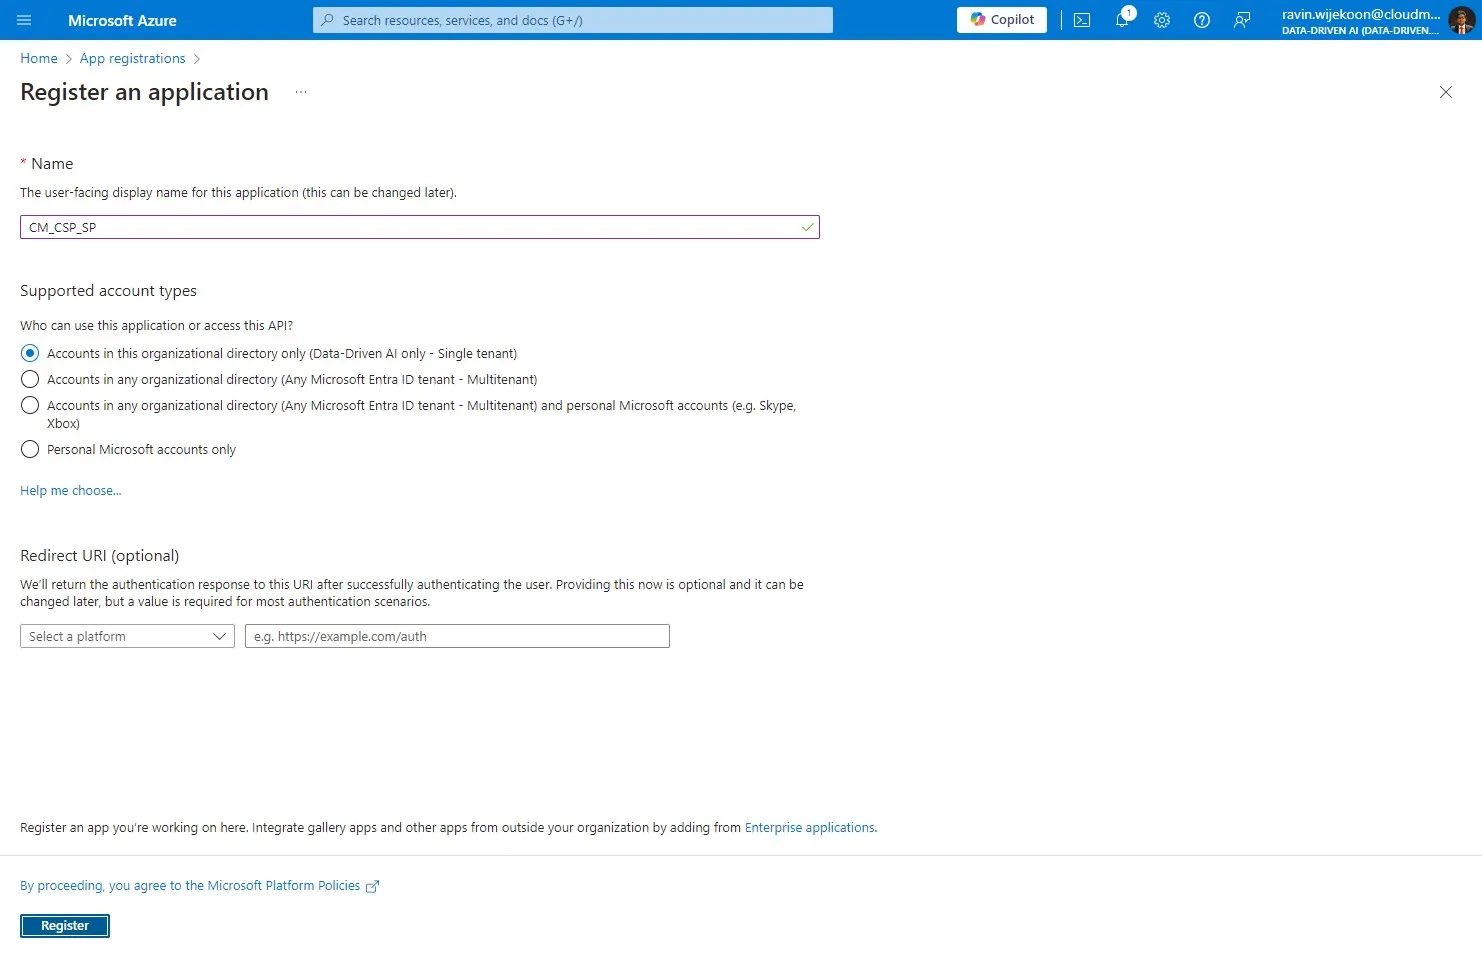
Section titled “Step 6”Click “Register”
Step 7
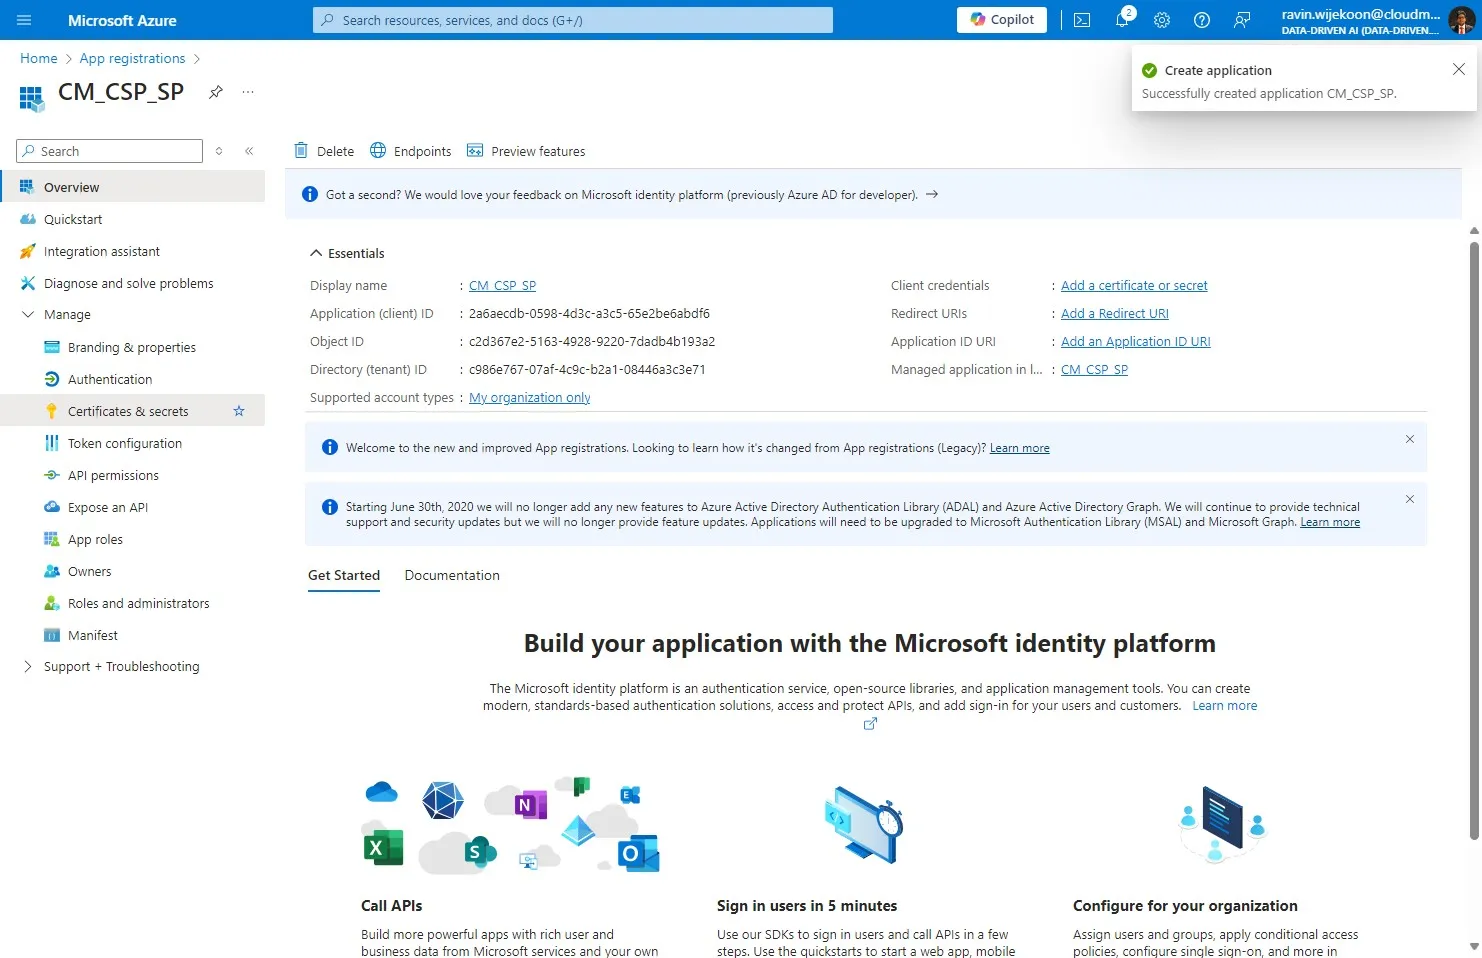
Section titled “Step 7”Then, Click “Certificates & secrets”
Step 8
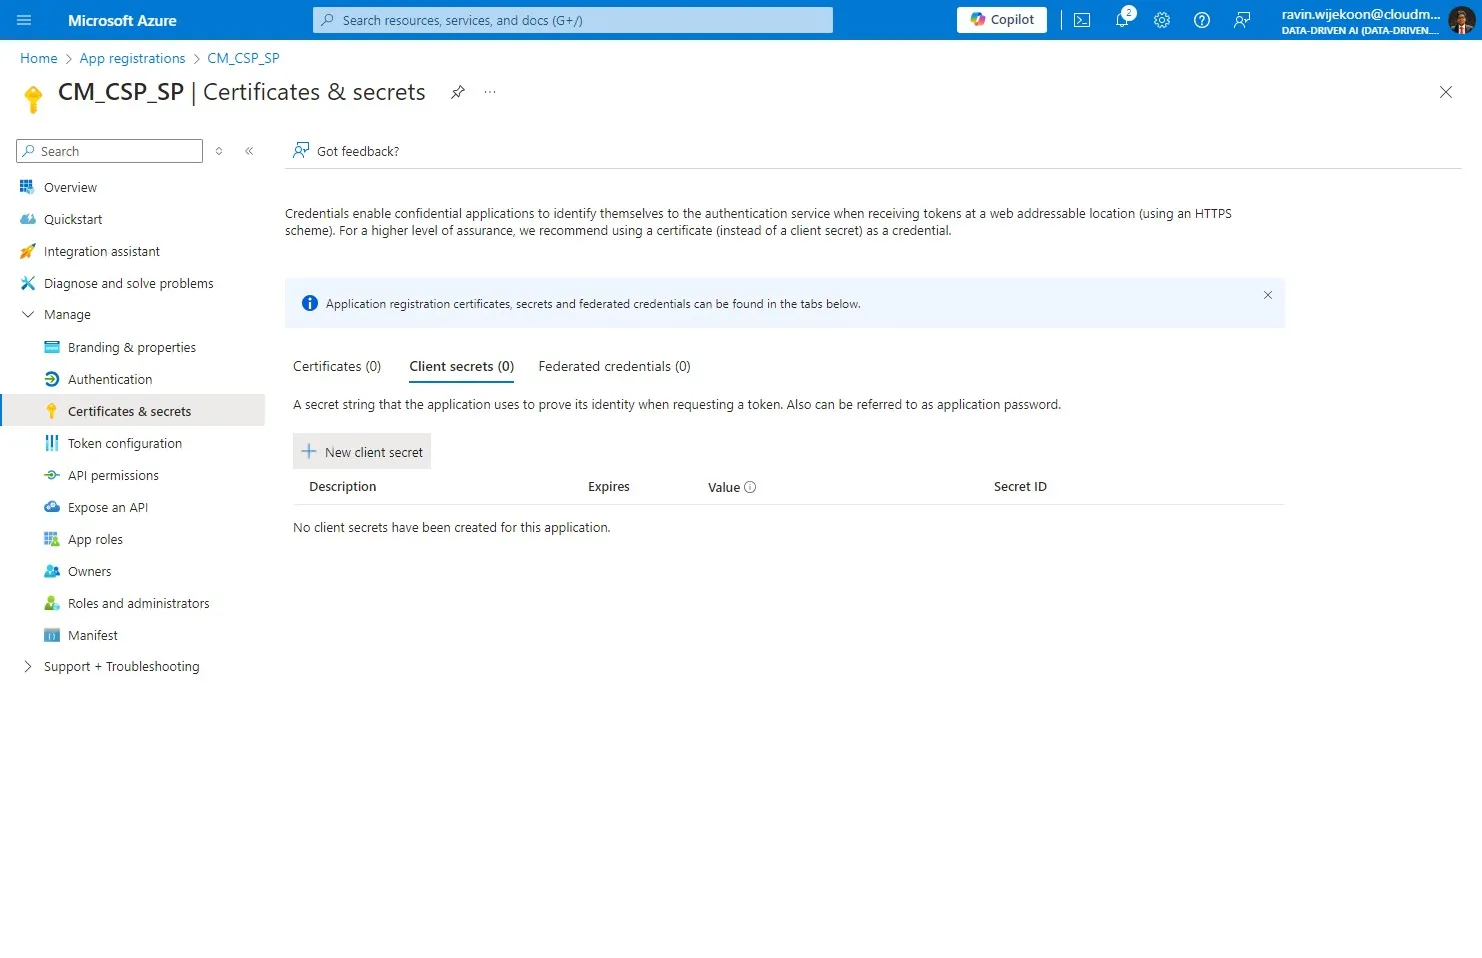
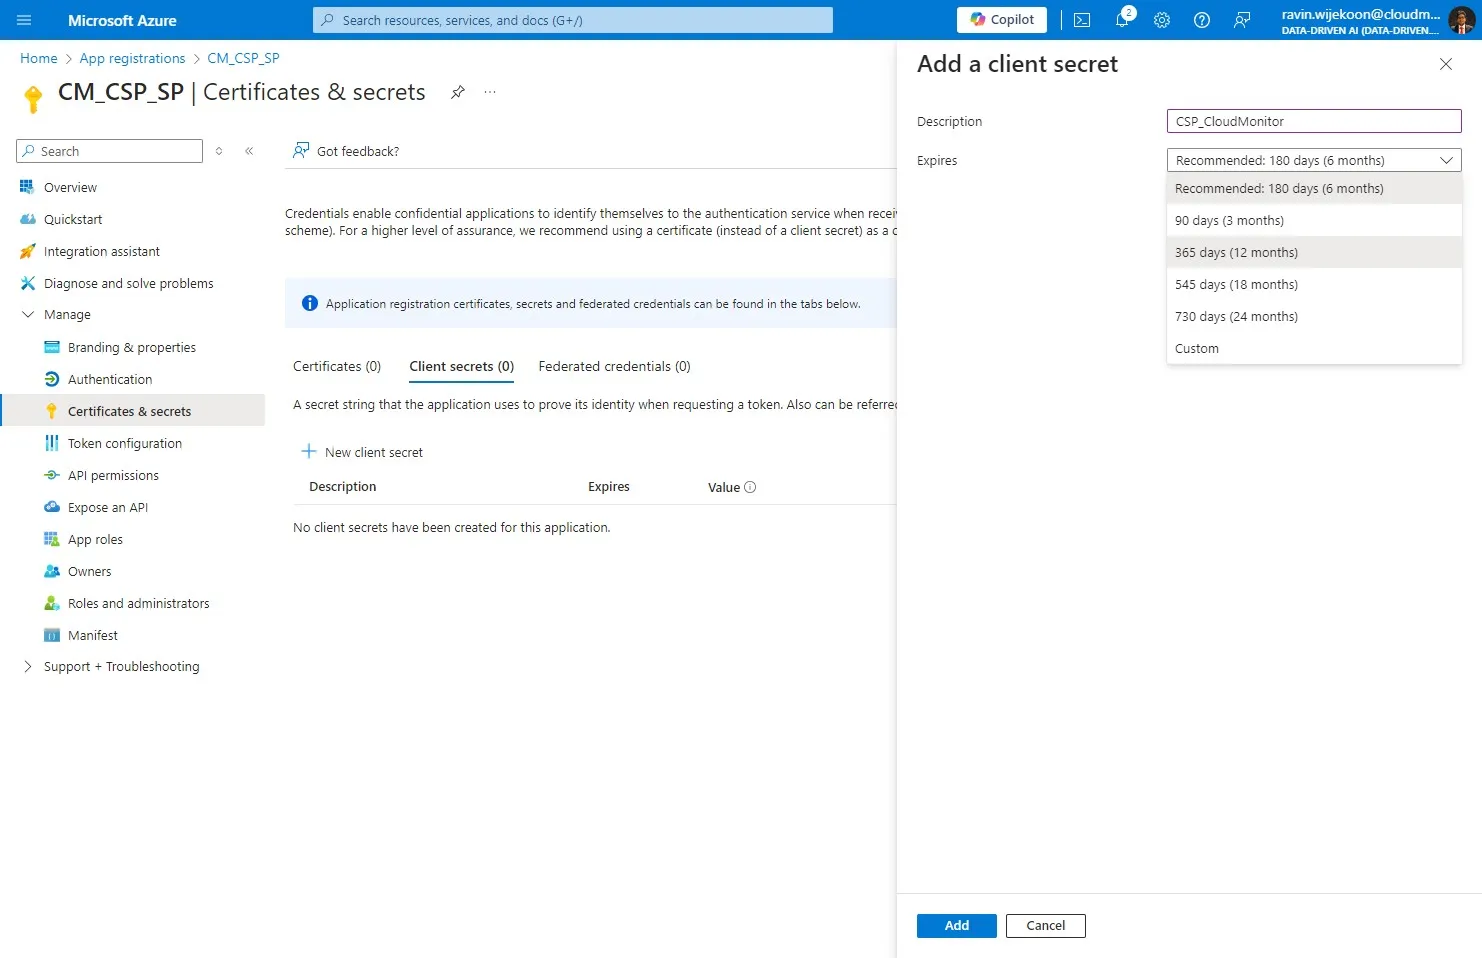
Section titled “Step 8”Click on “New Client Secret”.
Step 9
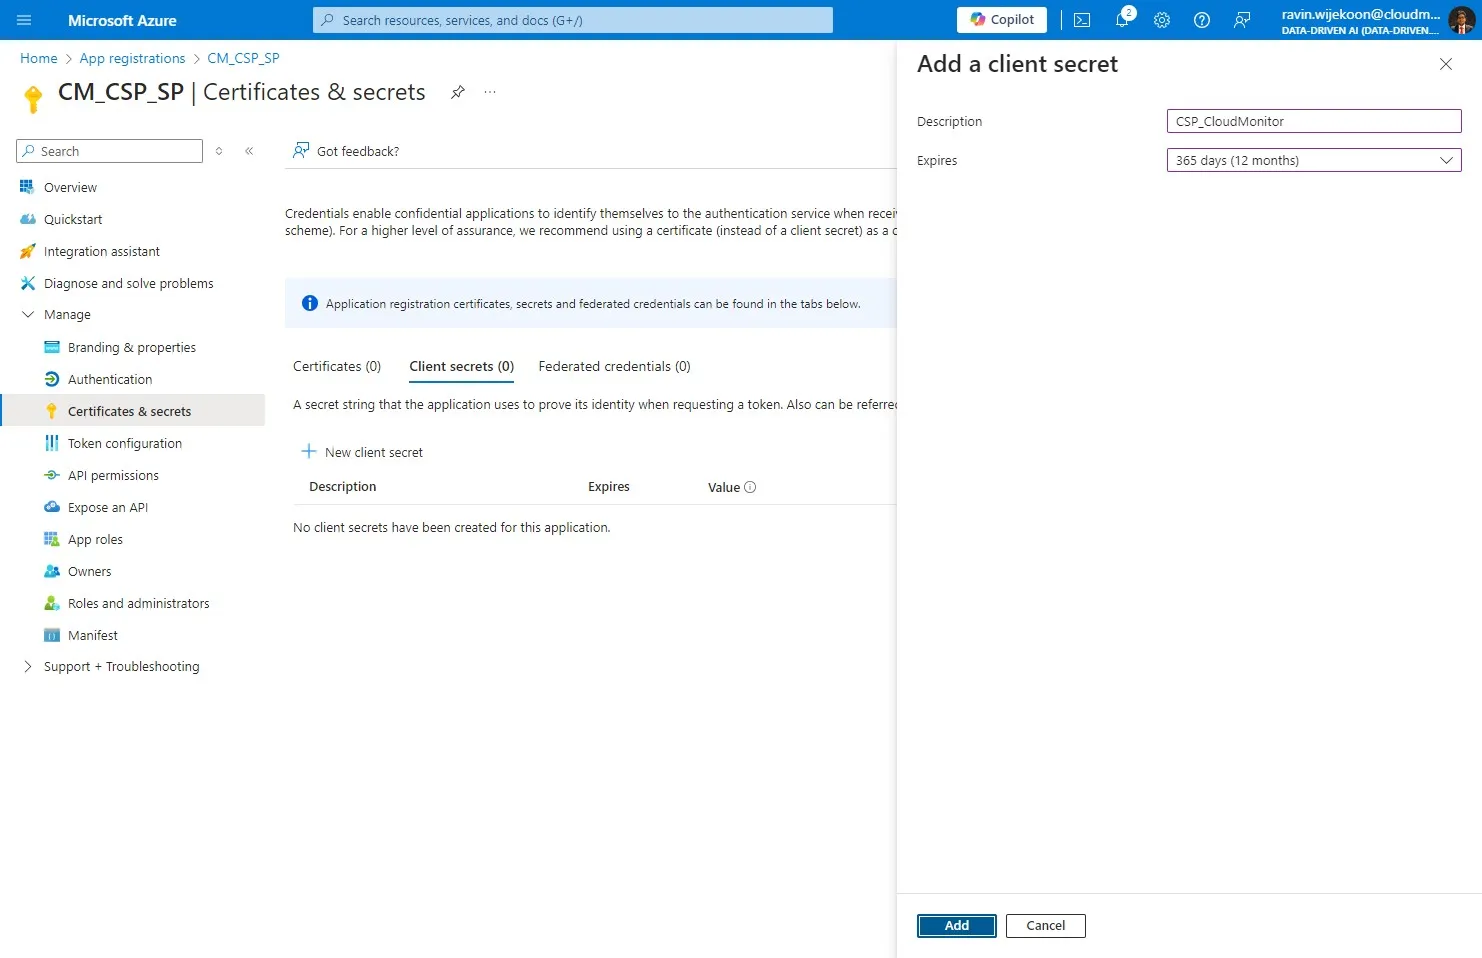
Section titled “Step 9”Add a description to the Client Secret and Choose an expiration period. We suggest you provide at least “365 days (12 months)”
Step 10
Section titled “Step 10”Click “Add”
Step 11
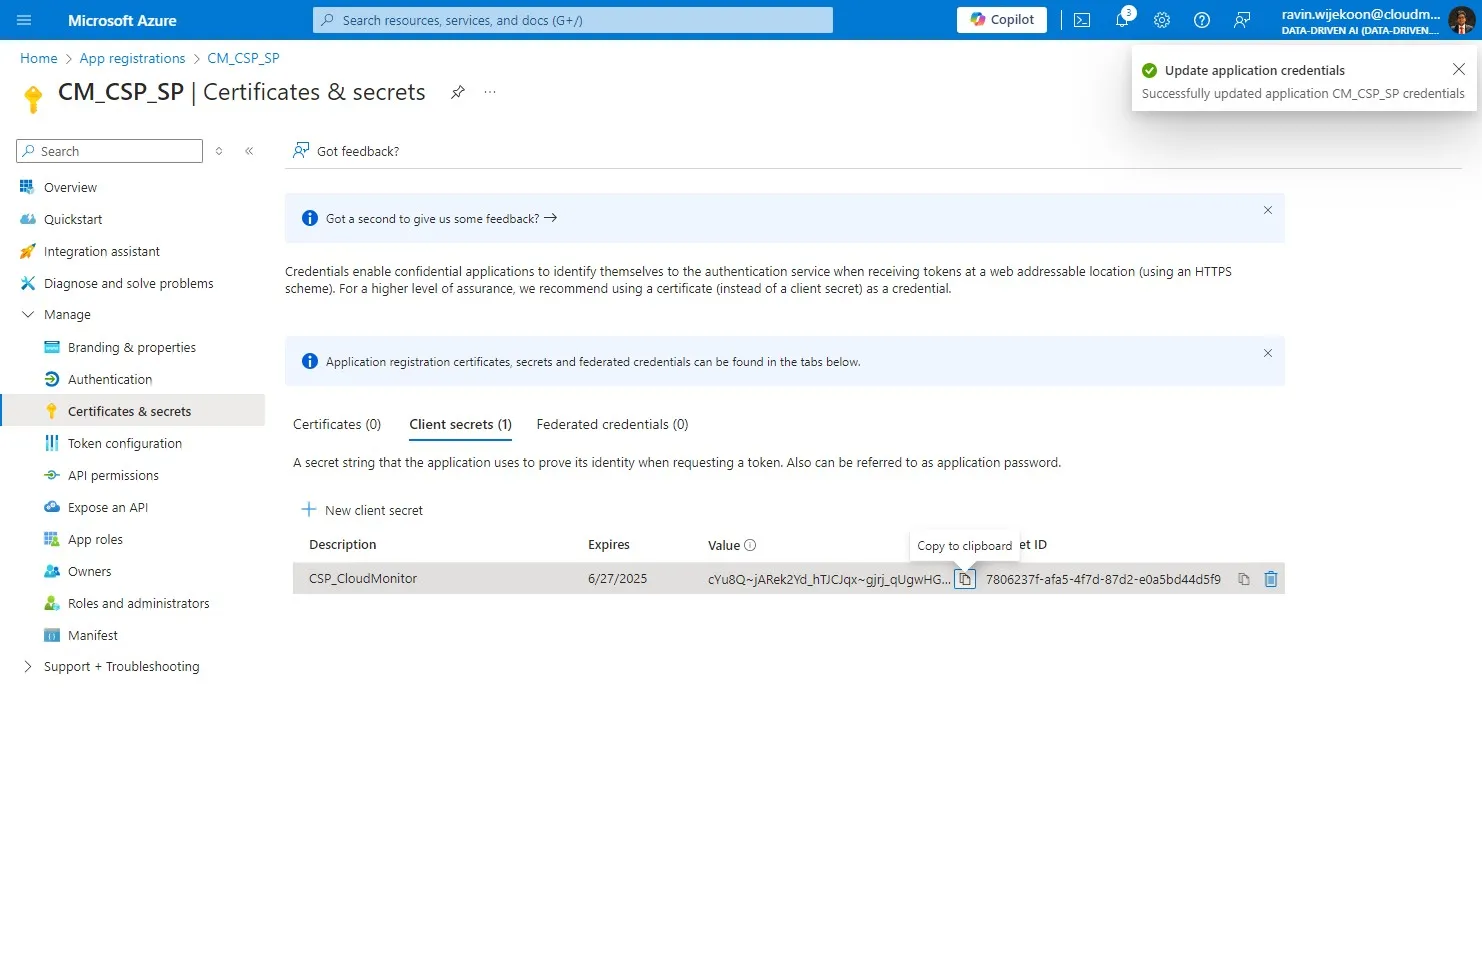
Section titled “Step 11”Copy the Secret Value(Not the Secret ID) and note it somewhere since it will be needed in next steps.
Step 12
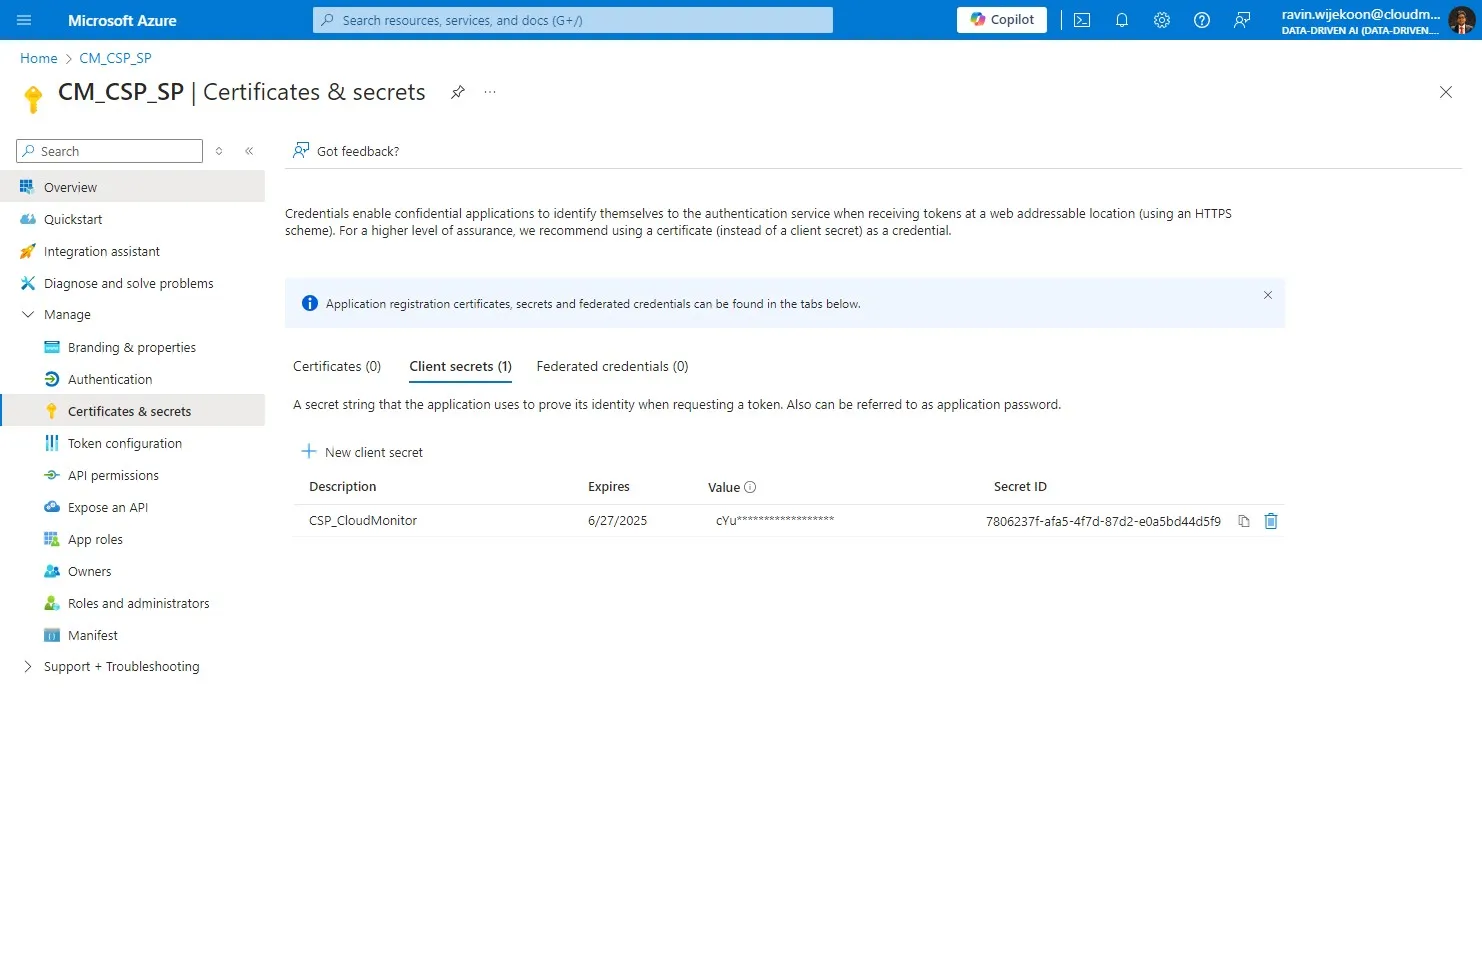
Section titled “Step 12”Now, Click on “Overview”
Step 13
Section titled “Step 13”Then, copy the Client ID and note it somewhere since it will be needed in next steps.
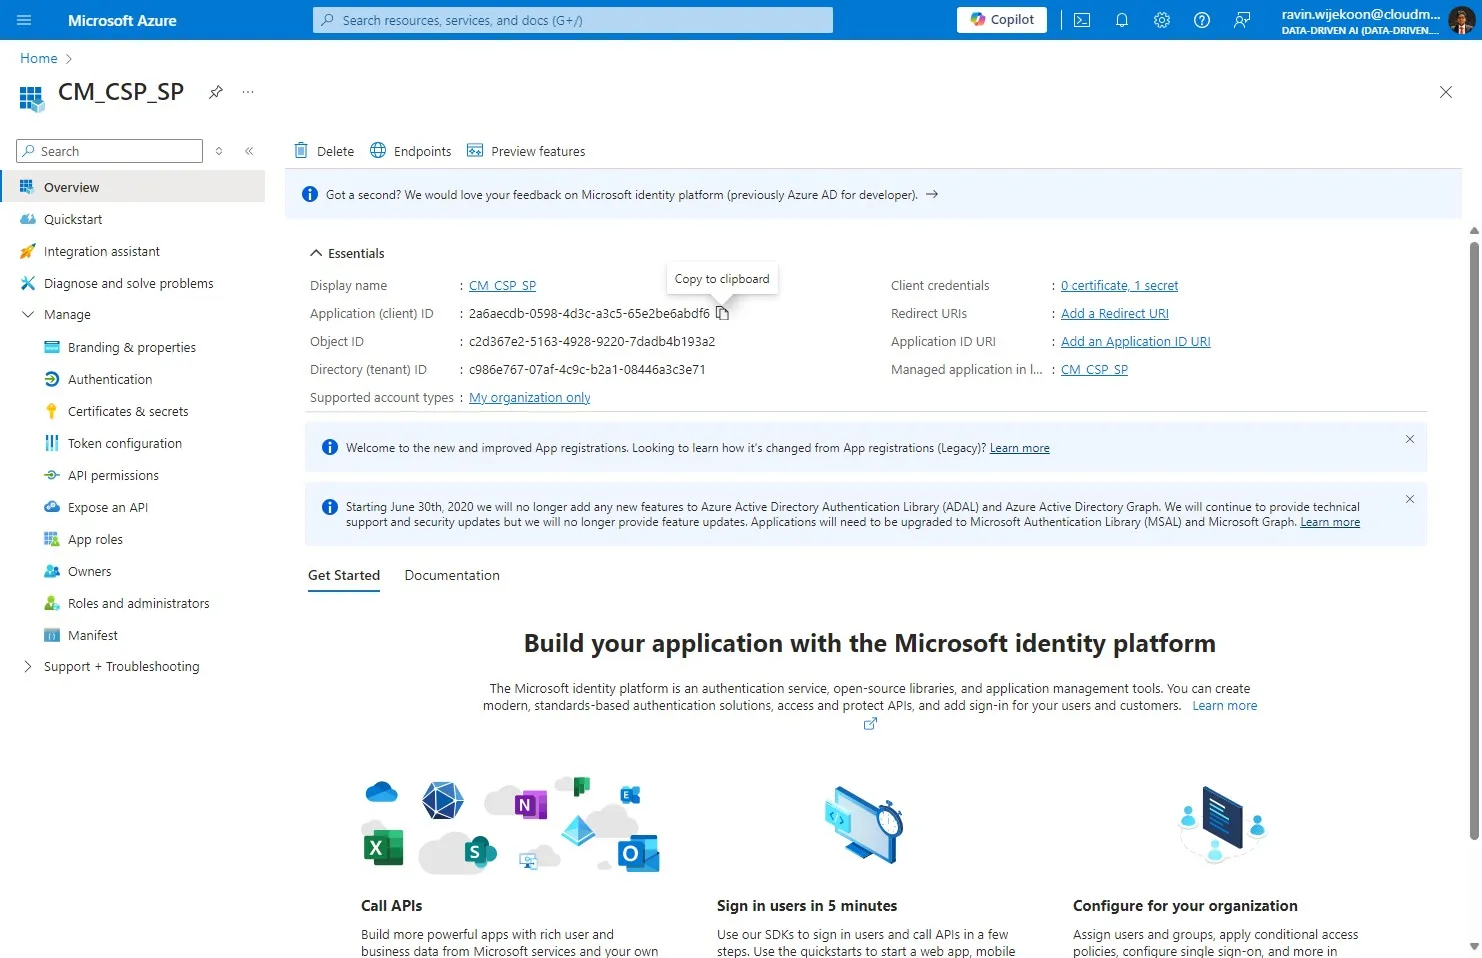
Step 14
Section titled “Step 14”Next, copy the Obejct ID and note it somewhere since it will be needed in next steps.
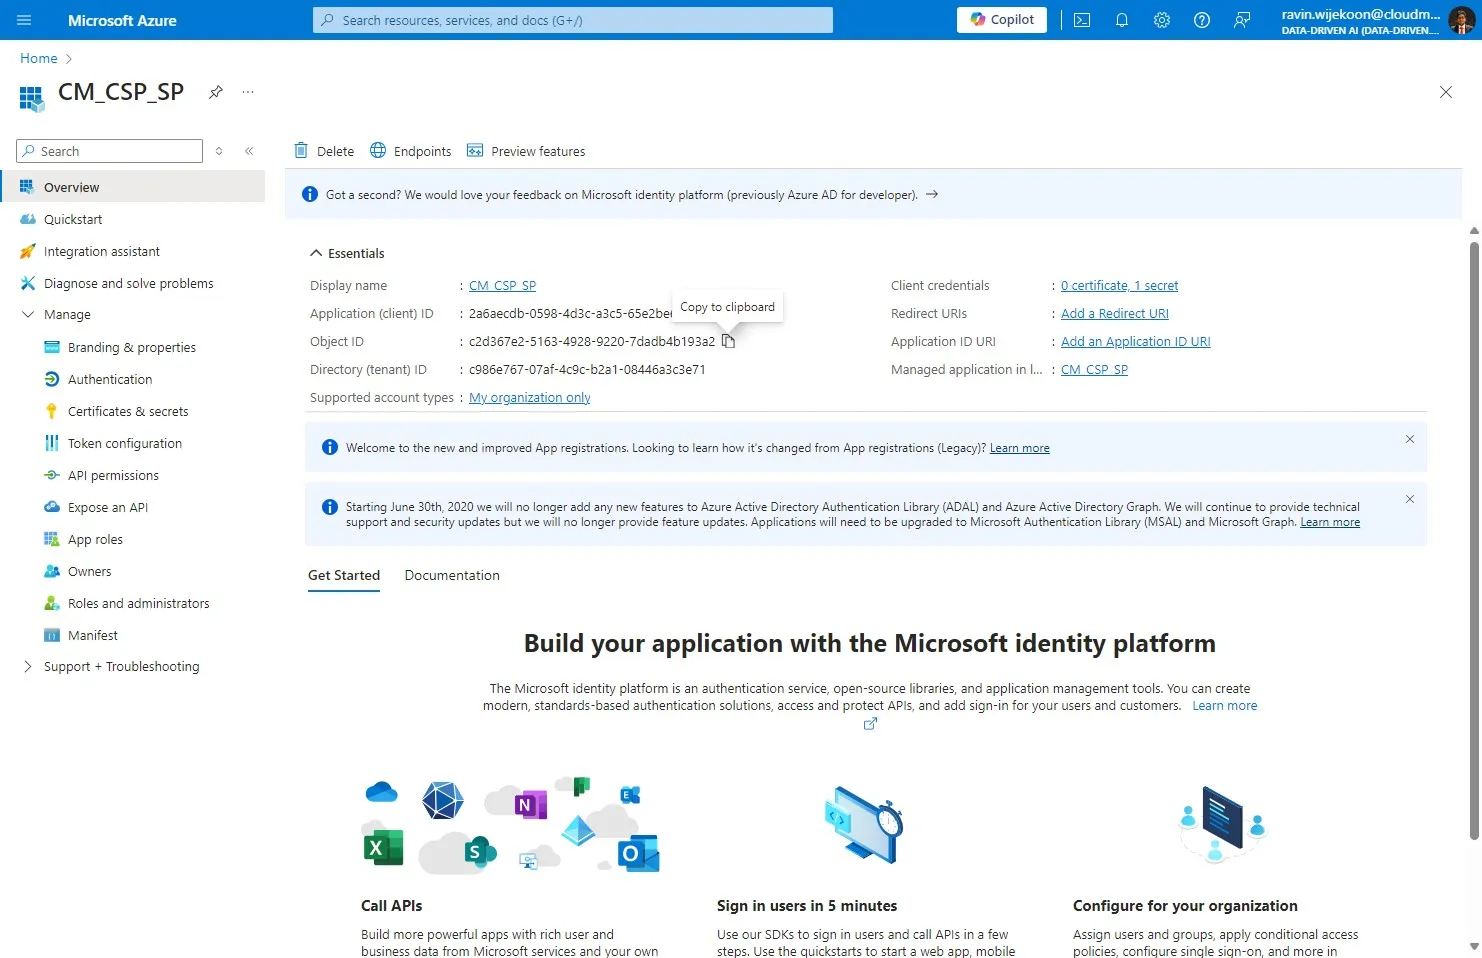
Step 15
Section titled “Step 15”Finally, copy the Tenant ID and note it somewhere since it will be needed in next steps.