Skip to content
Documents an earlier release of CloudMonitor — the app, screenshots and steps shown here may have changed. See the current FAQ.

Create the CloudMonitor Synapse B2B user legacy

Navigate to “Microsoft Entra Id” (formerly known as Azure AD).
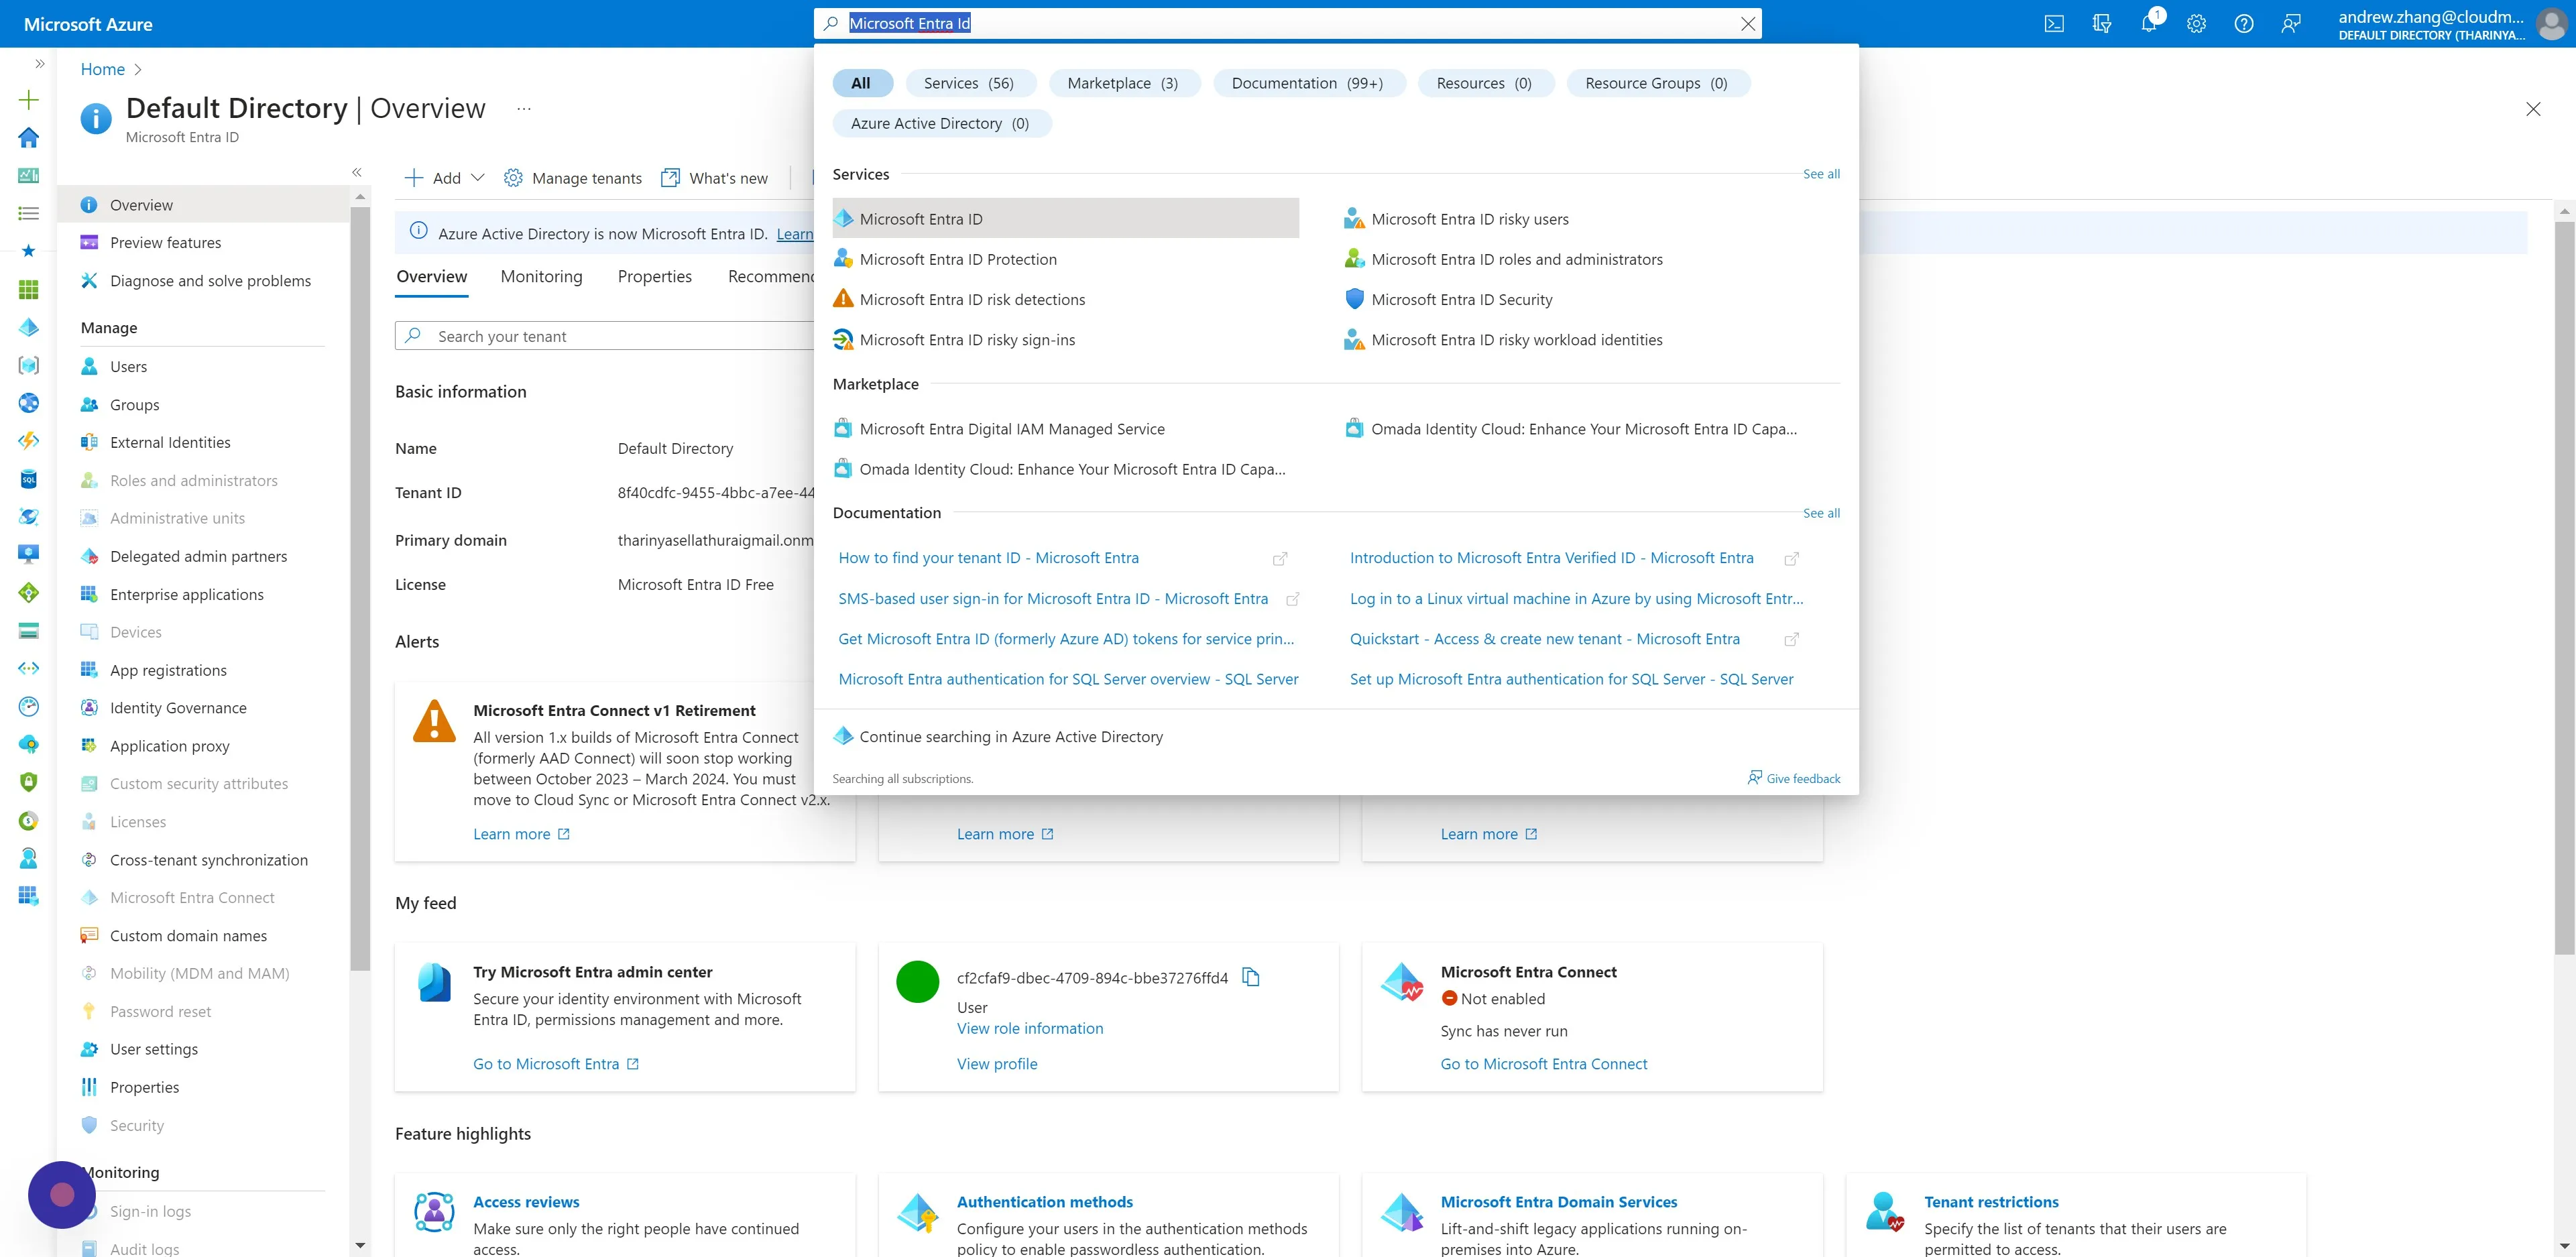
Navigate to "Microsoft Entra Id" (formerly known as Azure AD)

Click “Users” under the Manage blade. Then click “New user” and “Invite external user”.
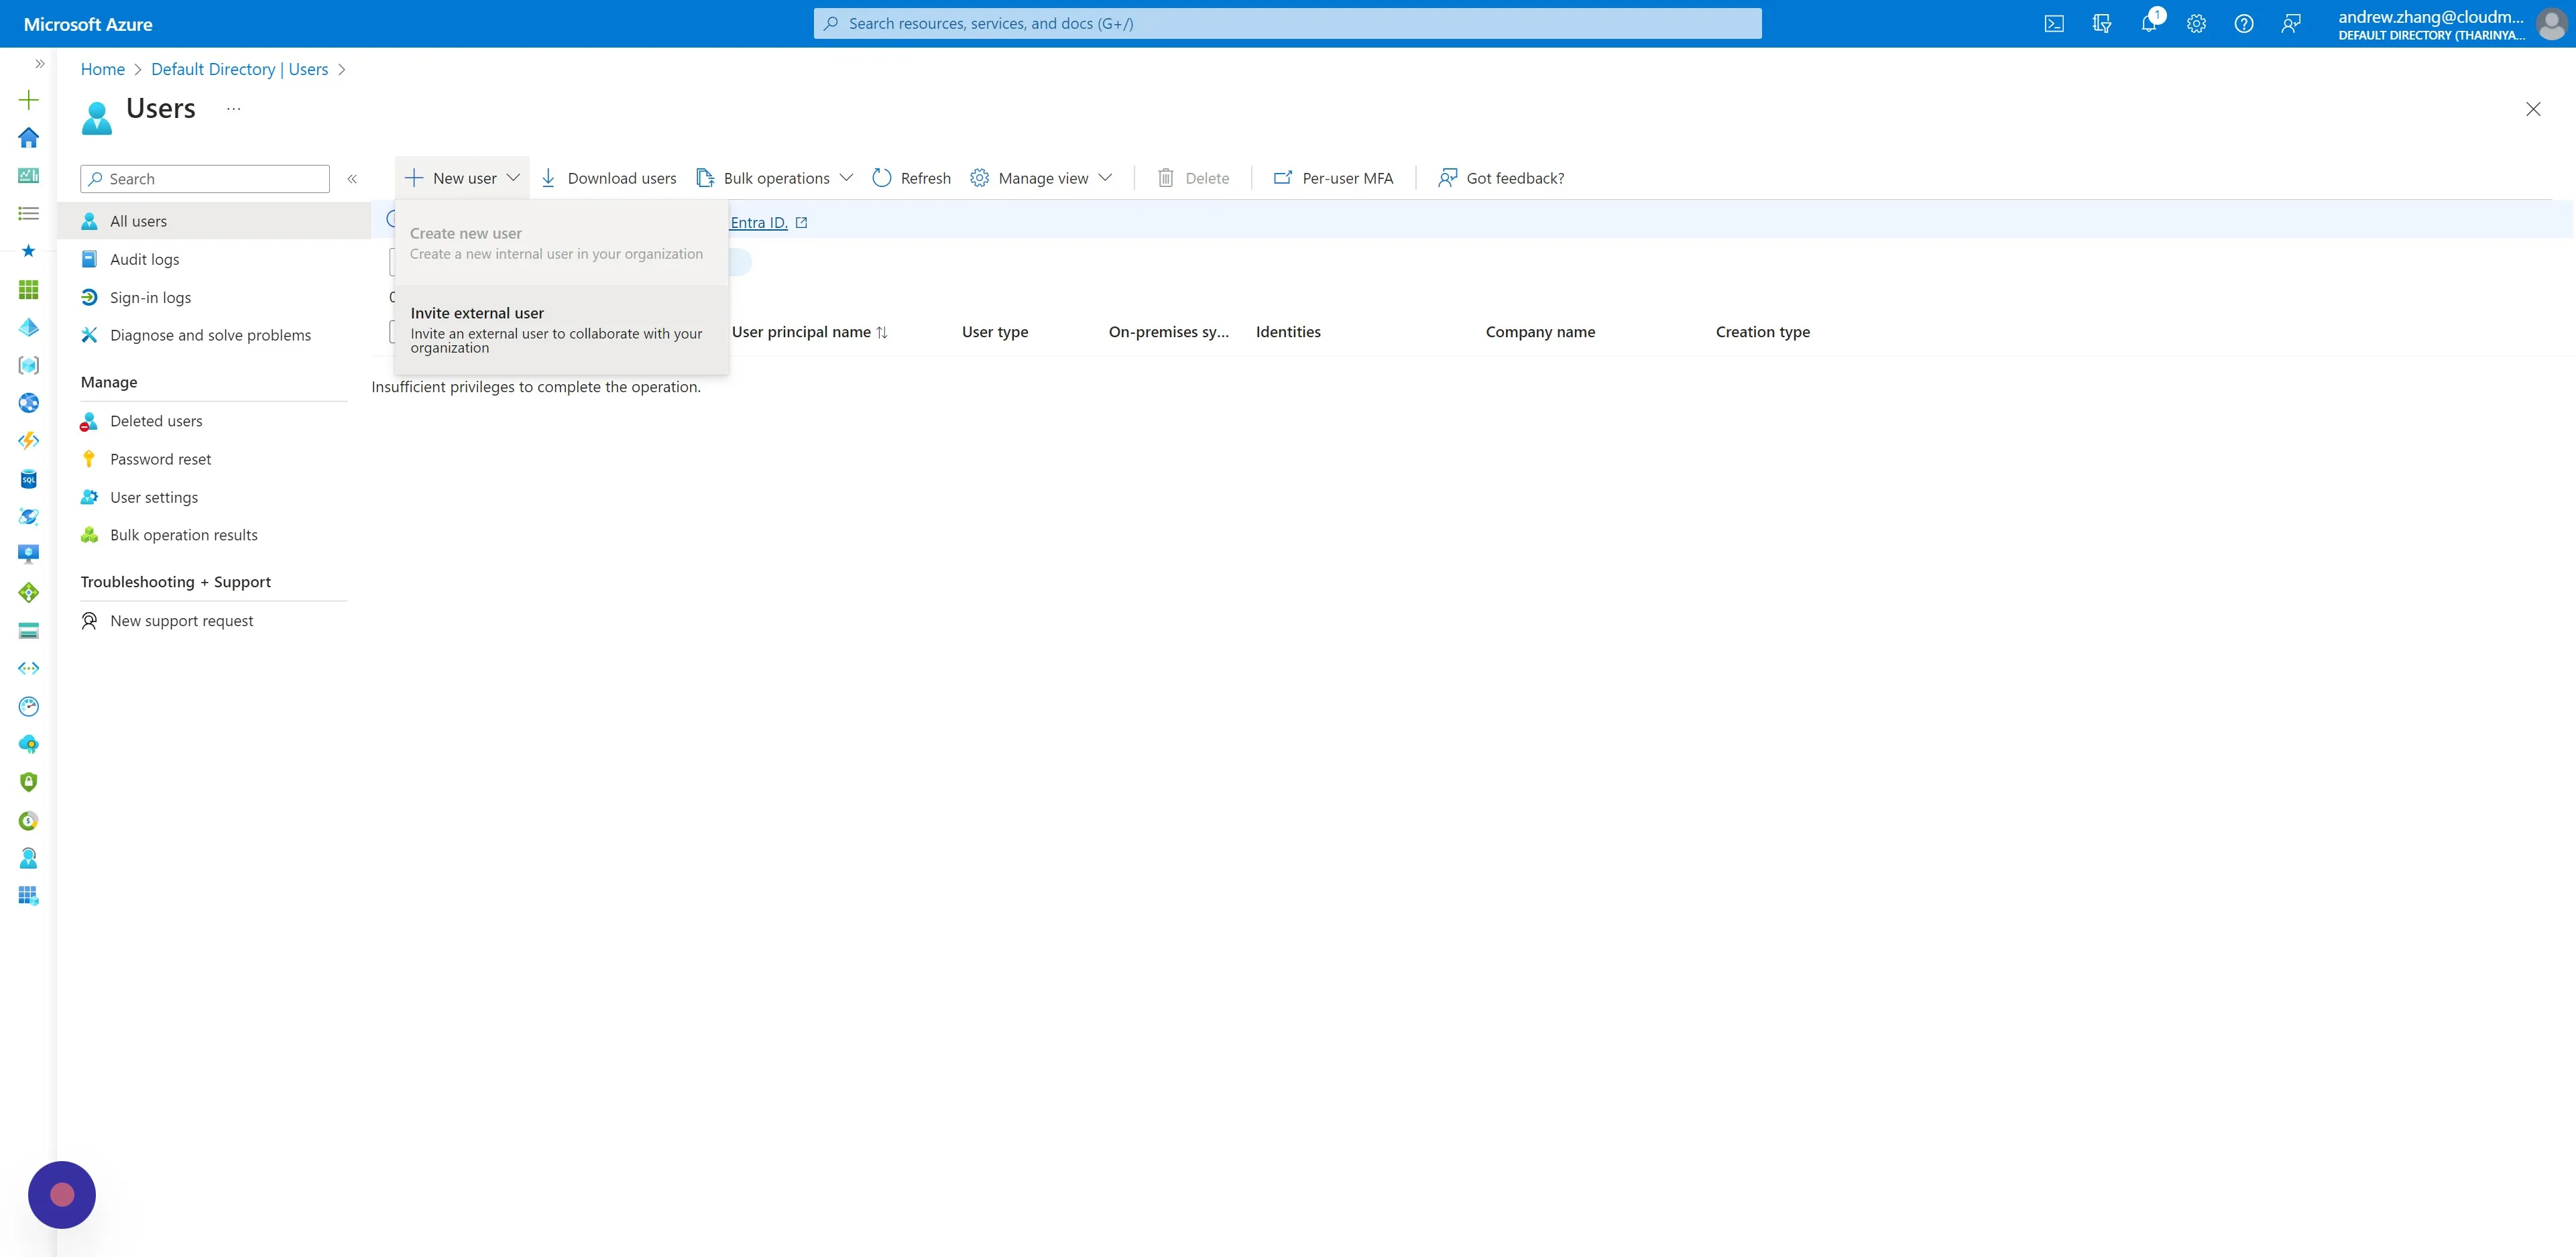
Click "Users" under the Manage blade. Then click "New user" and "Invite external user"

  1. Enter synapse@cloudmonitor.ai as the email address.
  2. Enter “CloudMonitor Synapse User” as the Display name.
  3. Tick “Send invite message” (leave the Message field empty).
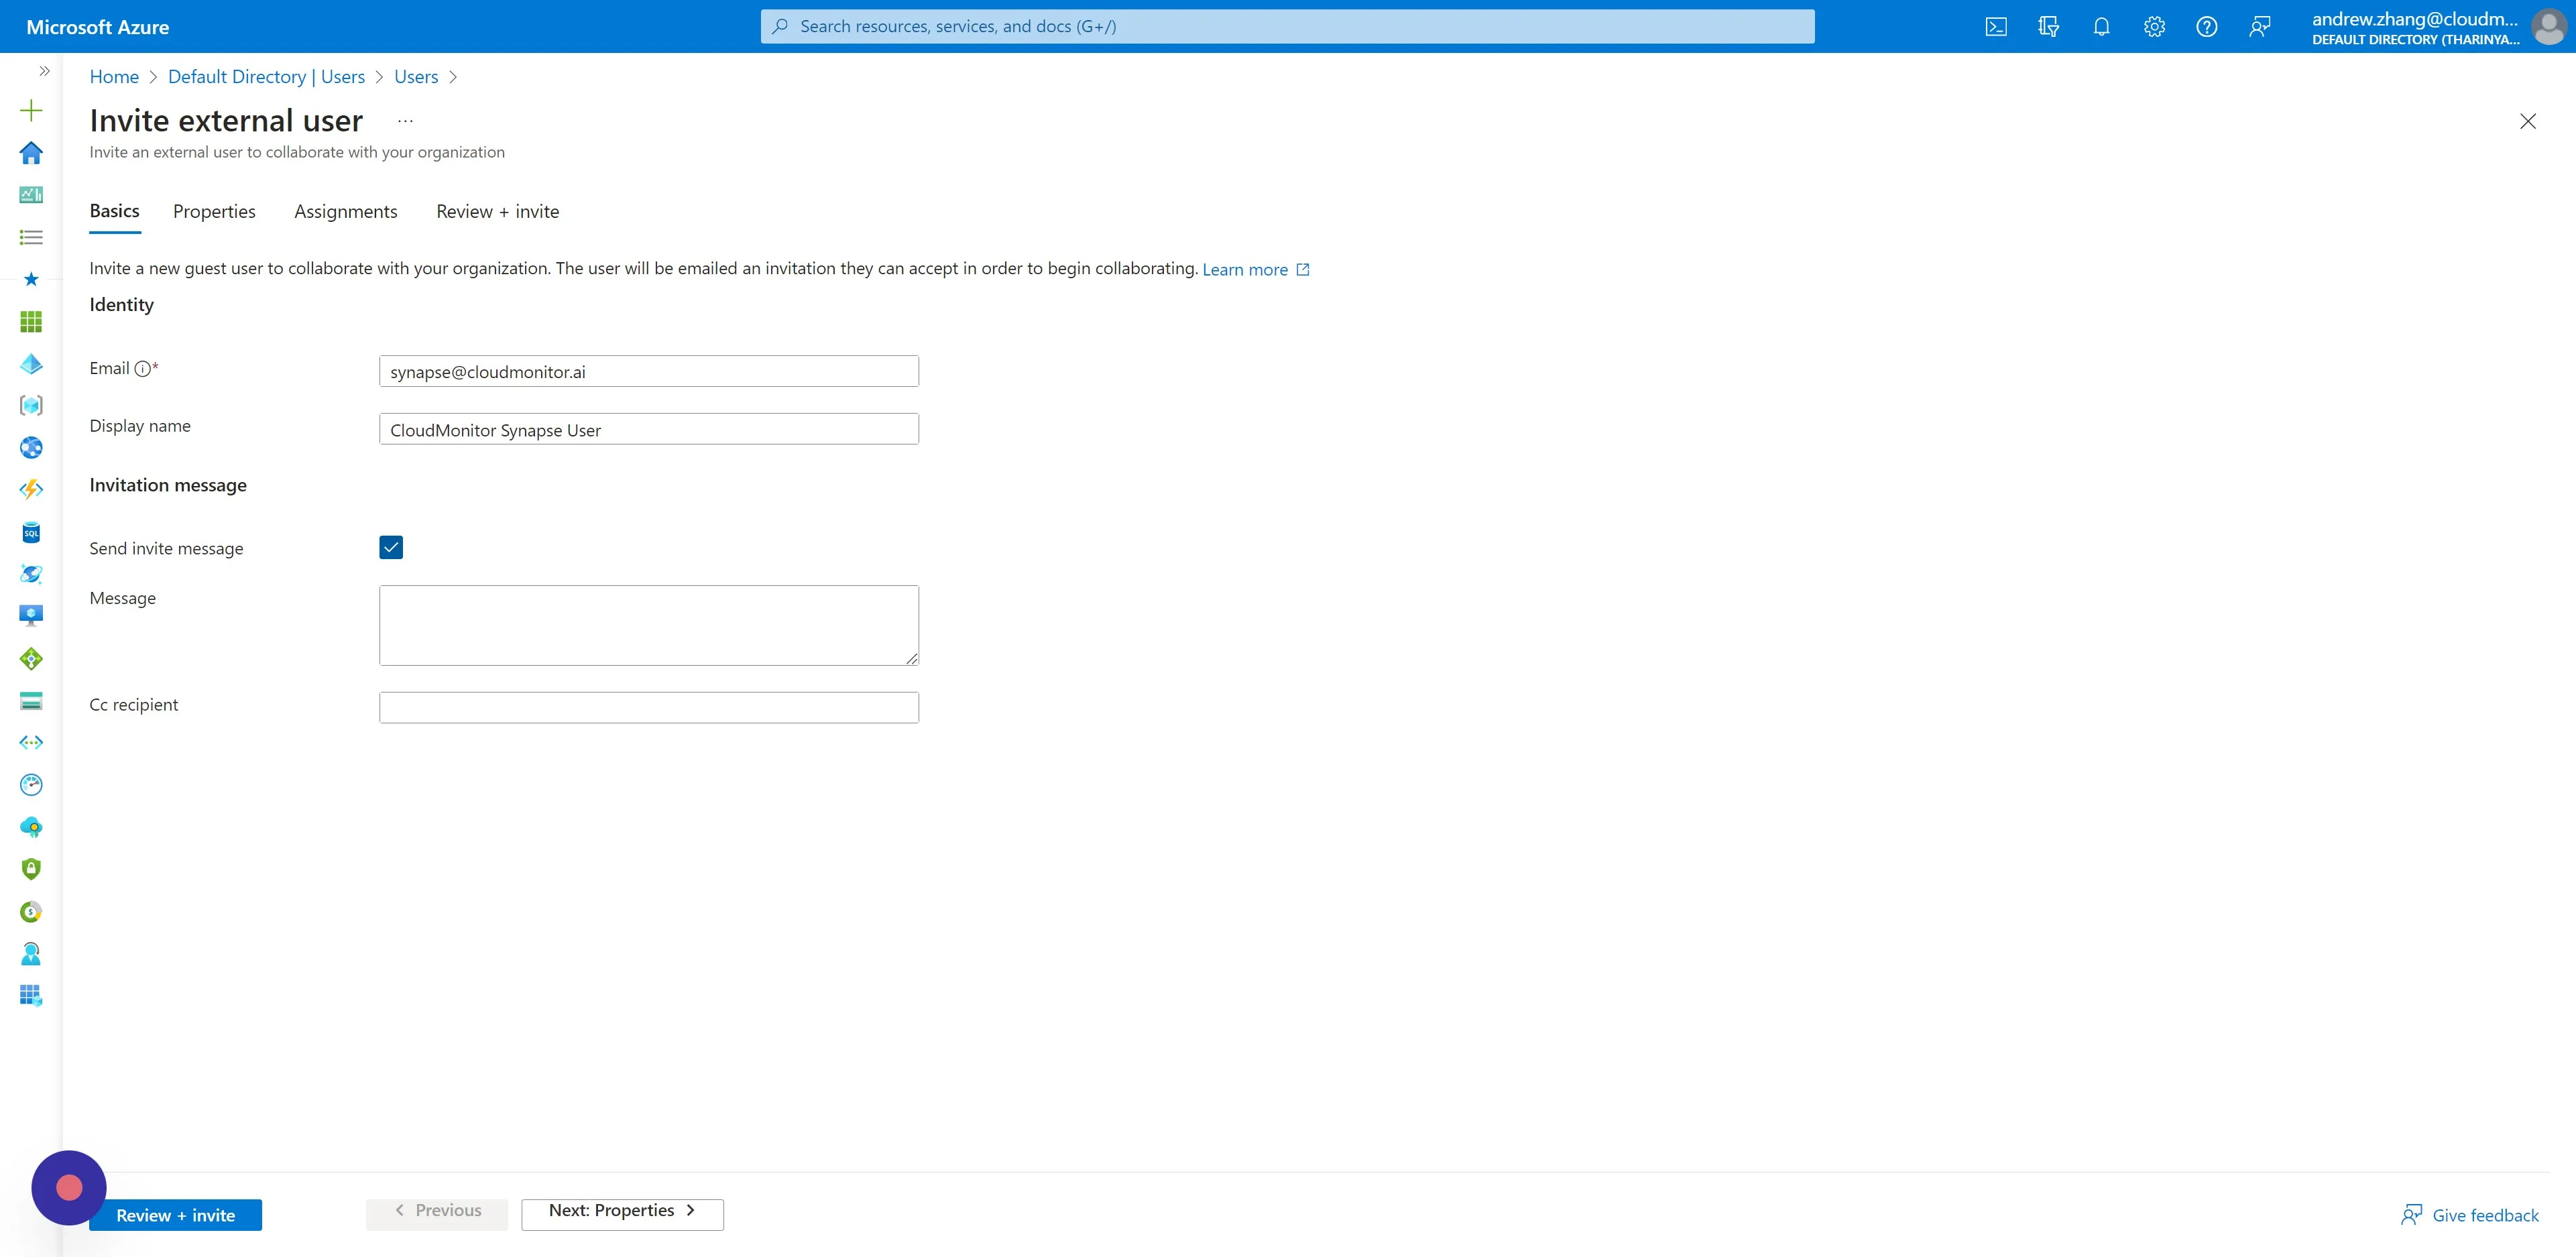
Enter synapse@cloudmonitor.ai as the email address. 2. Enter "CloudMonitor Synapse User" as the Display name. 3

Switch to the Properties tab, and ensure the User type is set to “Guest”.
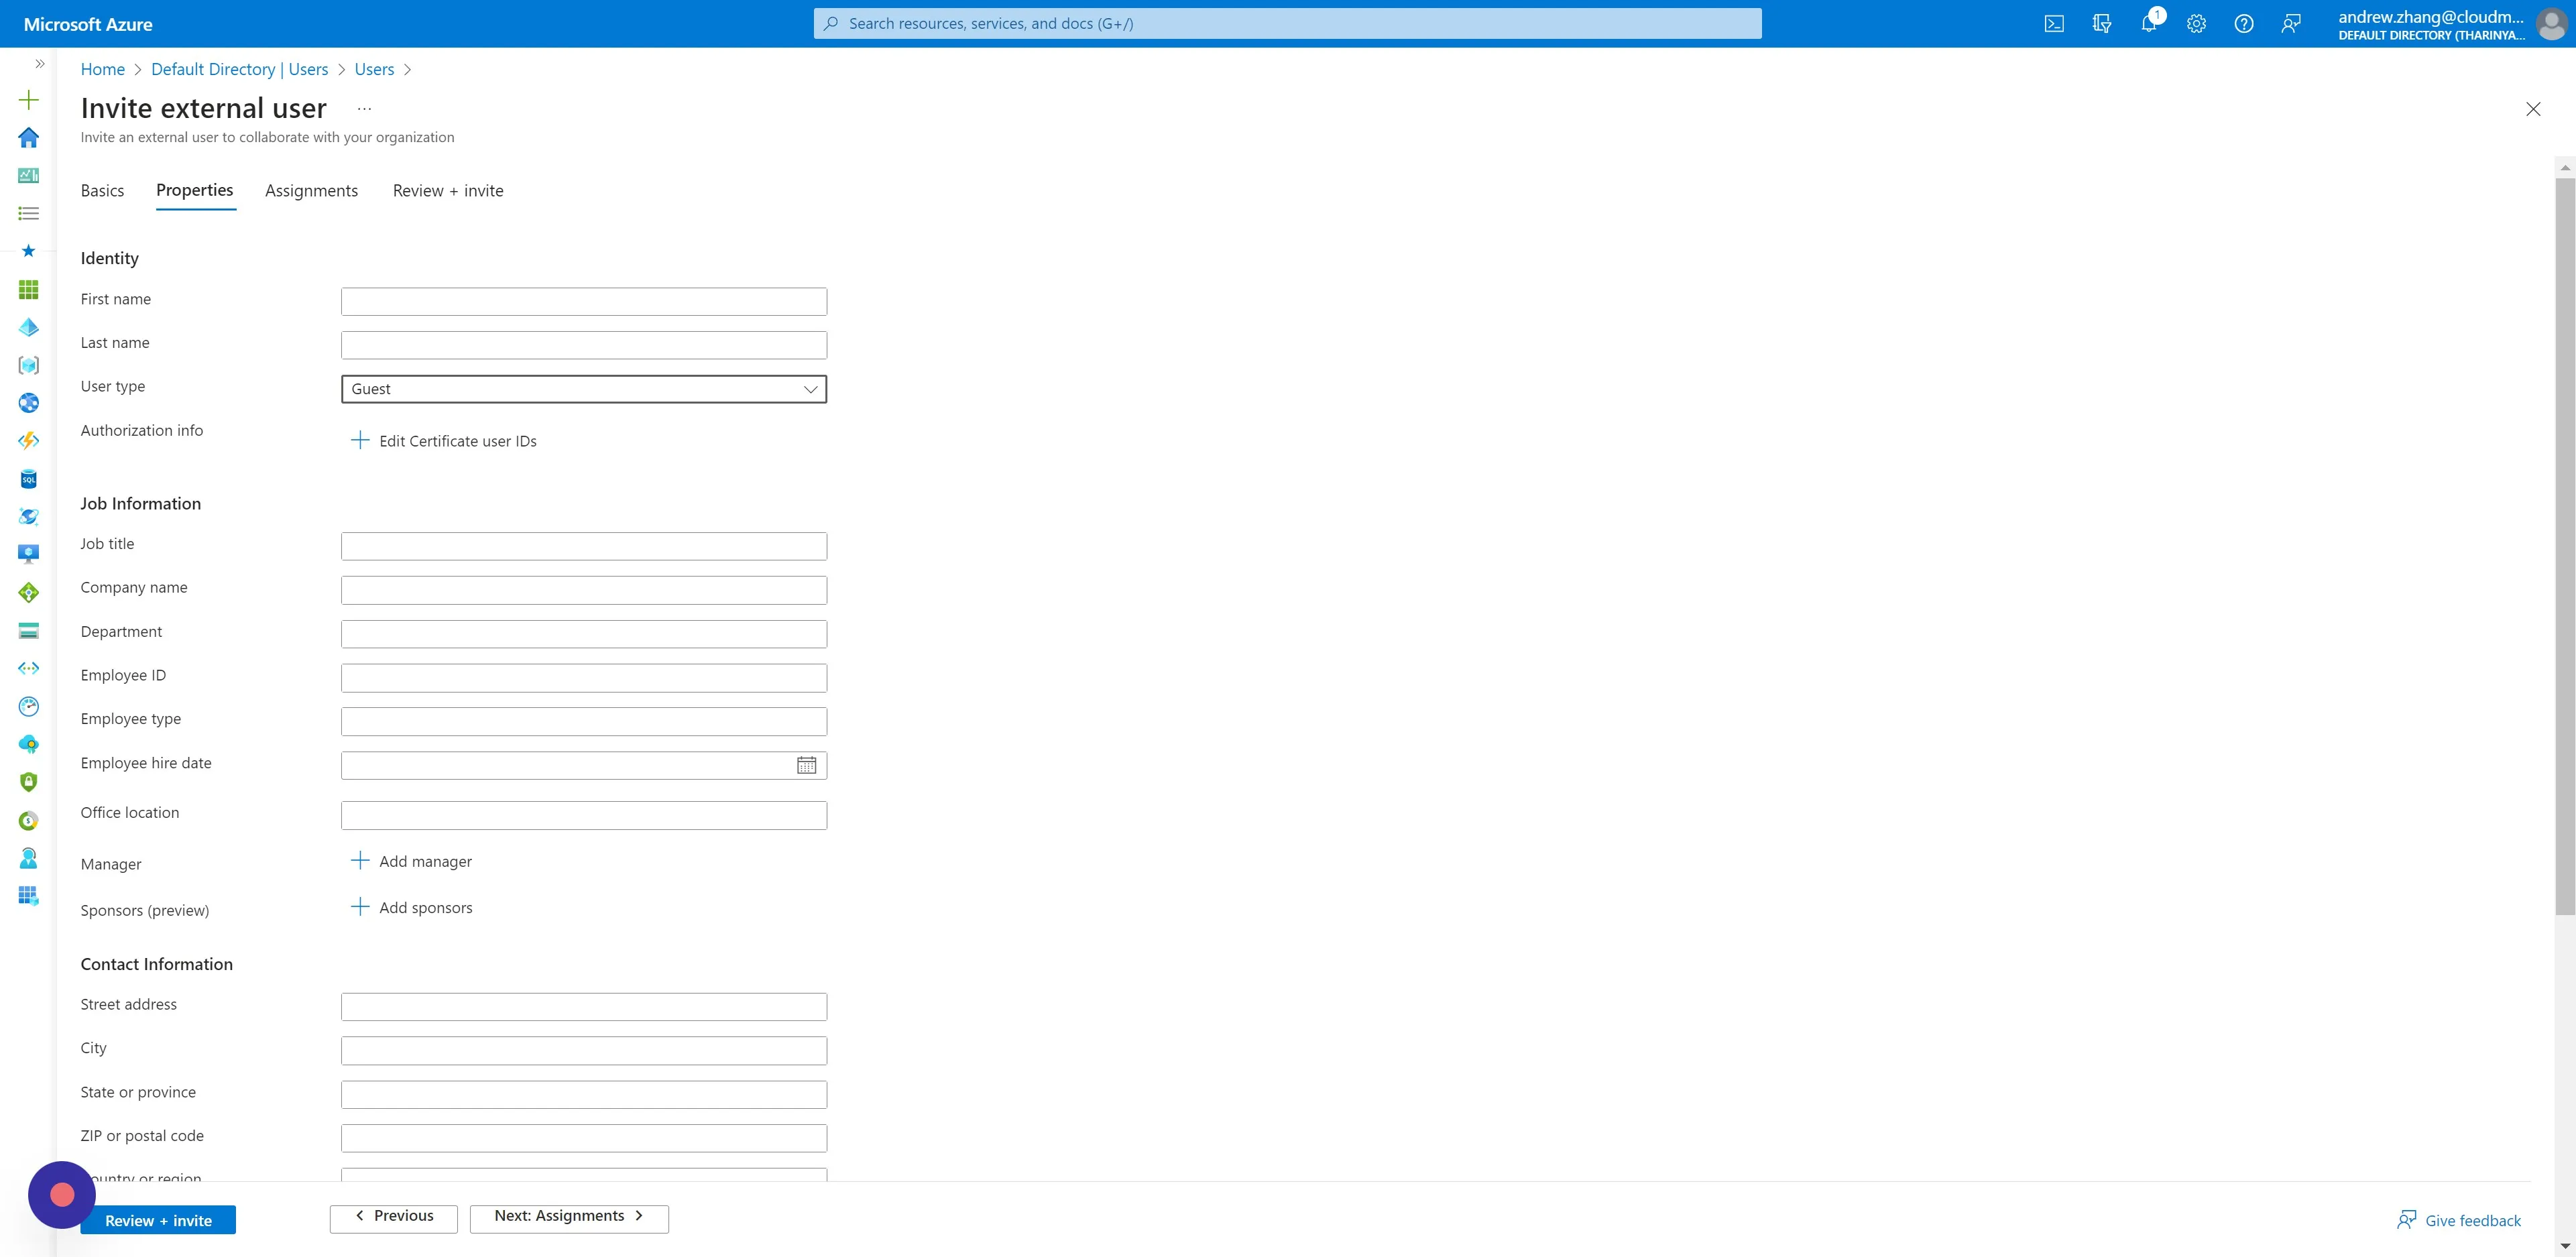
Switch to the Properties tab, and ensure the User type is set to "Guest"

No other configuration settings are required.
Click “Review + invite” and then click “Invite” once reviewed.
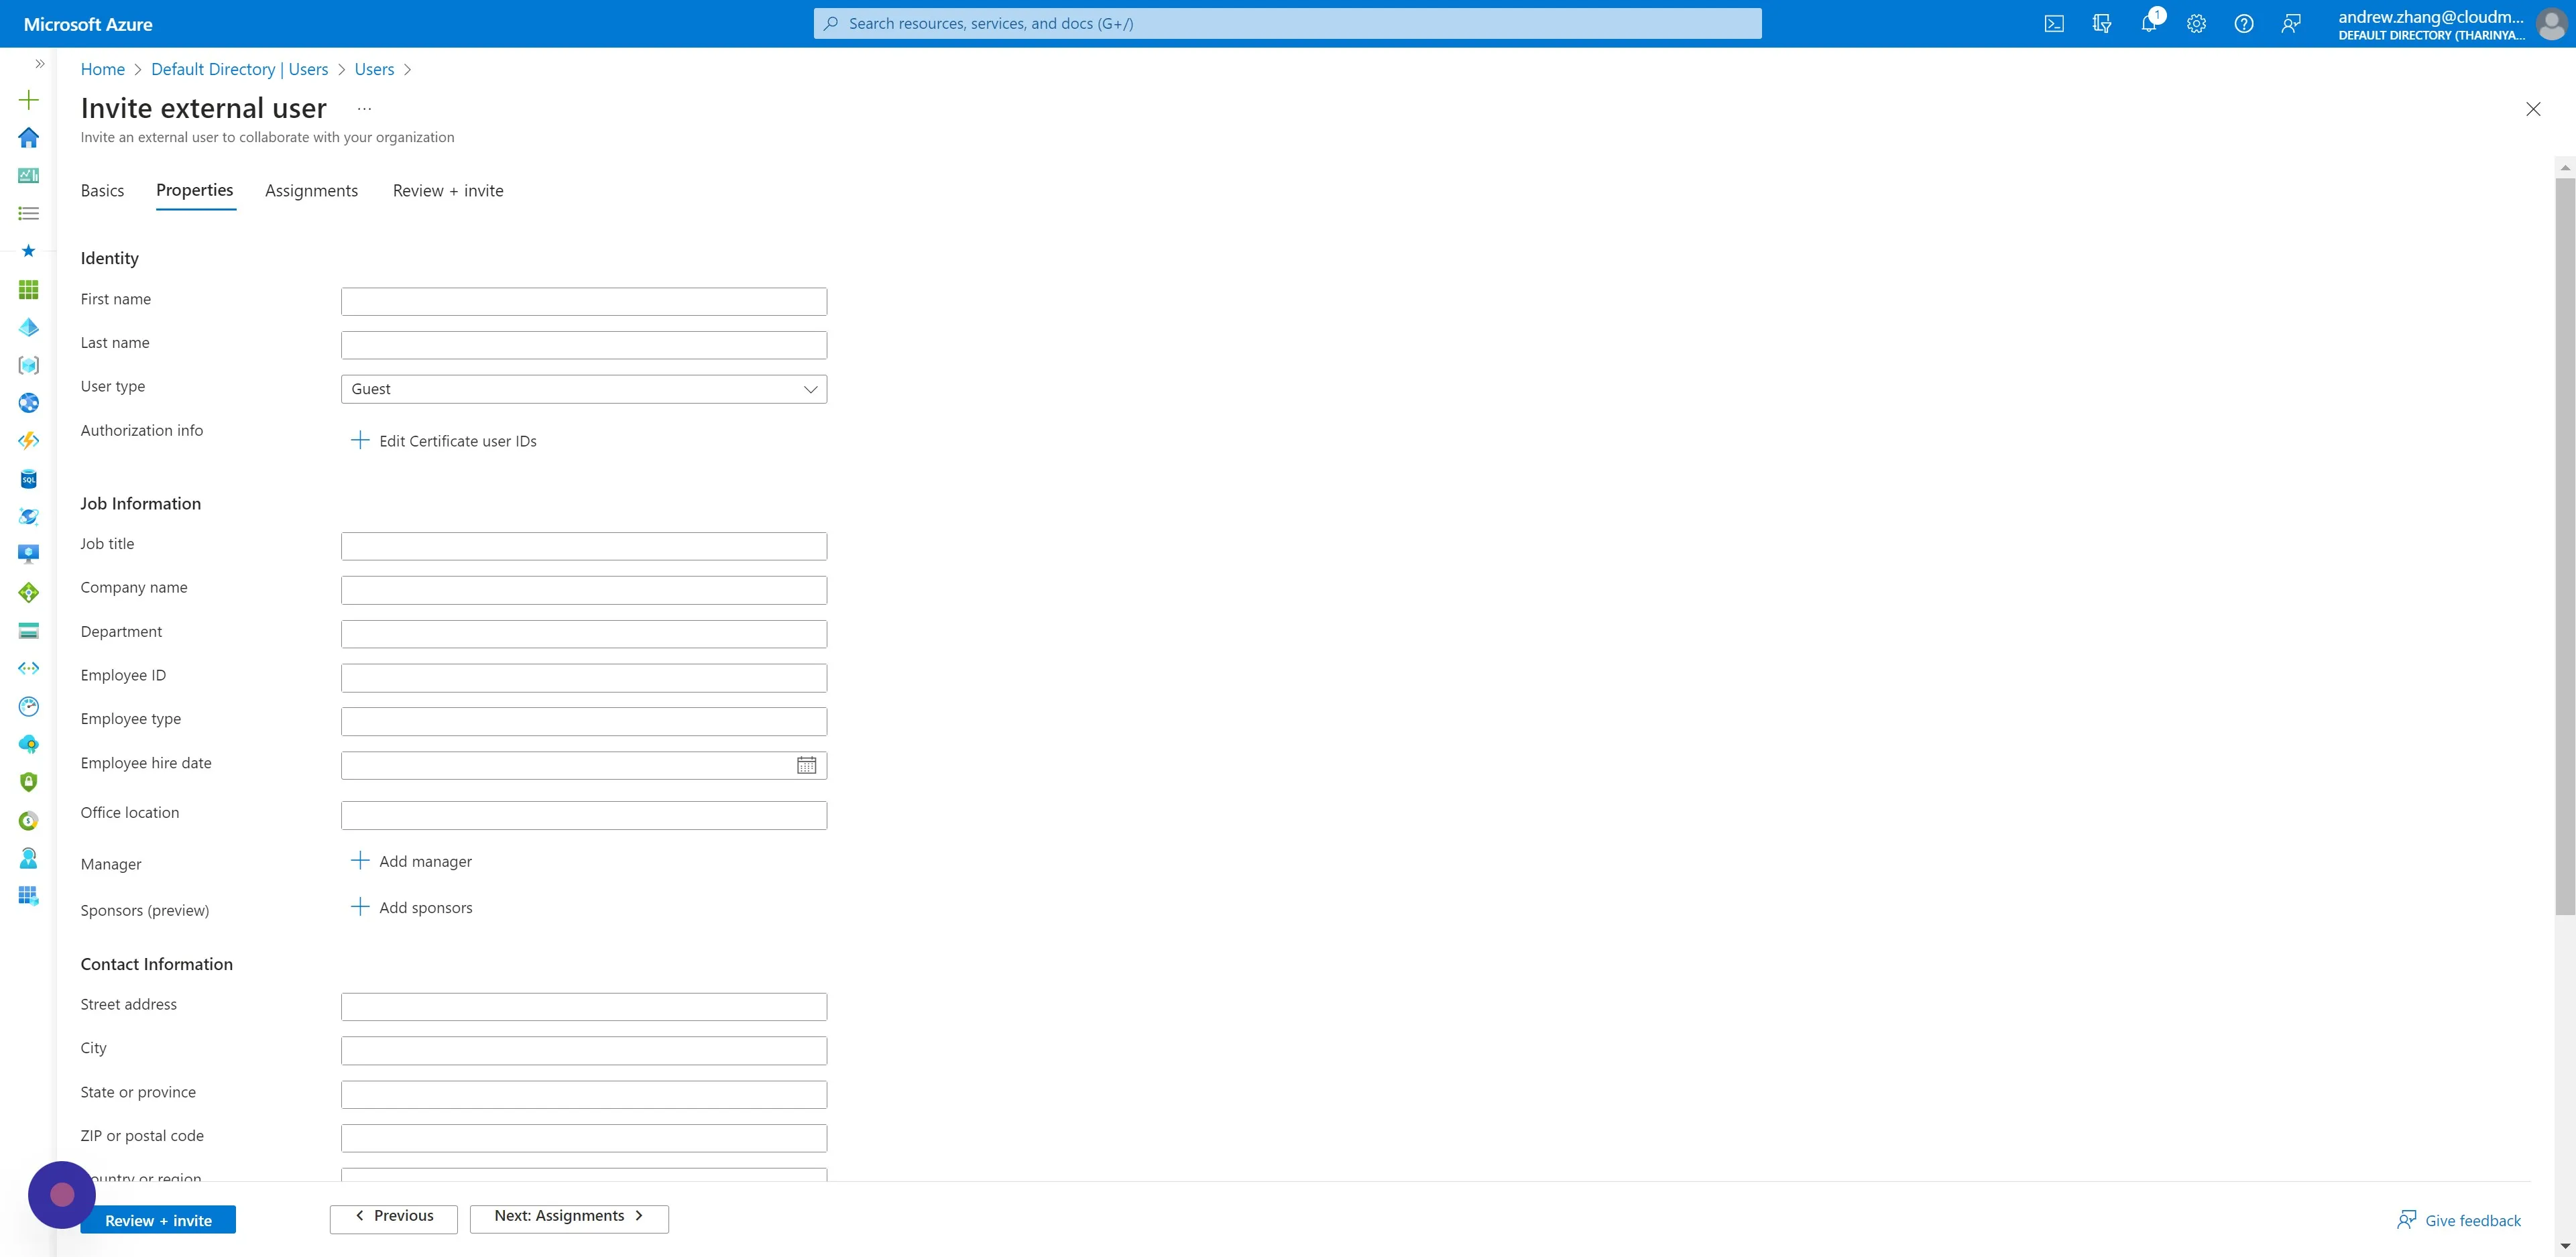
No other configuration settings are required. \ Click "Review + invite" and then click "Invite" once reviewed

You will receive a notification for successfully creating the Guest B2B User.
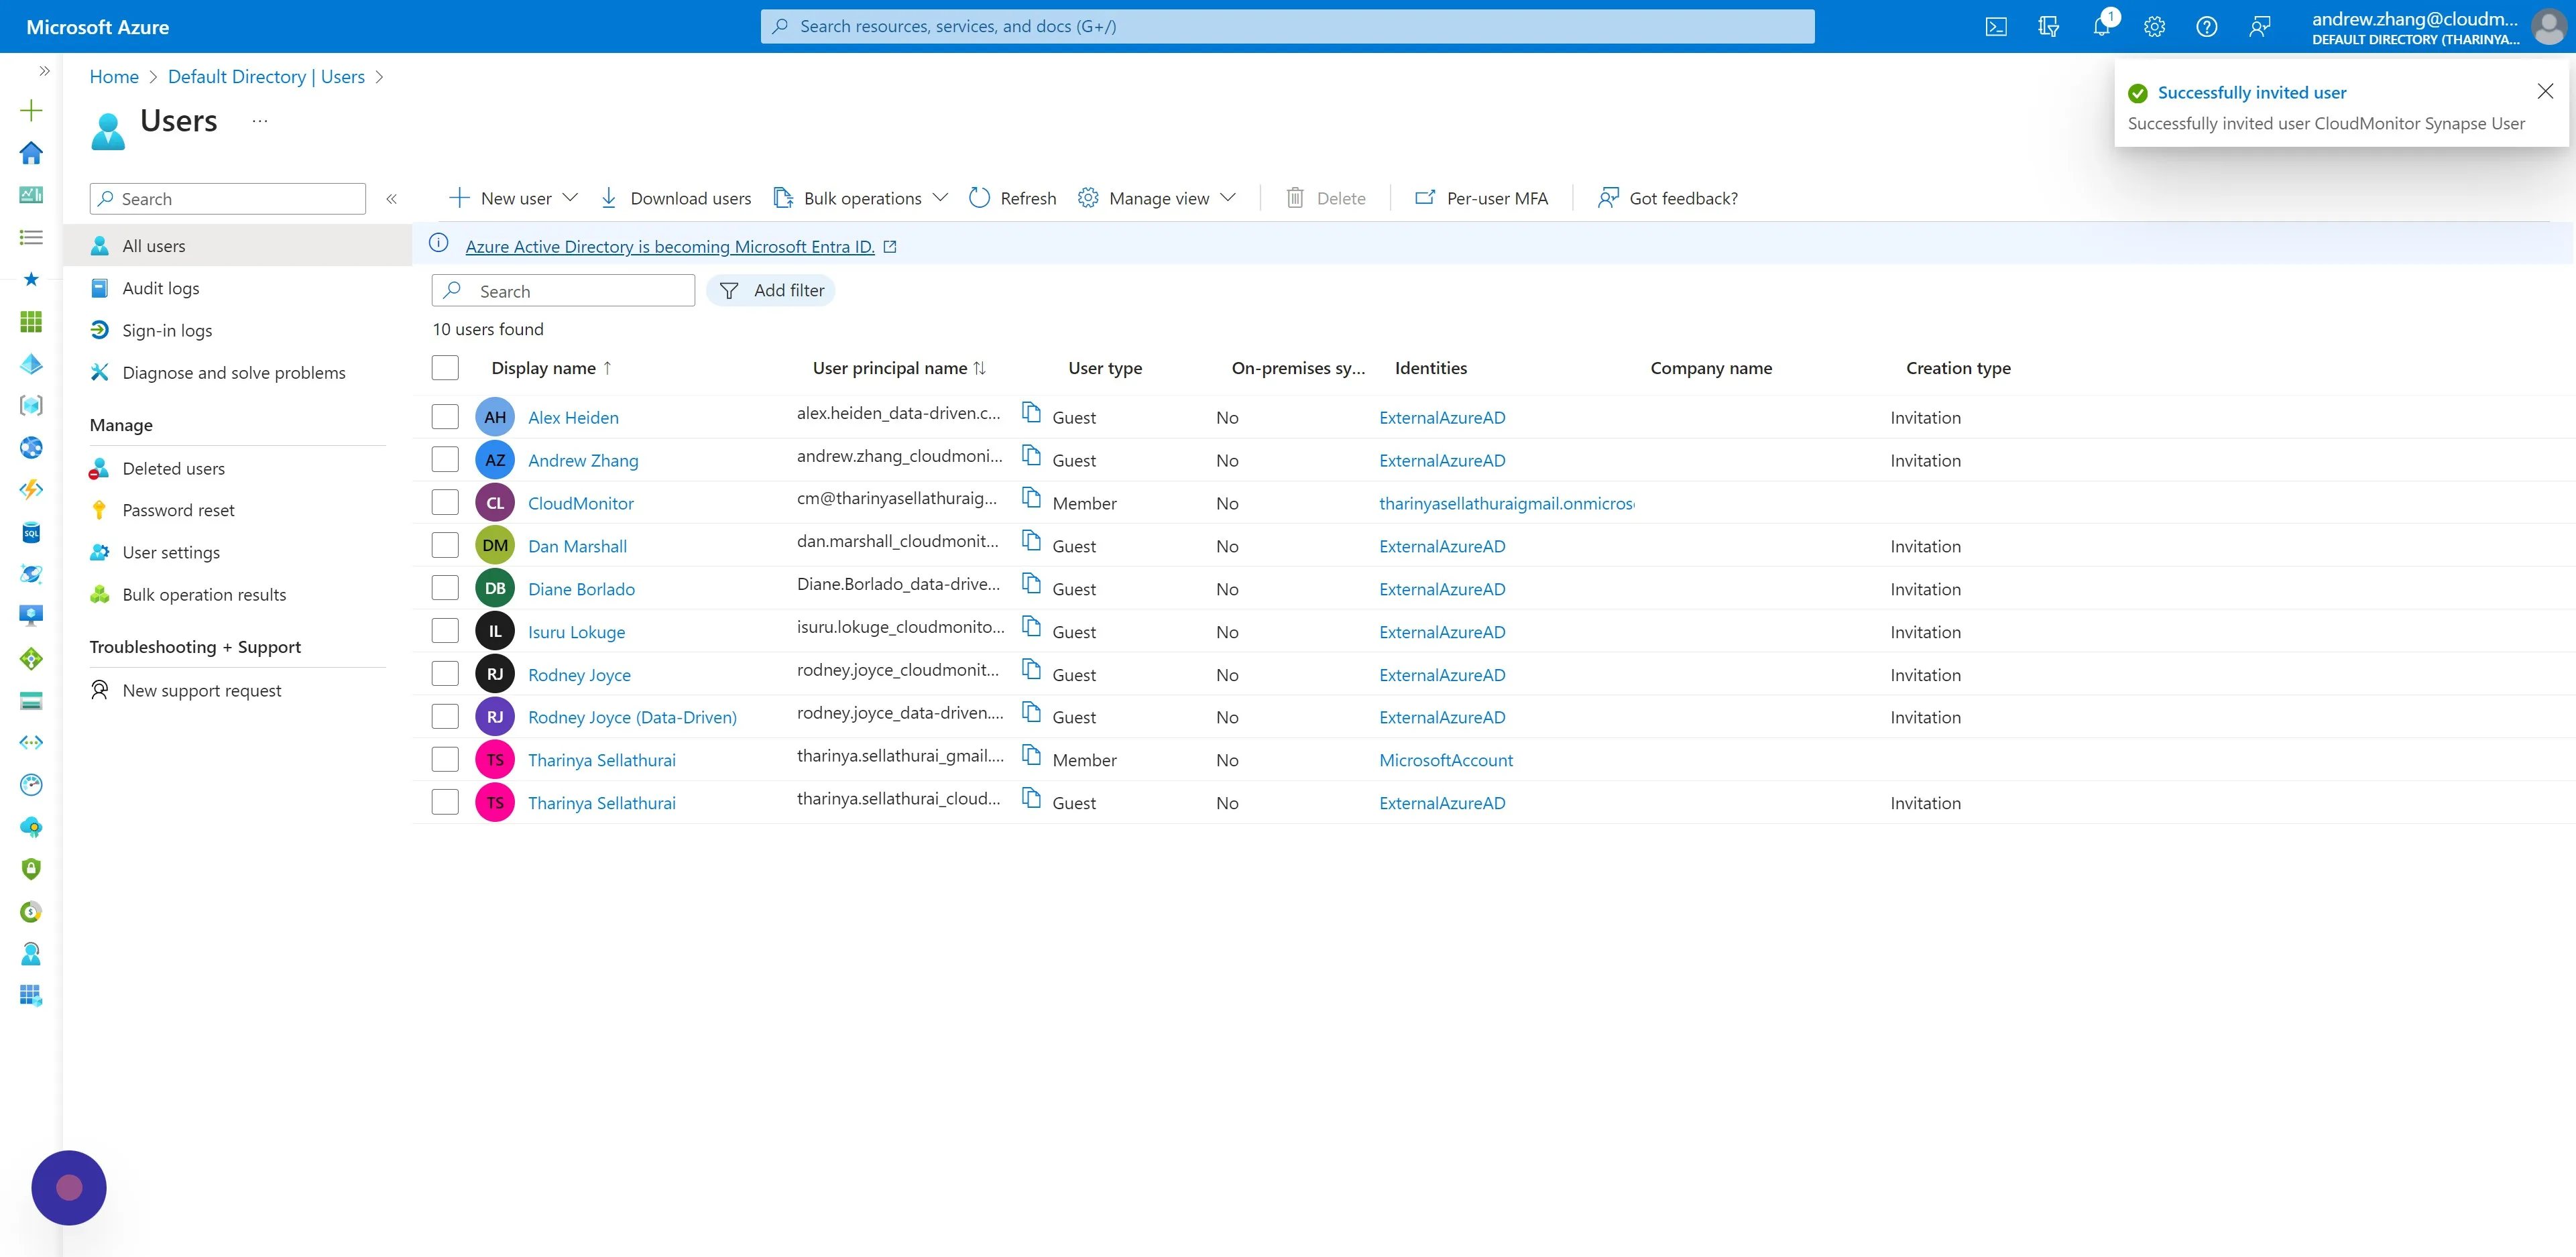
You will receive a notification for successfully creating the Guest B2B User

Live chat didn’t load

This browser blocked our chat widget, so the support button can’t open. A privacy shield or content blocker is the usual cause.

  1. Click the Brave Shields icon (the lion) beside the address bar.
  2. Turn Shields off for cloudmonitor.ai.
  3. Reload this page. The chat icon returns bottom right.
  1. Open your content blocker or privacy extension.
  2. Allow cloudmonitor.ai.
  3. Reload this page. The chat icon returns bottom right.

Rather leave the blocker on? Send us a message or search the help desk.