Create the Synapse B2B user (PowerShell) legacy
Step 1
Section titled “Step 1”Please find the “1_AddSynapseB2BUser.ps1” from the ConfigureB2BSynapseCloudMonitorUser folder and execute it in the PowerShell.
Please provide the necessary inputs when required.
Step 2
Section titled “Step 2”If the final output looks like below,
Successfully invited the CloudMonitor Synapse User (synapse@cloudmonitor.ai) as a Guest B2B user to your tenancy.
It means the user creation is successful.
Step 3
Section titled “Step 3”After the successful execution of PowerShell script, Please move to the Azure Portal and follow the next steps,
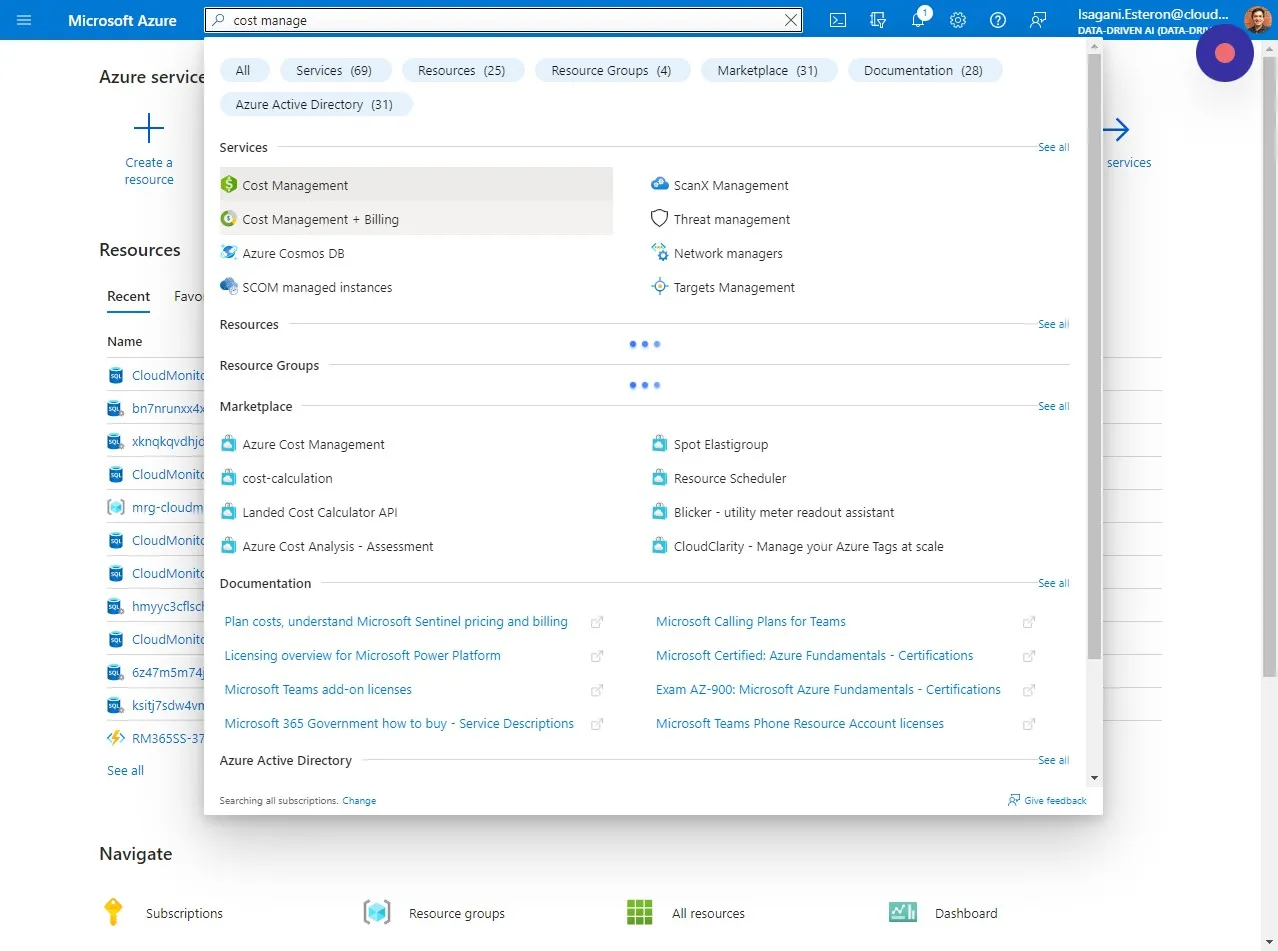
Open the “Cost Management + Billing” section in the Azure Portal. Note: This is not at the Subscription level and you will need to be a Global Azure Admin to do this.
Step 4
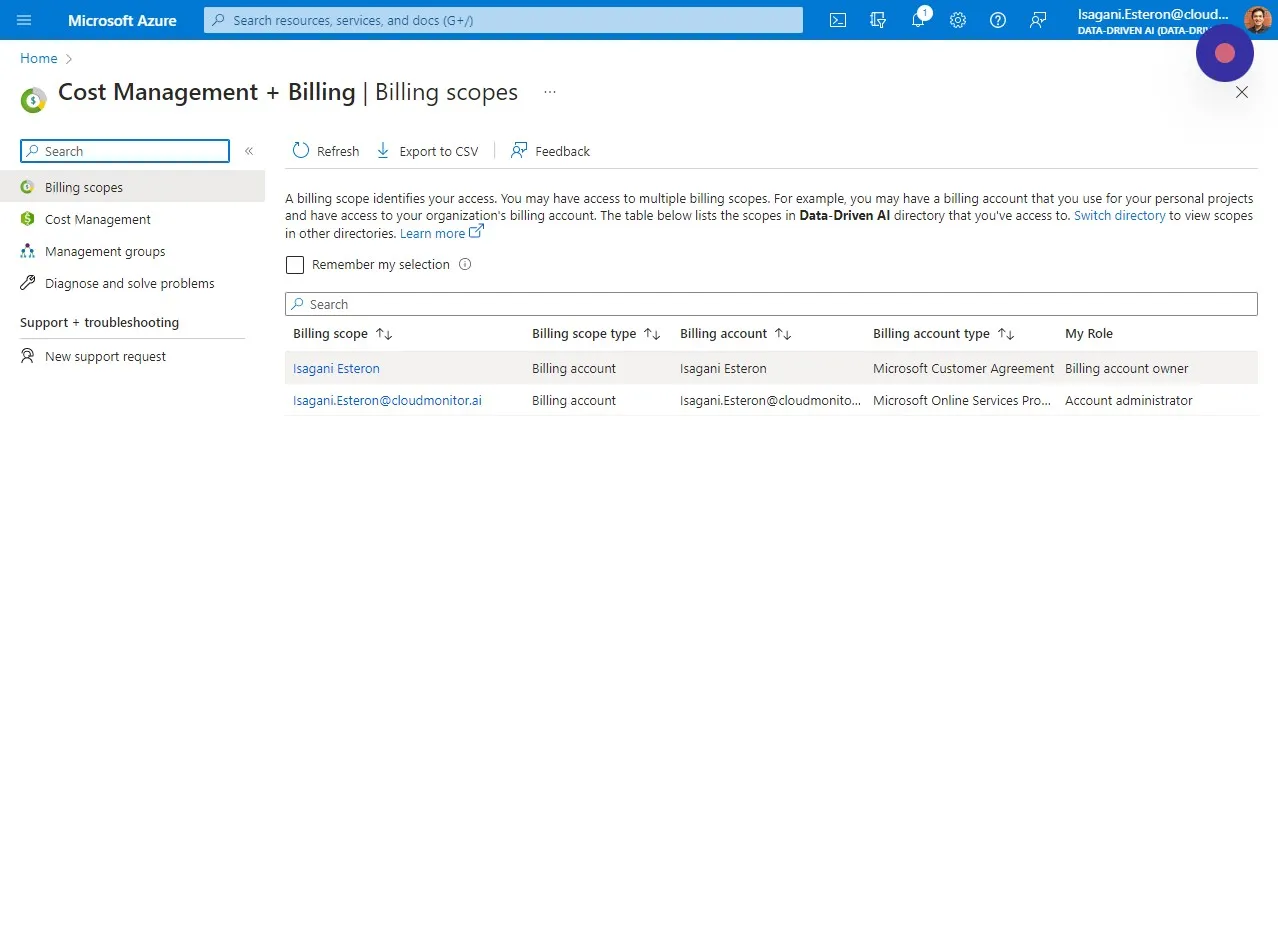
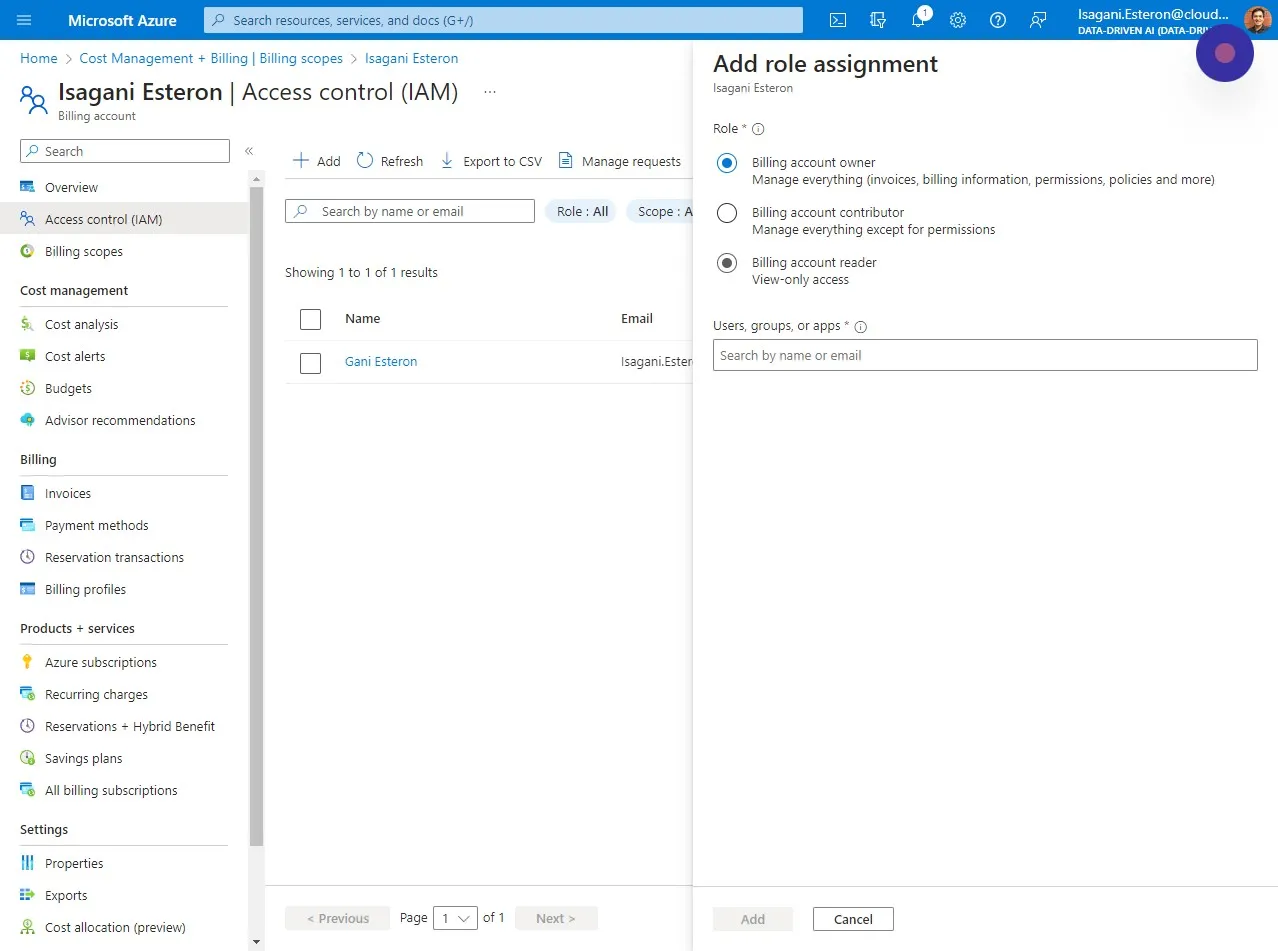
Section titled “Step 4”Select the Billing scope you want to grant a Billing account reader role to.
Step 5
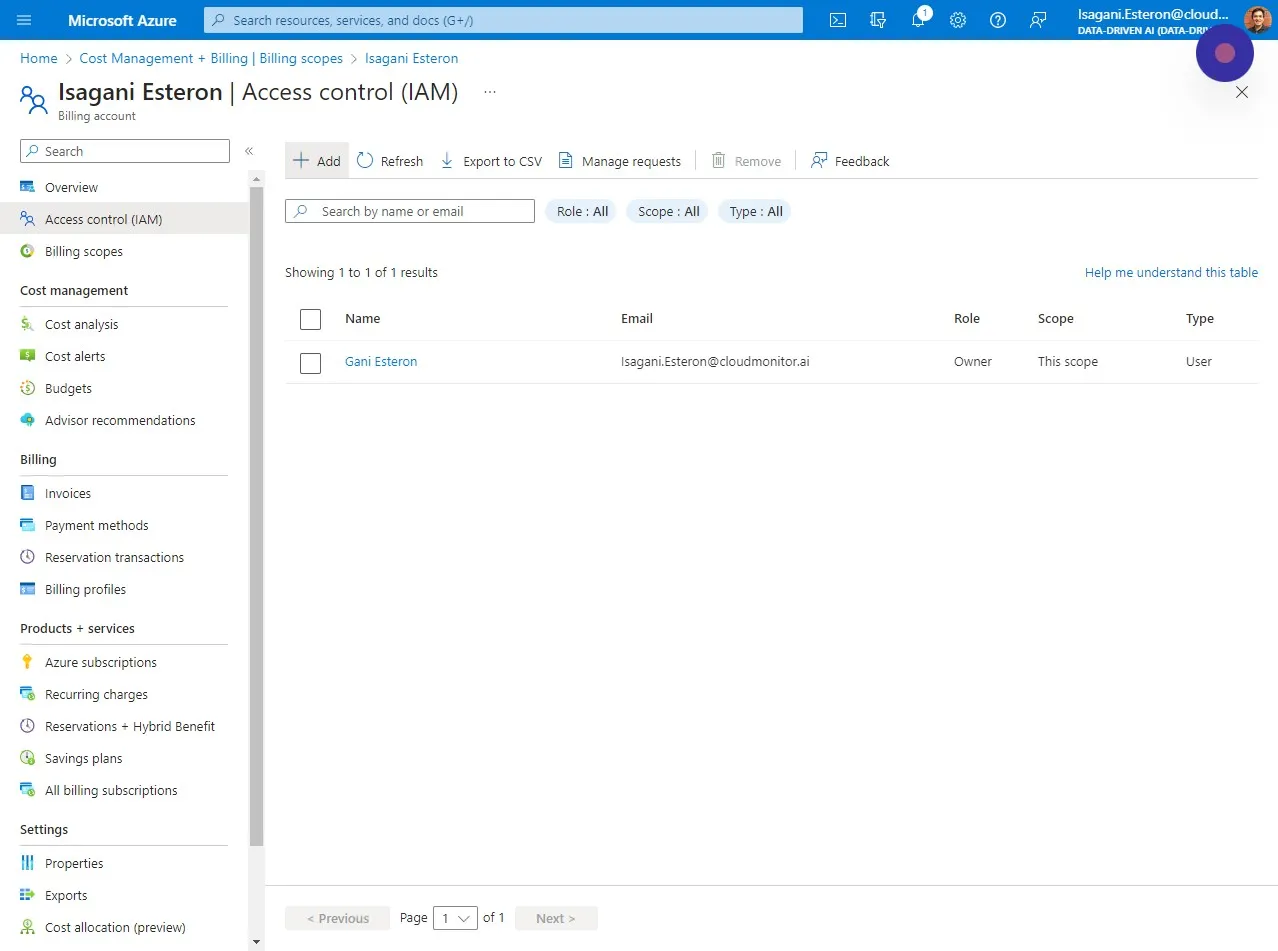
Section titled “Step 5”Click “Access control (IAM)” and click ” + Add”
Step 6
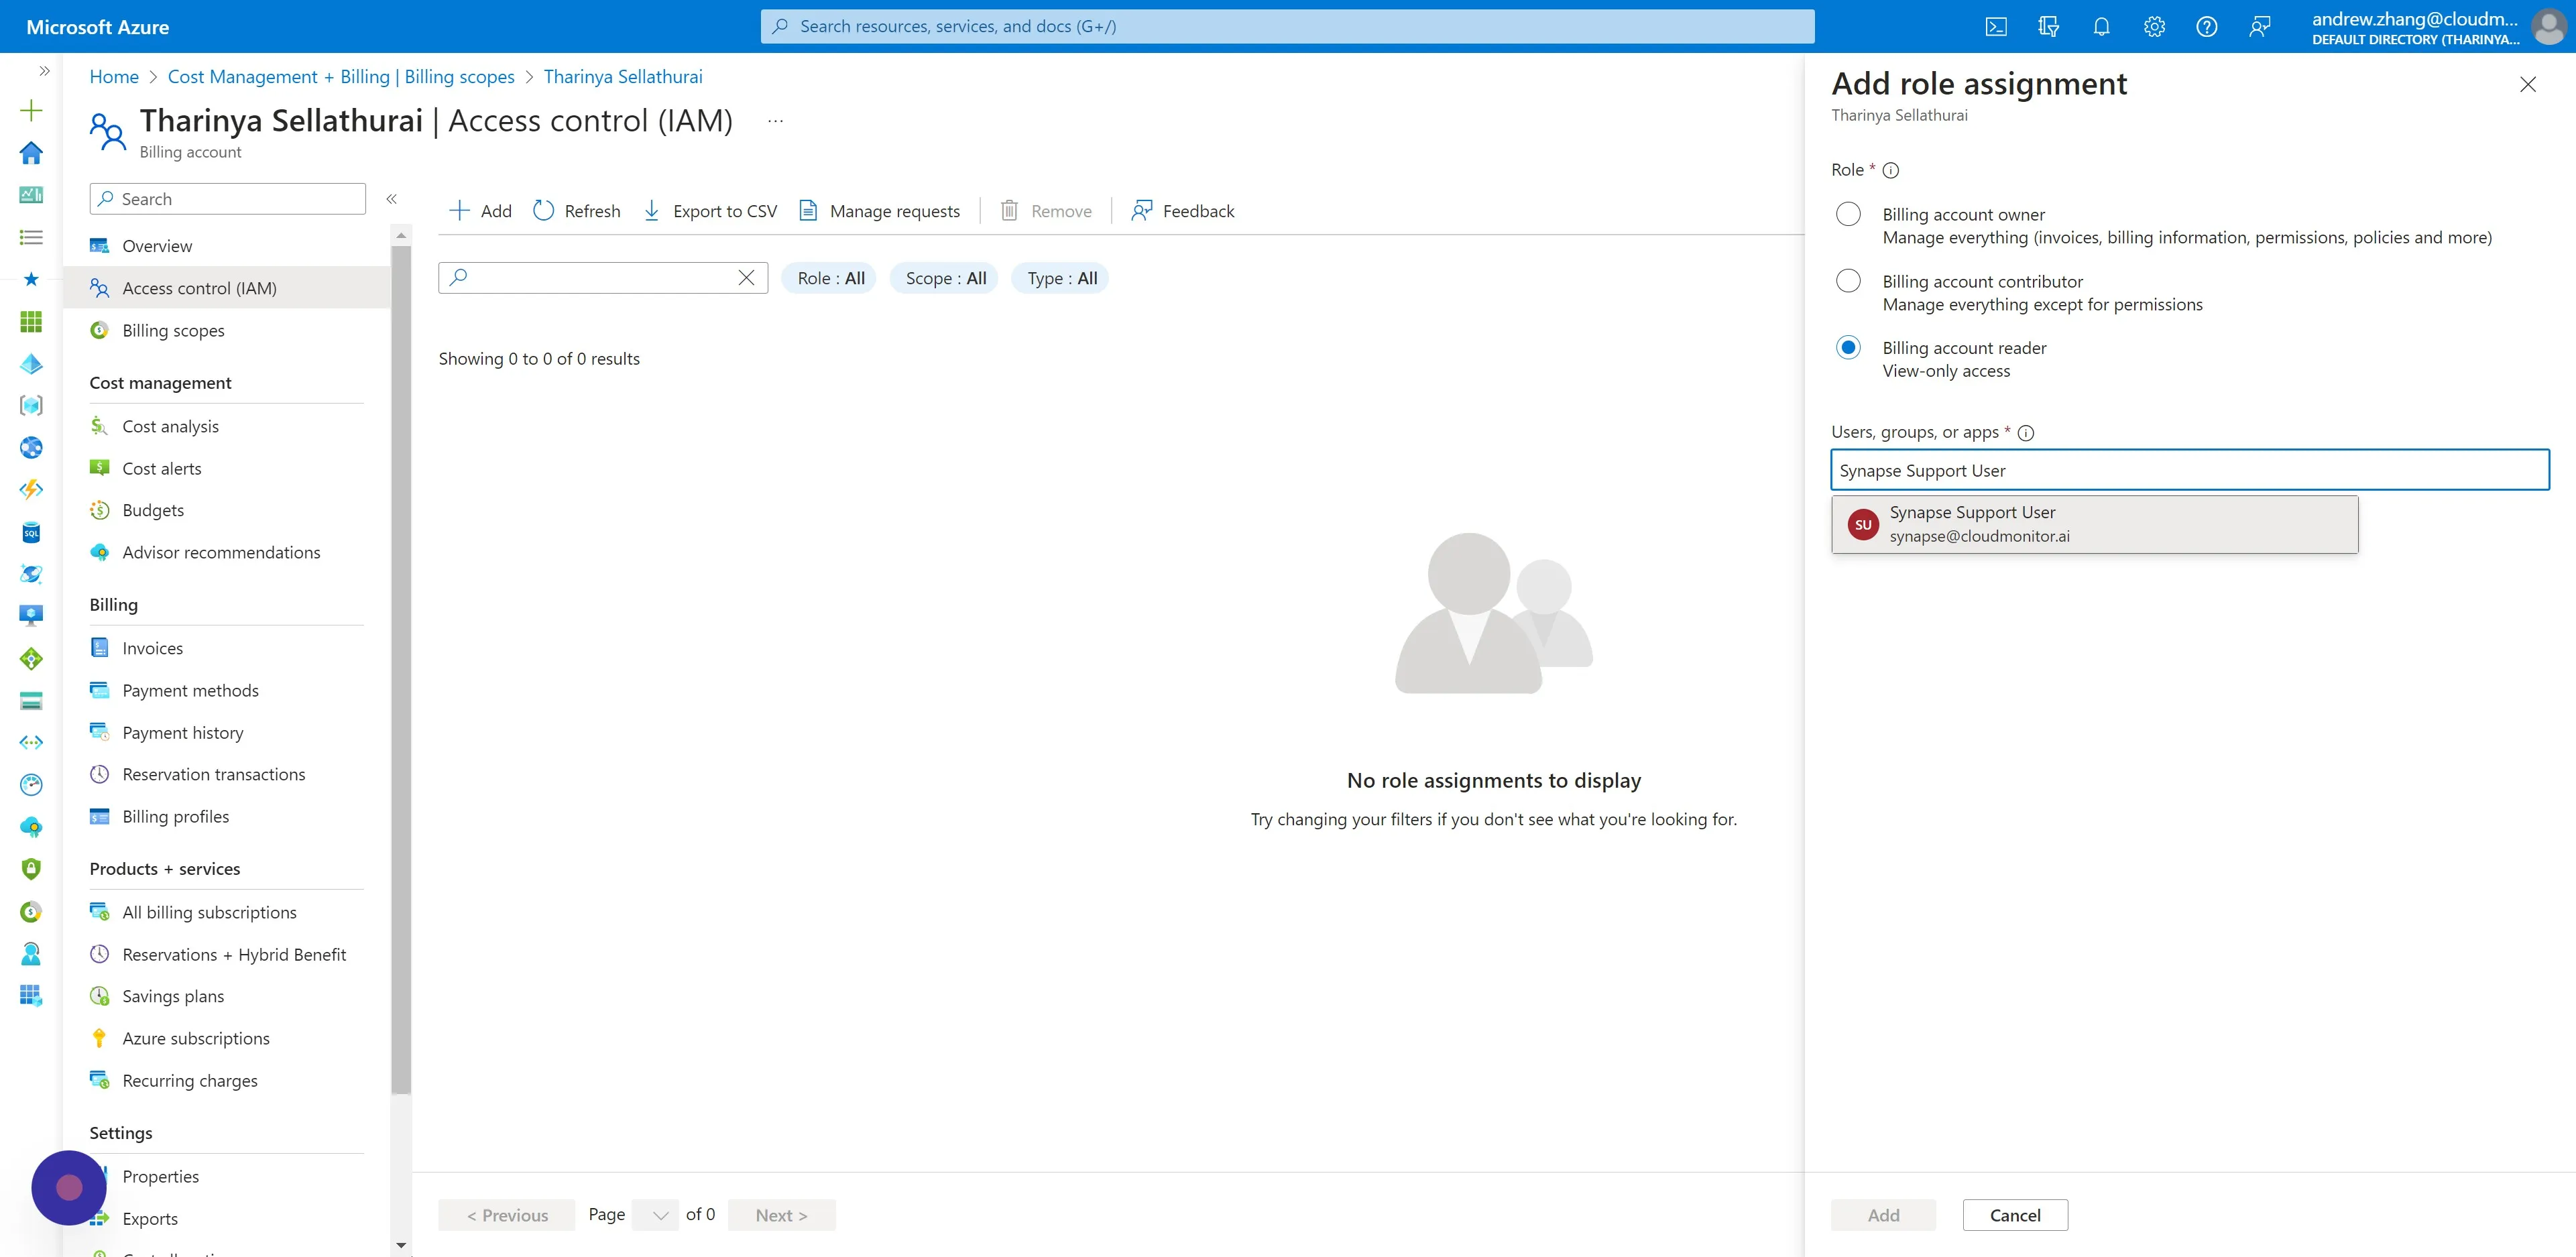
Section titled “Step 6”Choose “Billing account reader”. This does not have any permissions to write any data.
Step 7
Section titled “Step 7”Lastly, select the B2B Synapse User you added for CloudMonitor and click on Add.