How to create a cost group
Cost groups are how CloudMonitor maps spend onto your business. Almost everything else — budgets, chargeback, team reporting, who can see what — hangs off them, so this is the first thing to set up and the thing worth getting right.
Before you start
Section titled “Before you start”Decide what a group represents before you create any. The common choices are by team, by product, or by environment, and mixing them produces a hierarchy nobody can reason about.
A useful test: could you name one person accountable for this group’s spend? If not, it’s probably the wrong boundary.
Step 1 — Open the form
Section titled “Step 1 — Open the form”Settings ▸ Cost Groups ▸ New cost group.
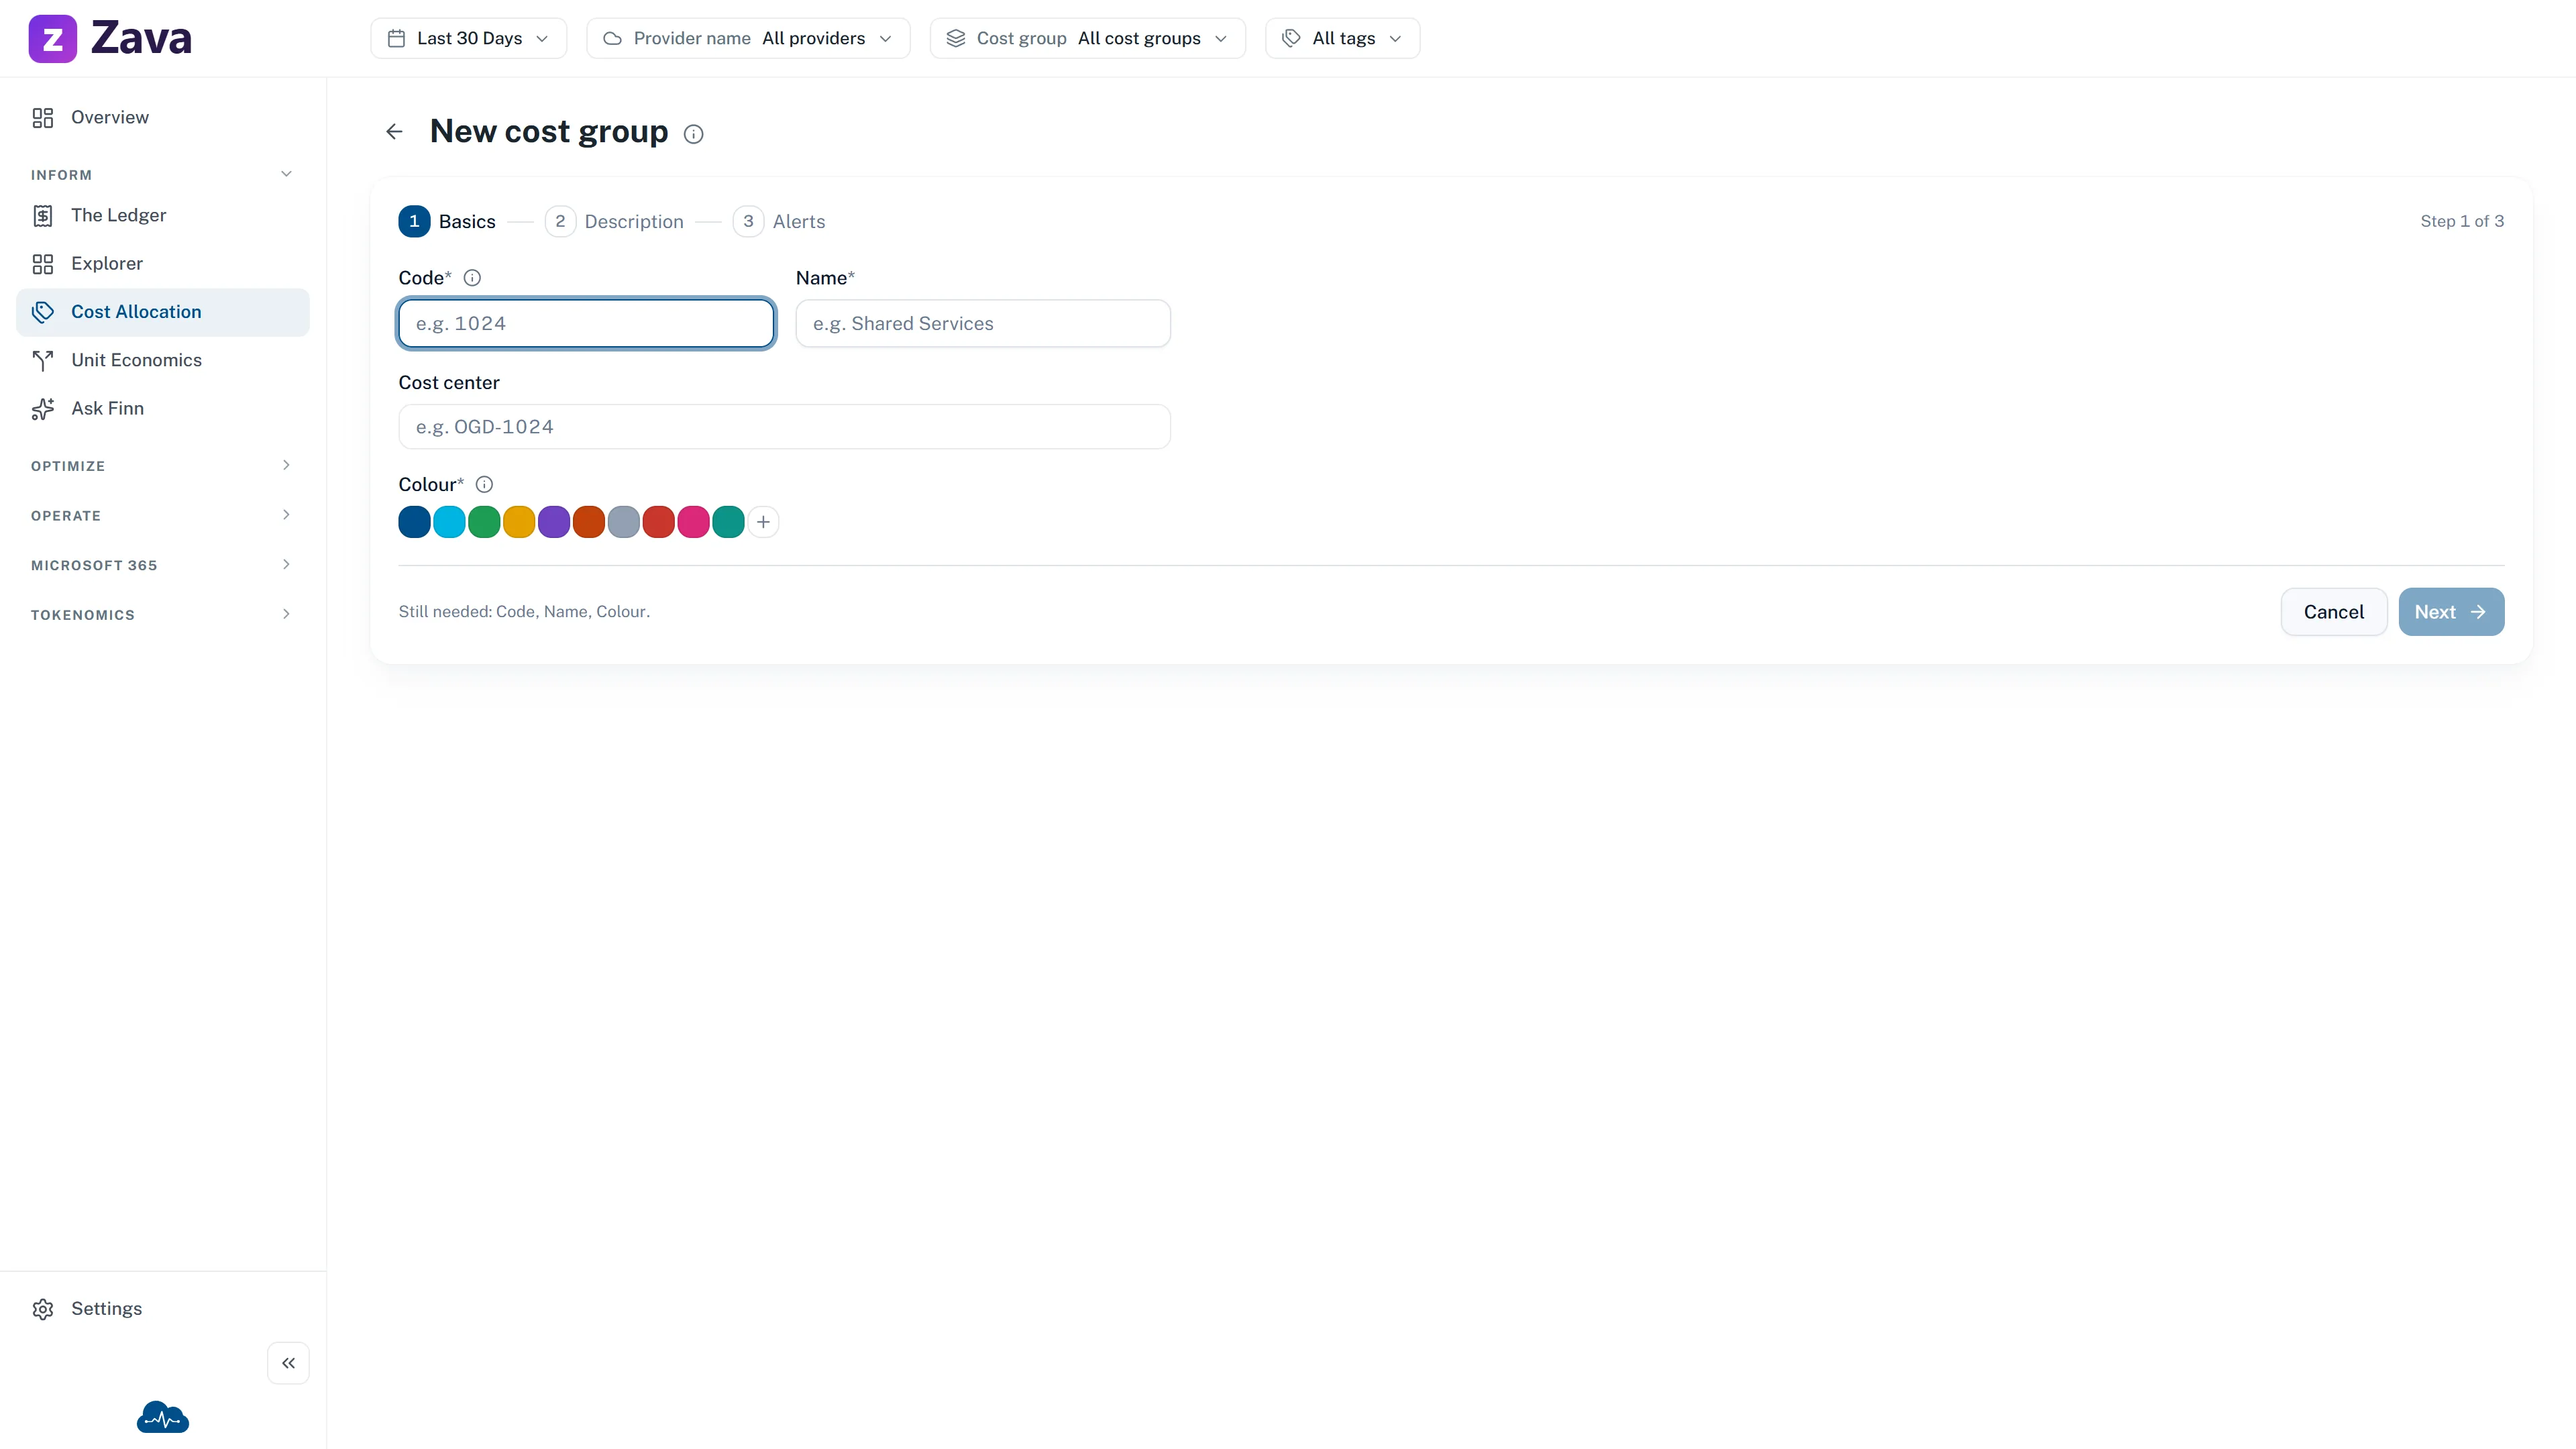
Step 2 — Basics
Section titled “Step 2 — Basics”Four fields. Anything marked with a small * is required; anything without one is optional, which is
why no label ever says “(optional)”.
Code — up to 20 characters, yours to define. It does two jobs: matching an identifier from
another system, and routing spend by naming convention. If a reservation or resource name contains
the code wrapped in underscores — _1024_ — an allocation rule can send it straight to this group
with no retagging. Worth choosing deliberately rather than accepting a number.
Name — up to 40 characters, e.g. Shared Services. This is what everyone sees.
Cost center — optional, up to 40 characters, e.g. OGD-1024. Set it if you want groups to roll
up the way your accounting system does. You can pick an existing one or type a new one.
Colour — pick a preset or choose your own. It becomes this group’s dot everywhere in the app, so make related groups visually distinct rather than choosing at random.
Step 3 — Description
Section titled “Step 3 — Description”Required, up to 500 characters. Write what the group represents, not what it’s called — the name already says that. Six months on, this is what tells someone whether a charge belongs here.
Step 4 — Create
Section titled “Step 4 — Create”Create cost group.
What happens next
Section titled “What happens next”You become the group’s Owner automatically. There’s no owner field on the form — whoever creates a group gets the Owner role on it, and you add others afterwards from Manage team.
No spend is in it yet. Creating a group doesn’t move any money into it. What lands in a group is decided by allocation rules, which is a separate step people routinely forget.
Reports stay empty until the next update. The group appears in the top-bar filter straight away, marked Pending. Its reports fill in once CloudMonitor next recalculates which costs belong where. That’s expected — nothing is broken.
Editing one later
Section titled “Editing one later”Open the group from the list and choose edit. Editing is a single page rather than a wizard, with the same fields.
Two things you can’t change there: who’s on the team (that’s Manage team) and what spend lands in it (that’s allocation rules). Both are deliberate — one place to change a thing is how the places stay in agreement.
Archiving
Section titled “Archiving”Archive from the row’s ⋮ menu. It moves to the Archived tab and can be restored any time.
Be aware of the knock-on: any allocation rule pointing at an archived group becomes Invalid and stops applying, so its spend falls through to whatever matches next — usually the Unallocated catch-all. Repoint or delete those rules rather than leaving them.
The built-in Unallocated group can’t be archived or deleted at all. Every charge has to land somewhere.